
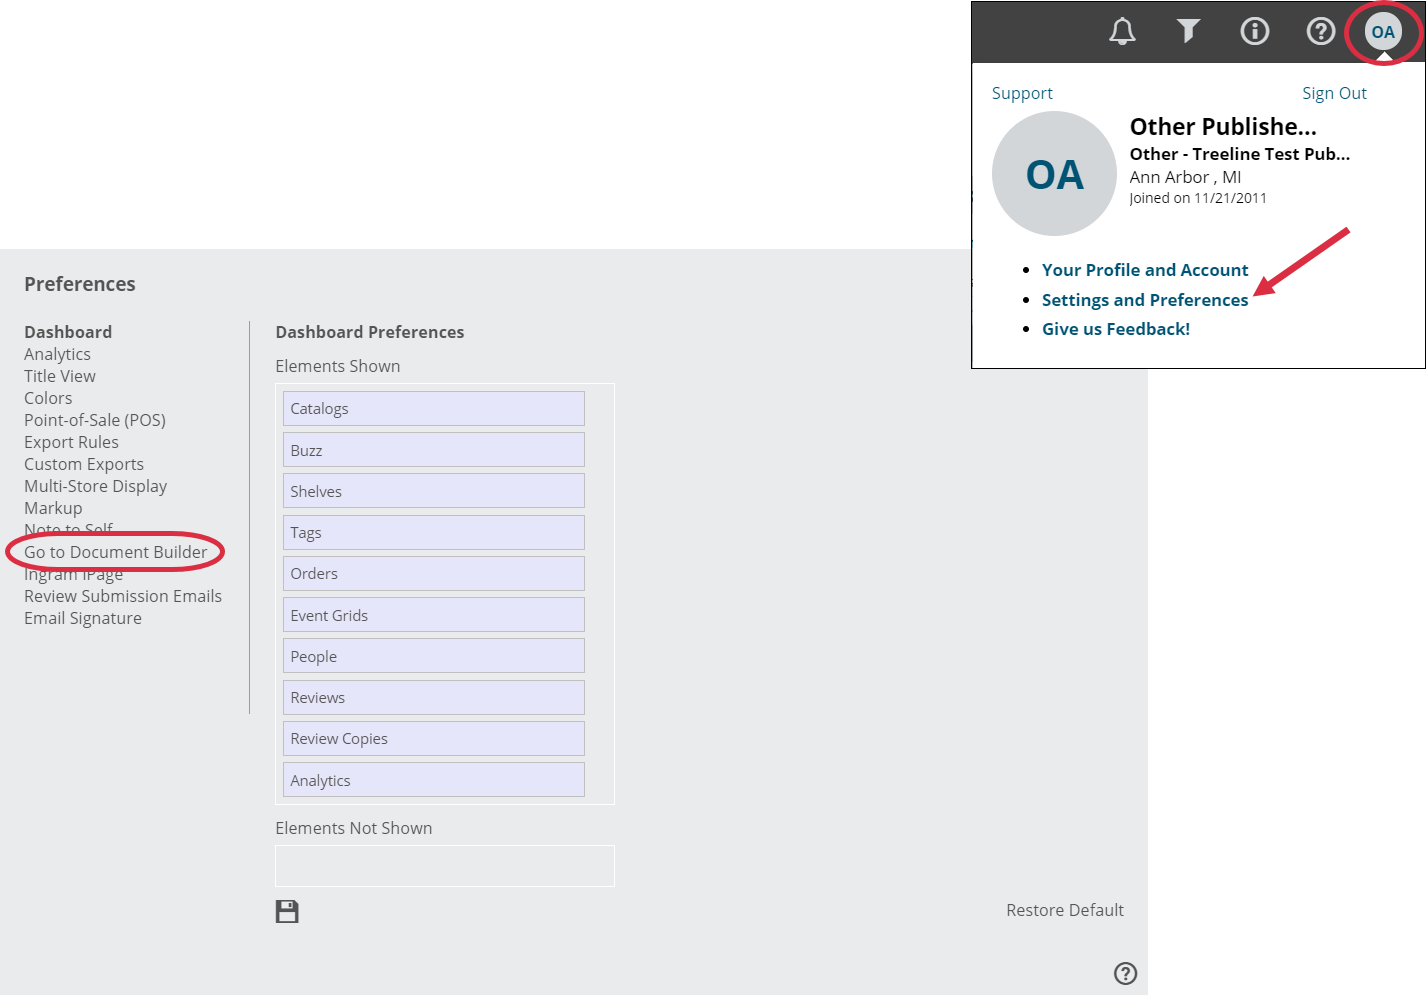
To access the Document Builder, click on your profile picture or initials at the top of any Edelweiss page, Settings and Preferences, then Go to Document Builder. Document Builder is an add-on Module so if you do not have the link shown above and would like access to it, or if you have any questions about the module, email support@abovethetreeline.com.
Your Document Builder homepage will have 3 sections:
- Documents: a quick list of the documents you’ve created and saved. These will be based on catalogs or collections and will have used templates set up by you or a colleague.
- Title Templates: a list of the various templates you and your colleagues have set up, with title elements placed as you’ve chosen in the template creation process
- Custom Data Elements: uploaded chunks of data that were imported to be included in a document; information not provided in your official Edelweiss catalogs/title listings.
When you create a template, you are determining the layout of the pages of your catalog export. Begin by clicking Create Template under the “Title Templates” heading. You will be presented with a popup that looks like this:

• Page Orientation – Portrait or Landscape
• Titles per Page – Number and layout of titles included in the template
• Name – Name your Document template
• Description – Add a short blurb about the Document template. Example: “4 titles per page for tradeshow flyer”
• Font / Font Size – Take your pick!
• Visibility – Choose whether this Document template will be visible to just you, or to others in your organization
The first step in creating a template is choosing the size, name, and font, as well as whether you want to share the template with the rest of your organization. Once you have established these parameters, click Save and you will begin the ‘creative’ aspect of Document Builder.
If you would like to create a template but don’t want to start from scratch with a blank template, you have the option to copy an existing template. To do this, click on the “pages” icon to the left of the template you wish to recreate.
![]()
Once you’ve set the basic parameters for your template, click on its name to get to this screen:

Now, you can select a catalog and title that you will use as a stand-in / sample when creating this template. This can be changed as you design the template, and once it is completed. Basically, you’re just giving the program some title data to work with so you can have a better idea of how things will look. Begin typing the name of the catalog and title that you wish to use to design your template, and the Document Builder will autocomplete your choices.
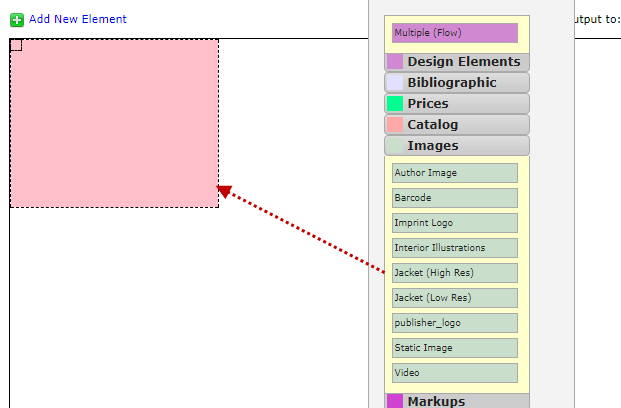
Begin adding elements to your template by clicking on Add New Element over the top left-hand corner of the template.

Adjust the size of the element you plan to add, and then click Assign to designate a specific element to feed to that space in your template:
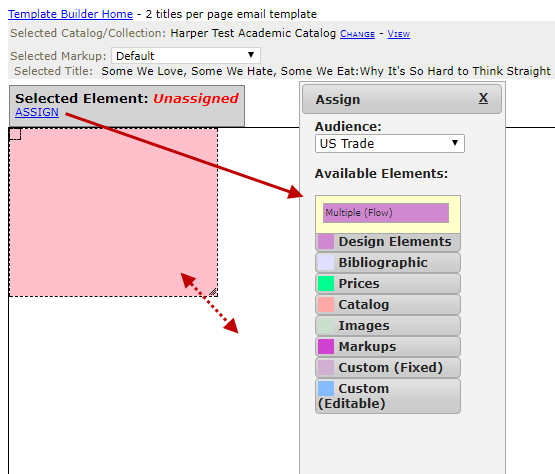
Click on an element to expand it and view your options. For example, click into Images to select between a publisher logo, author photo, cover image, etc.
 You can then Save, Undo, and Edit this element:
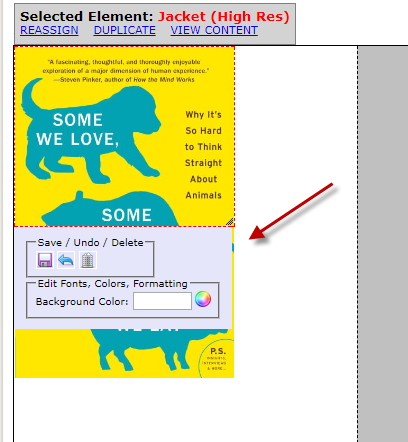
When you click on an element, the “Style Box” will appear, allowing you to edit the appearance of your element. Continue customizing elements until you’re happy with the layout!
Here’s a quick rundown of the elements you can add to your template:
– Design Elements – Visual items that can spice up your template’s look, but won’t contain any information about the titles. Examples include lines and static text. EXCEPTION: Sub templates – this will allow you to add a template within a template that can include related or comparable titles.
– Bibliographic – Where most of the information provided in your templates comes from. It includes the most basic information about a book such as its title and author, as well as more detailed information such as the size of the book and contributor statements.
– Prices – The price of the book in many trade markets / currencies
– Catalog – Generally longer pieces of information about the title, such as background information on the author and quotes from the book.
– Images – the most common image used in Document Builder is the cover image (available in high and low resolution), but can also include other images such as an author image or video.
– Markups – include markup elements which will allow you to provide extra information to the people you send the document to. This includes markup notes, tags, and comparable title tables.
– Custom Elements – imported by the publisher or sales rep creating the catalog / document that can include anything else that you deem necessary for your catalog.