
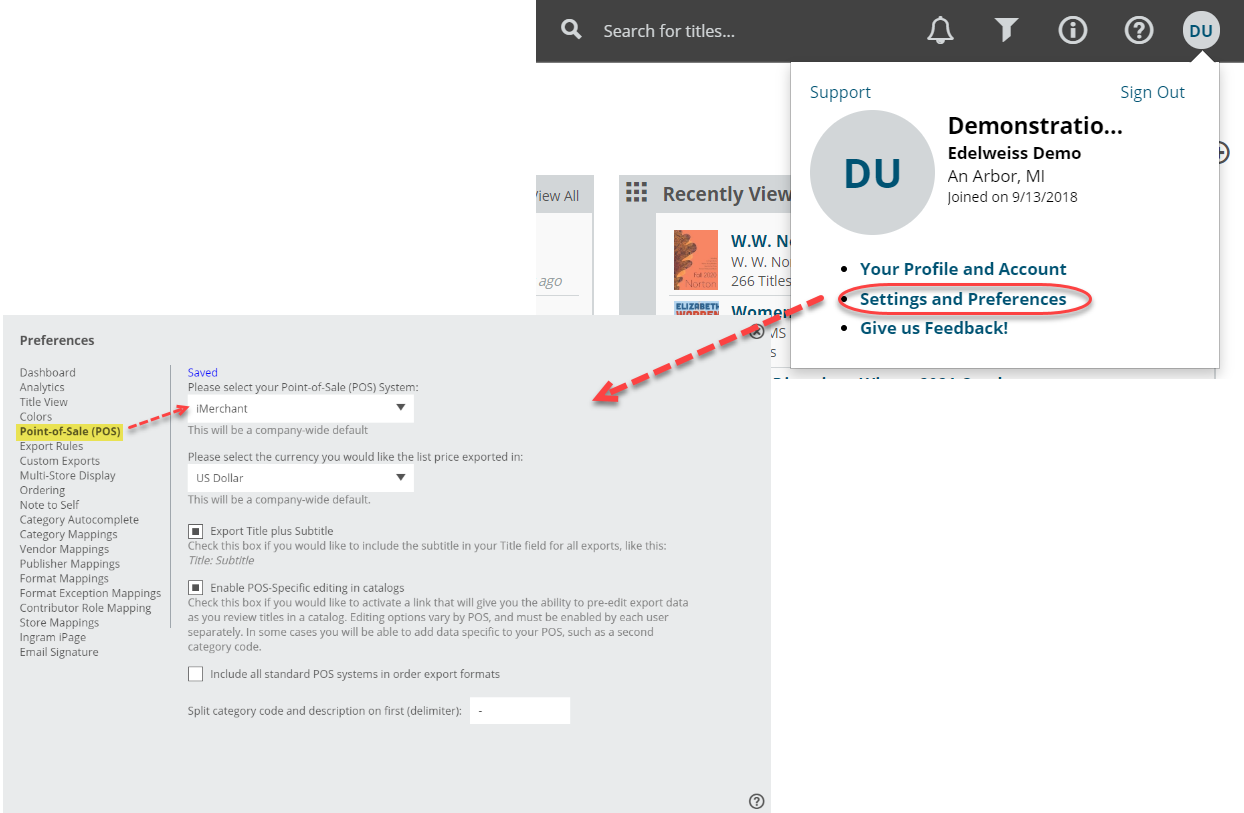
The first step to exporting an order to import in to [i]Merchant is to set [i]Merchant as your Default POS system.
Then go to your Orders page, and click in to the Export Preview screen for the order you wish to export.
 To view your order in the Standard View, which shows your order in a catalog format, so with all the title covers, catalog copy, bibliographic information, etc. just click on the order name. This can be a useful view when editing titles’ category codes, etc. While in that view, enter your Export Preview screen here:

In that Export Preview screen, click Download to export your order:

Edit your order as needed. Details about doing so here.
Then click that Download button.
The following information has been provided by [i]Merchant to help with importing your orders on that end. For questions about the process of importing orders in to [i]Merchant , you’ll want to contact [i]Merchant Support.
————————————————-
[i] Merchant lets you read front list files provided by book publishers, load them onto the system, and place orders using the front list information. This is an easy way to order front list titles and update your Inventory file with new titles. In this document, we will provide instructions on how to import an Edelweiss file into your [i] Merchant system.The Front Lists/PO Import program can be accessed as follows:
- From the [i] Merchant Desktop, select Modules-Purchasing-Front List/Import PO. The Front List/PO Import Selections window appears.
- To import a Front List file, click on the binoculars icon at the right of the Import File field, or place your cursor in this field and press the F3 key. You are taken to the Front List/PO Import Find window. From here, click on the Import icon at the top of the window. This will call up a standard Windows box, where you will need to locate the desired file to be imported.
You can import BISAC files, delimited files, Ingram ROSI files, or Edelweiss files. Delimited files and Edelweiss files are handled essentially the same way. Again, in this document, we will look at Edelweiss files.
To import an Edelweiss Front List file:
- Once you have selected the desired file and the Front List/ PO Import window displays, fill in the “Name to Identify the file” field and “Vendor” field, and add a comment to the “Comment” field if desired.
- Under “File Type,” select the Edelweiss option. When you do this, the fields underneath will become active (they are grayed out for BISAC and Ingram ROSSI files). Check the box next to the “Header Record is Included” field if the file you are importing has column headers and you want [i] Merchant to read and match them.
- In the Delimiter Used field, click on the down arrow at the right and select the delimiter used in the imported file (for example, if a .csv file, the delimiter would be a comma).
- Finally, click on the Match Fields button at the lower right of the window. This will call up the Front List/PO Import Delimited File window. Here, you will match the column headers from the imported file with the standard [i] Merchant headings.
- At the top of the window, you can select an existing template with which to work. Click on the “Manage Saved Forms” button, and select what you want to do. You can create a new format, or have the option to choose from formats designed by all users, or just yourself. You can also save the format you are currently working on, or delete it.
To the field at the left, click on the down arrow and scroll through the options, assuming you are selecting an existing format. If you are creating a new format, a new format dialogue box will appear, asking you to name it.
At the extreme left of the Front List/PO Import Delimited File window, there is a column called “Field Name.” The values underneath this are the [i] Merchant header names. What this window does is allow you to match the headers from the imported file with their [i] Merchant equivalents.
The rows under the Field in File column represent the header names in your imported Front List file. They will all have a down arrow to the right of them. Click on this arrow, and from the list, select the name that best matches the [i] Merchant equivalent to the left of it. Sometimes, there will be a direct match. For example, “Author” will often be the same in both columns. But it doesn’t matter. Because if the heading in the imported file was “Auth,” it will still be converted to “Author” once the process is saved.
Only the top two rows–Product Number and Description–are required. For example, with “Binding,” if you do not have an equivalent column heading in your imported file, you can leave it blank–or, select the “Use Default Only” choice from the pulldown menu under the “Field in File” column.
The “Use Default Only” selection refers to the third column–“Default.” Whatever you select under “Default” for each row will be that row’s default value for every title imported from the Front List. For example, with Binding. If you select “Use Default Only” under the “Field in File” column, then every title imported from this Front List file will have the Binding Code you select under the “Default” column.
The “Default” value can also be used in another way. Let’s say you choose “BINDINGS” under the “Field in File” column in the [i] Merchant “Binding” row. This means your imported file does include at least some Binding Codes. But let’s say not every title in the imported file has a Binding Code–some are blank. So, under “Default” you select a default Binding Code of “B.”
If you had selected “Use Default Only” under the “Field in File” column, then all titles imported from this file would have a Binding Code of “B”. (If you had left the Binding Code blank under “Default”, then the titles imported would have no Binding Code at all.)
But if you select “BINDINGS” here, coupled with a Binding Code of “B” under the “Default” column, any title that had an existing Binding Code on the import file will retain its preexisting Binding Code after the import. However, any title that did not have a Binding Code in the import file will now be assigned a Binding Code of “B” (the default) after the import. This method applies to any nonrequired row in this window.
Also, take note of the “No Default” checkbox field to the right of the Default column. This checkbox field will appear for all rows that have lookup boxes. If you leave the “No Default” box unchecked, then everything described above will take place. However, if you check it, the system will override a default value (if one is assigned) for any row whose value is invalid or blank.
Go through all of the rows and set the values accordingly, then, when finished, click on the Apply button at the top left of the window. You are returned to the Front List/PO Import window.
From here, having imported your file and matched your headings, click on the Save icon at the top of the window and Close out of the window. You are returned to the Front List/ Import PO Find window, and the just-added Front List file is now included in the grid at the bottom of the screen. From here you can select the Front List if you are ready to process its titles onto a PO.