
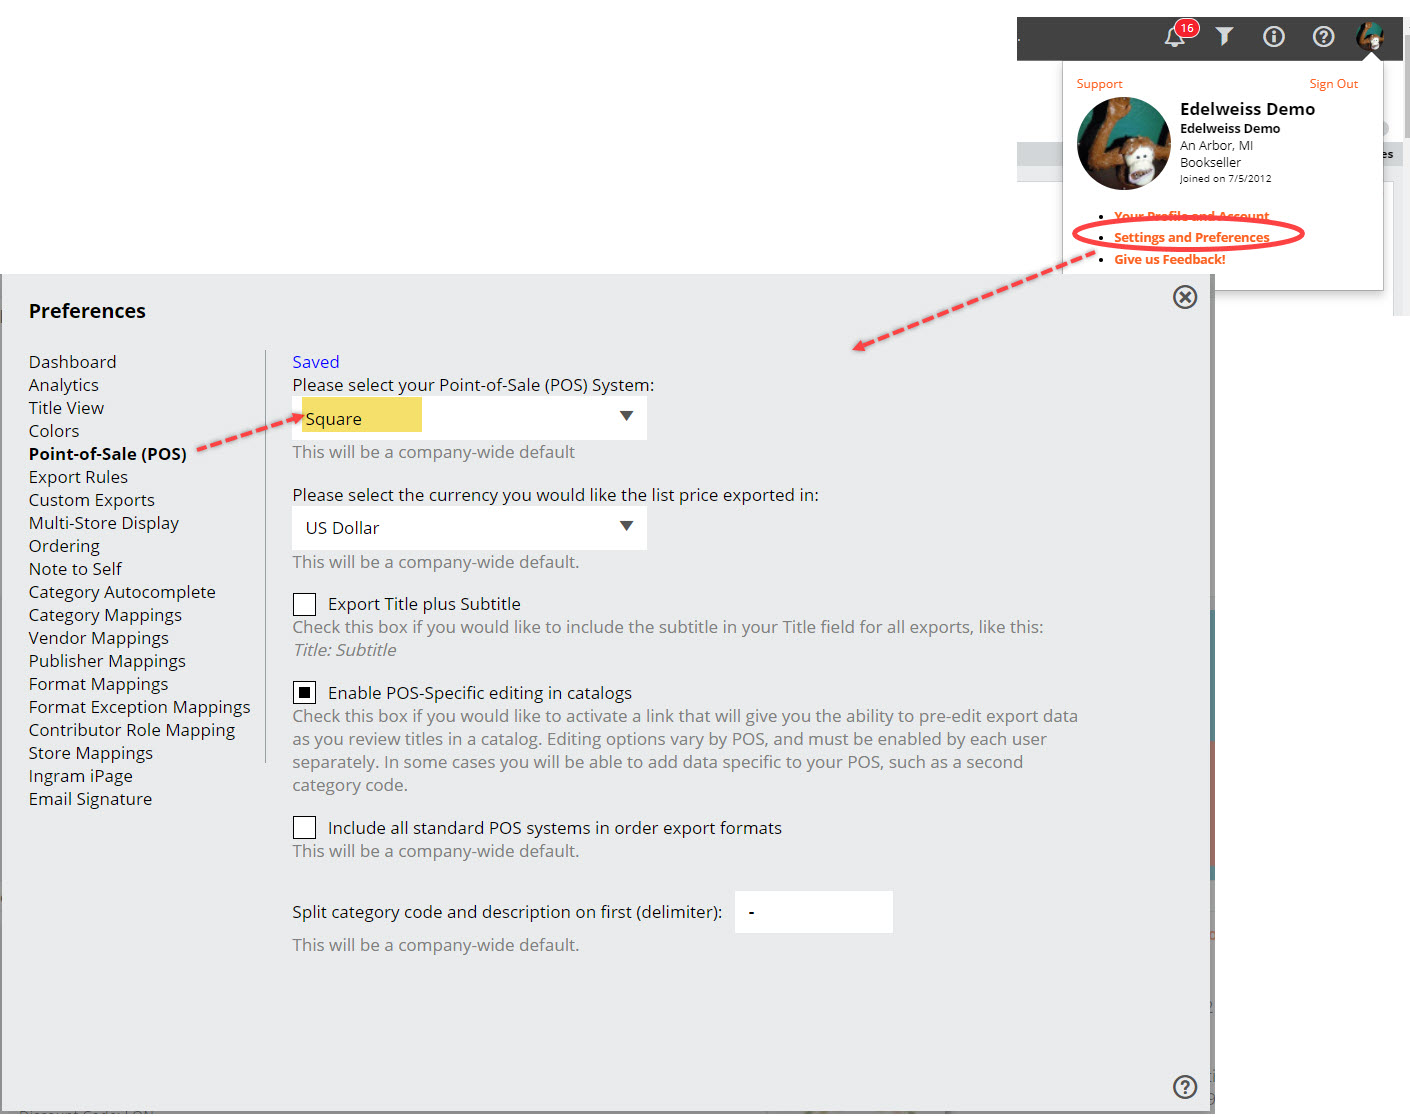
The first step to exporting an order to import in to Square is to set Square as your Default POS system.
Then go to your Orders page, and click in to the Export Preview screen for the order you wish to export.

To view your order in the Standard View, which shows your order in a catalog format, so with all the title covers, catalog copy, bibliographic information, etc. just click on the order name. This can be a useful view when editing titles’ category codes, etc. Edit your order as needed. Details about doing so here.
While in that view, enter your Export Preview screen here:

In that Export Preview screen, click Download to export your order:
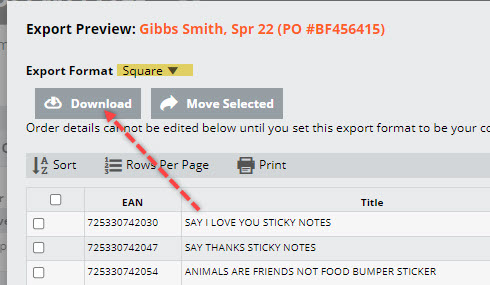
Your file should download automatically to your computer’s Downloaded file. The information below is provided by Square to help with importing your orders on that end.
Create a New Purchase Order in Square
- Go to Items > Inventory Management > Purchase Orders.
- Click Create Purchase Order.
- Enter purchase order details, such as vendor name, delivery location, date expectancy, and item information.
- Click Create or Save as Draft.
- Add your vendor’s email address and add an optional note. To see the purchase order before hitting send, click Preview Email.
- If you’d like a copy of the purchase order, select Send me a copy, Save as PDF, or Save as CSV.
- Click Send or Done.
Import a Purchase Order
With Square for Retail Plus, you can save time creating purchase orders by importing a CSV or Excel version of the purchase order via the online Square Dashboard.
Prior to importing a purchase order, we recommend downloading Square’s import template. You can do so by clicking the link below, or by visiting the Items section of your online Dashboard.
While we recommend downloading Square’s import template to make the process easier, you can also use a template of your own choosing, as long as it’s a CSV or Excel file.
After filling out the template, you’re ready to import the CSV or Excel file. To do so:
- Go to Items > Inventory Management > Purchase Orders on your online Square Dashboard.
- If you’re working directly from a new purchase order, you will also see the option to Import there.
- Click Import.
- Drag and drop the file into the Import purchase order pop-up, or click select it from your computer to upload the template directly from your files. Note: If you have not filled out the template, click Download template to get started.
- Click Import.
- Select the appropriate item identifier by choosing either the item name, SKU or GTIN to help easily identify duplicate items during the import process. Note: Square recommends selecting either SKU or GTIN as the appropriate item identifier for ease of use.
- Click Next.
Note: All item identifiers must match exactly one item or variation for the import process to be successful.
If you’re using your own template, you’ll need to go through the column matching process during the first portion of the import process. To do so:
- Click the Import button to begin the import process and upload your personalised template.
- Once uploaded, you’ll see the Match document columns screen. From here, use the drop-down menus to confirm each Square purchase order attribute is matched to the correct column in your import file.
- Click Next to continue the import process.
The import process can take up to a minute, but usually only lasts a few seconds. Make sure to keep an eye out for any error messages that appear during the import. Once the import is complete, the newly created purchase order will appear at the top of the purchase order list available in your online Square Dashboard.
You can also import any existing purchase order drafts that are already associated with your account by exporting the draft. To do so, click ••• next to the purchase order draft and select Save as CSV.
Manage Existing Purchase Orders
- Go to Items & orders > Items > Inventory Management > Purchase Orders.
- Click the purchase order you wish to edit.
- Click Edit Order > update the order details.
- Click Save.
Note: Editing a purchase order does not automatically generate a new email to your vendor. To ensure they receive the updated order information:
- From Purchase Orders, click ••• to the right of the purchase order.
- Click Send as Email.
- Include a note to explain that the purchase order has been updated.
- Click Send.
- From the Purchase Orders tab, click the purchase order you have received.
- Click Receive All or Receive None. To partially receive inventory, click Receive in the product row.
- Enter the amount to partially receive.
- Click Save.
Important to note
- A maximum of 500 unique items can be added to a single Purchase Order.
- Once you’ve created a purchase order for an existing vendor, the item variation will be associated with that vendor and the cost to purchase from that vendor. Items associated with a Vendors will be visible under the Item Library tab of the vendor’s profile.
NOTE: You’ll want to be sure to enter the standard ISBN13s for your inventory in Square for Edelweiss tools to work. You should include it only in your items’ SKU field under Variations in order for it to connect to the correct title information in Edelweiss. This is especially important for Square stores using Analytics.