
With a little bit of effort up front, you can create useful Groups in which to place your contacts. When it comes time to share markup notes, DRCs, or Collections, you can then simply share with an entire group in one brilliant swoop.
Creating a Group is simple; open your People page and be sure you’re viewing your Contacts.
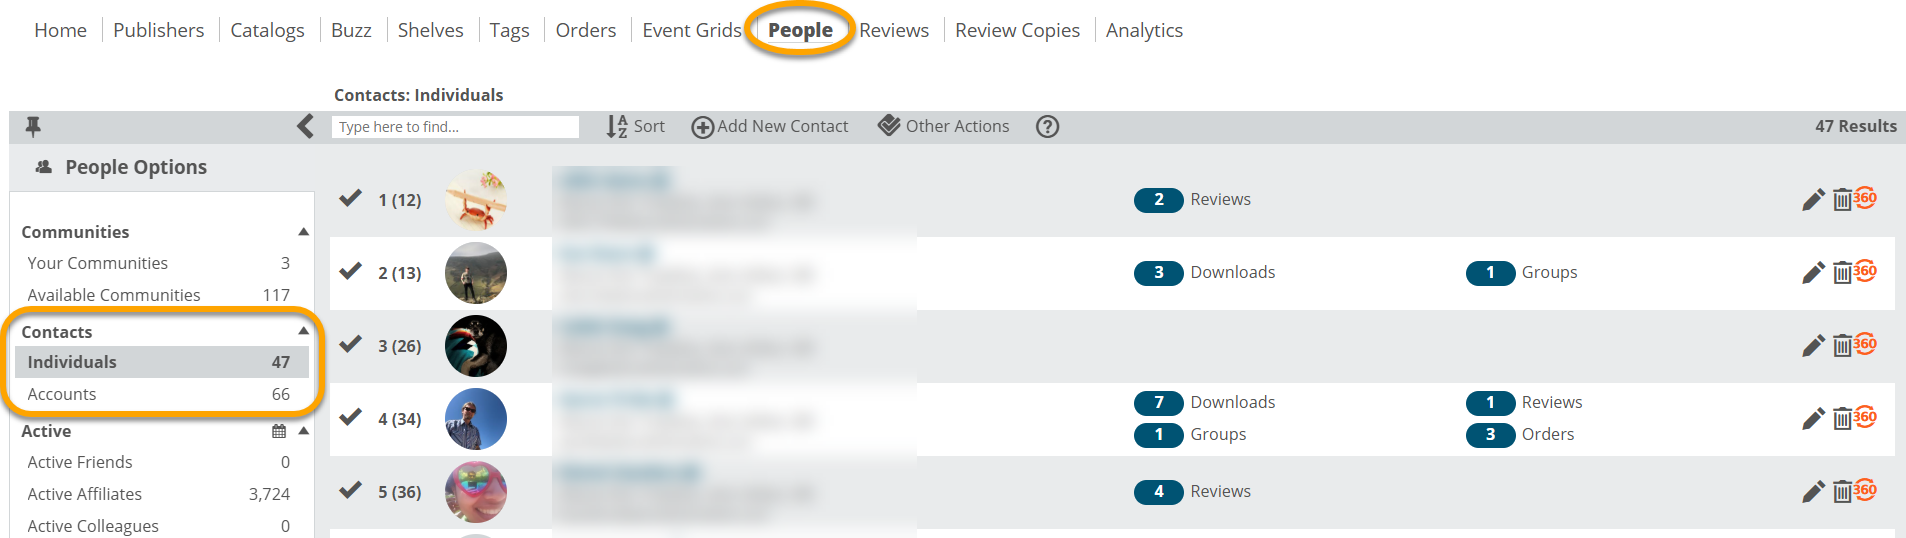
In the Individuals view, you can refine your contacts by Group.
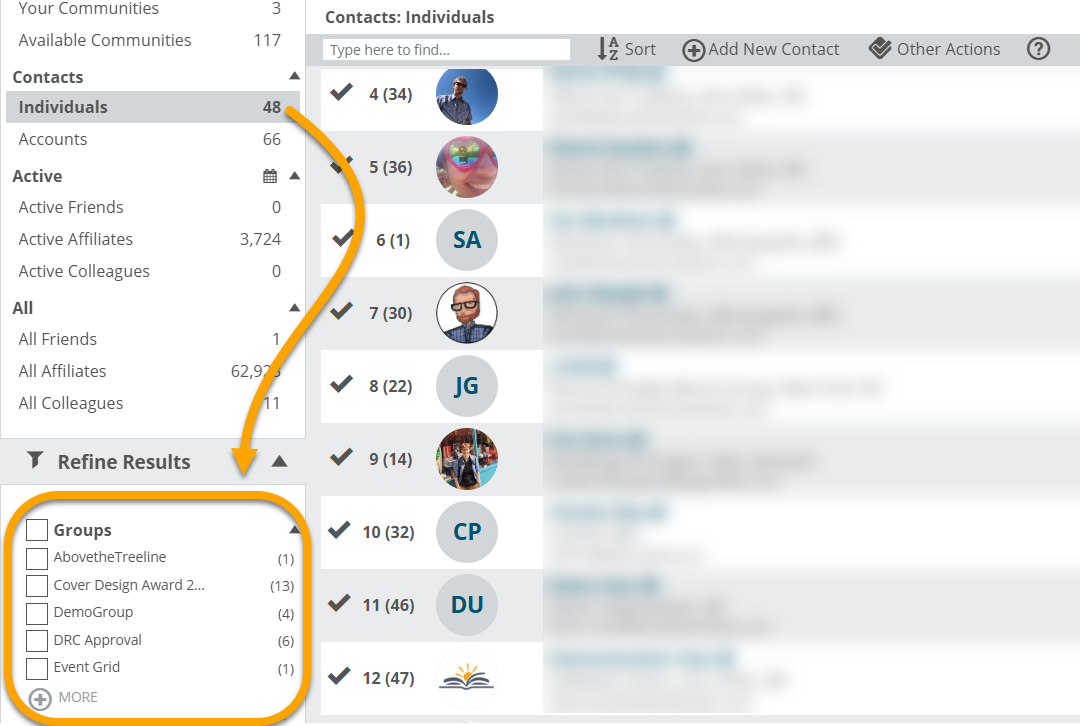
Then, you can see at a glance how many contacts are in each Group, refine by that Group, and see who specifically is included in each Group.
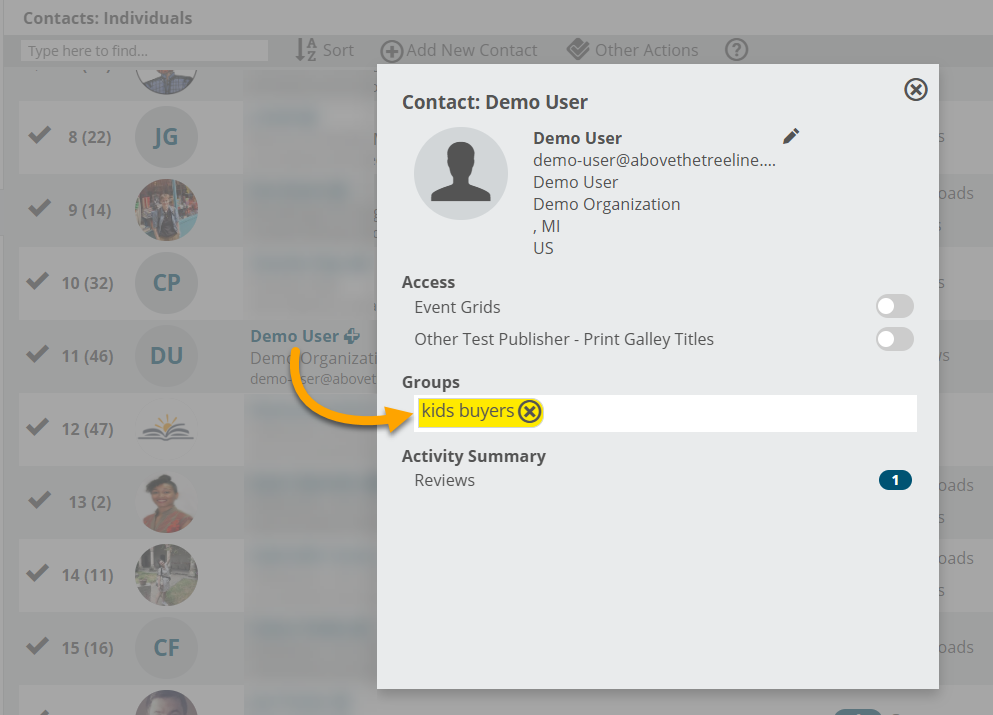
To add to a Group or create a new one, you’ll want to simply locate an individual you’d like to add to a Group and click on their name. In the Groups field, simply type the name of a Group (if it’s an existing group, it will populate). If you’re creating a new group, type in whatever you’d like and hit <Enter>. That’s all there is to it!
See the Groups a contact is included in by hovering over the bubble as shown below.

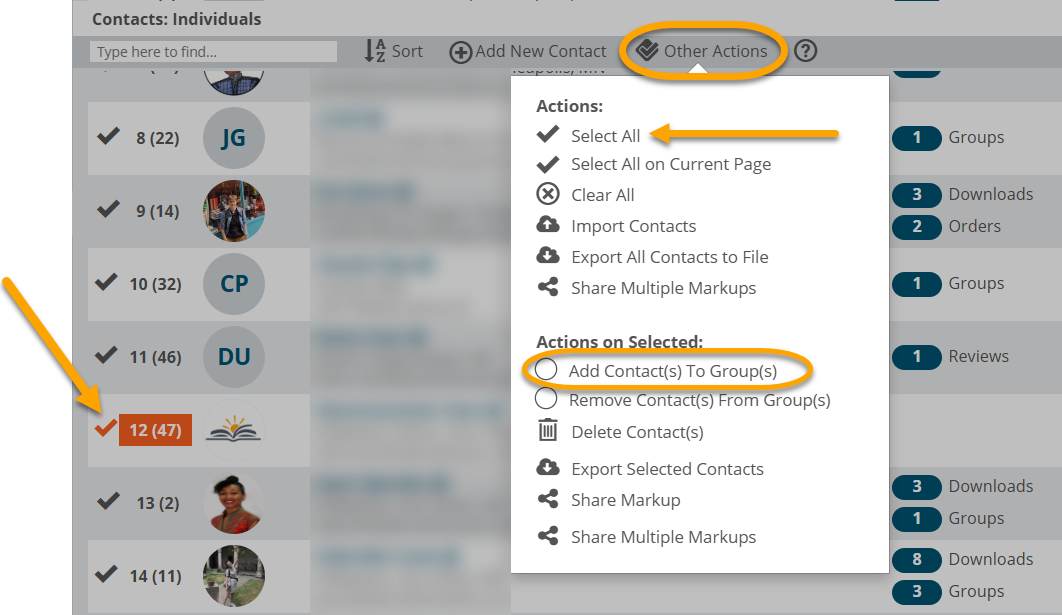
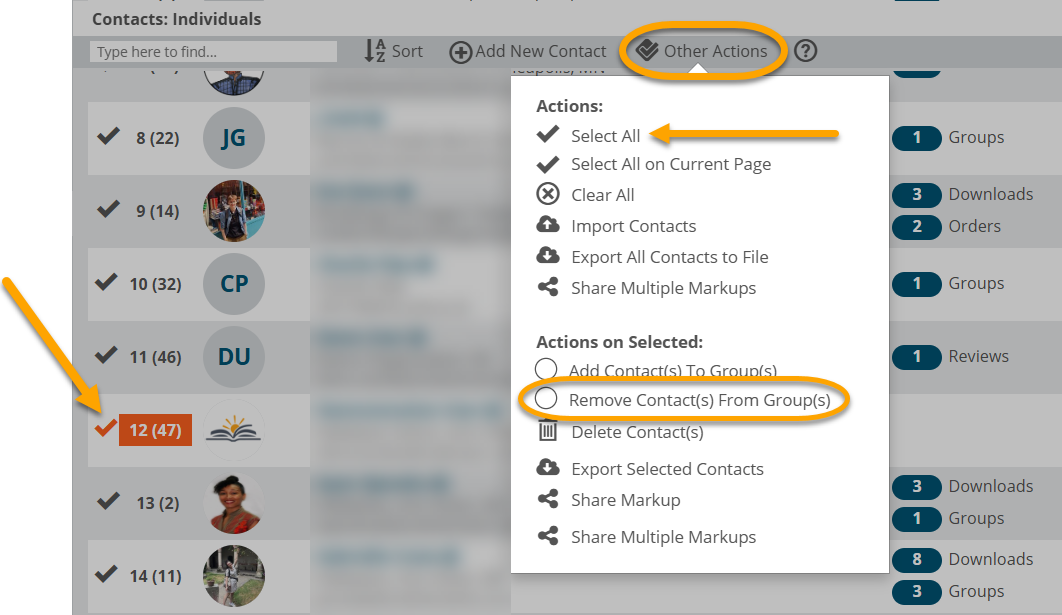
Add many contacts to a Group all at once by using the checkmarks to the left of each entry, or by using Select All in the Other Actions menu.
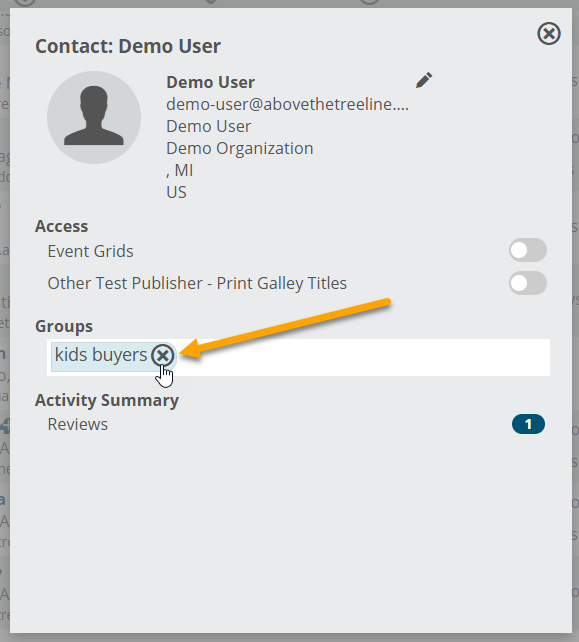
Remove a user from a Group by clicking on their name and selecting the ‘x’ next to the Group entry.
Or, you can do this in bulk by clicking the checkmark to the left of each contact to select them, or select all contacts under Other Actions. Next, click Remove Contact(s) From Group(s), and in the resulting window, enter the group name you’d like to remove, and select the group that populates.
Once there are no users associated with a Group, the Group will disappear.
Sharing a Markup or Collection with a Group:
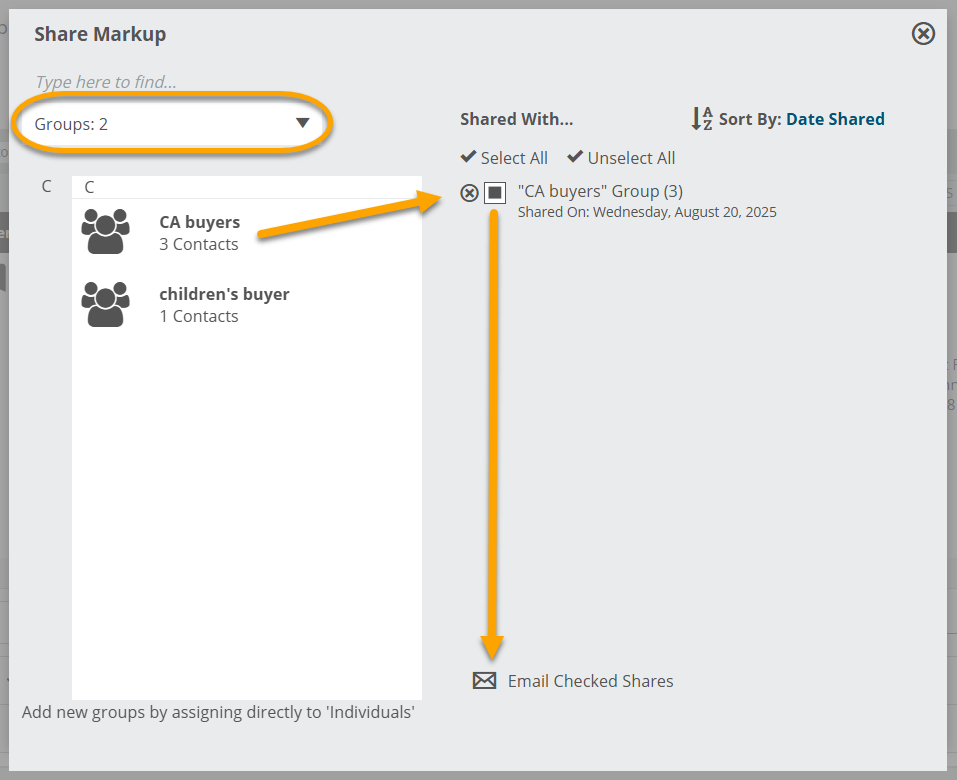
From the markup toolbar, select Shares. Next, choose Groups from the drop-down menu. (More information on sharing markups can be found here!) Simply click on a group name to share with that group. Check the box next to the group to send them a markup notification email.
There is a clear benefit here in that you can share information with a specific group of users of your own choosing with a single click, and save yourself lots of time.