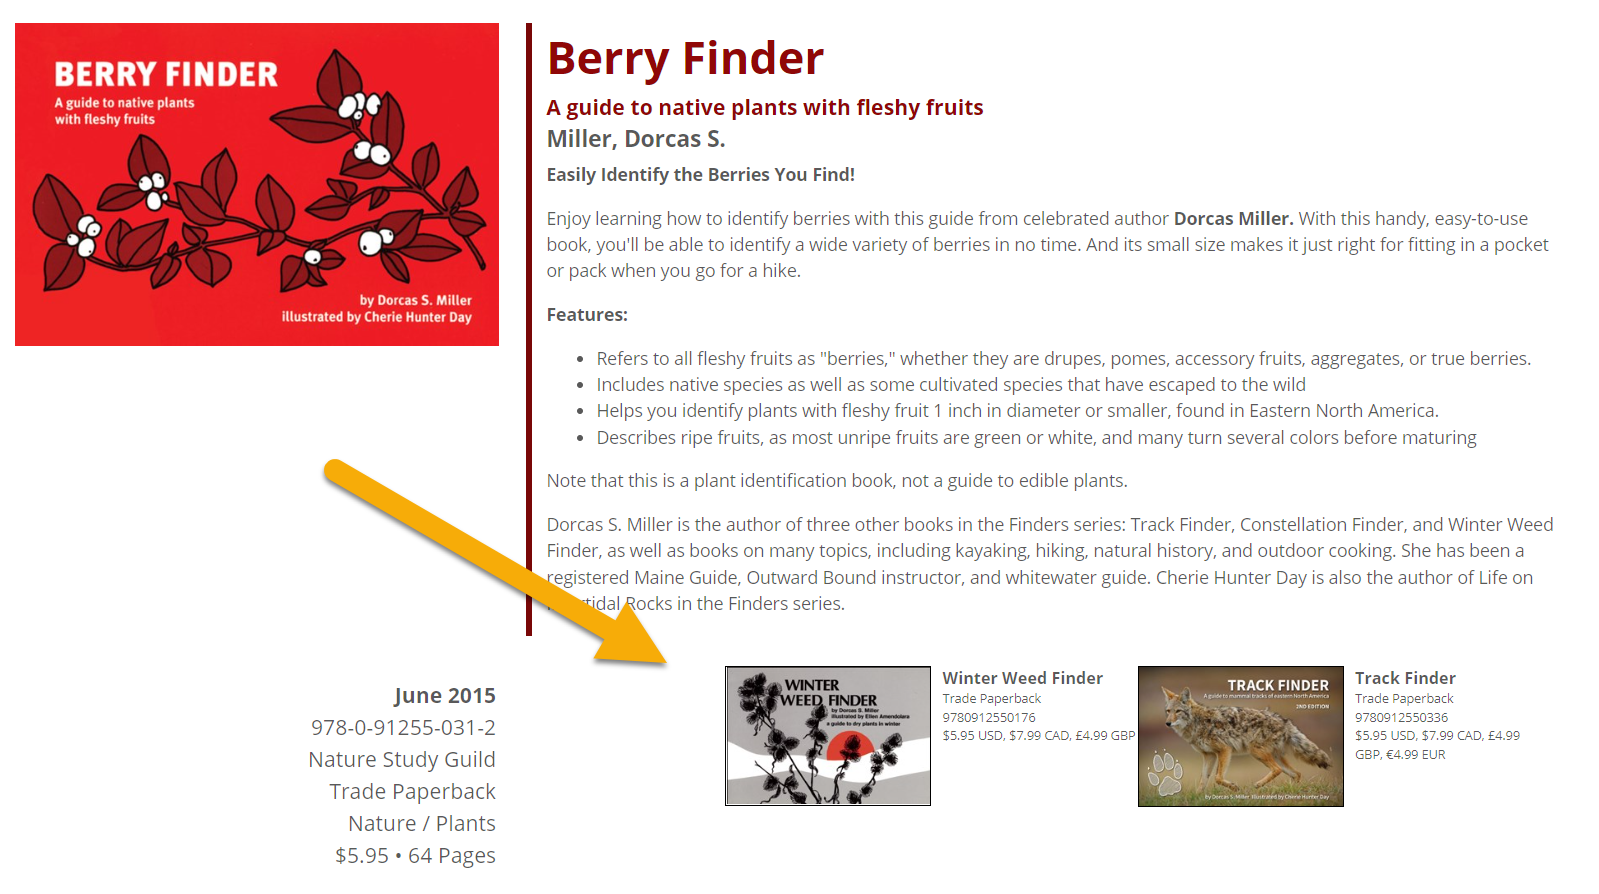
Using a Related Titles widget in your templates and documents is a multi-step process. The widget can be used to include a title’s related products on the page with a jacket cover and text, as shown below, or with text only, as shown here.
Step 1:
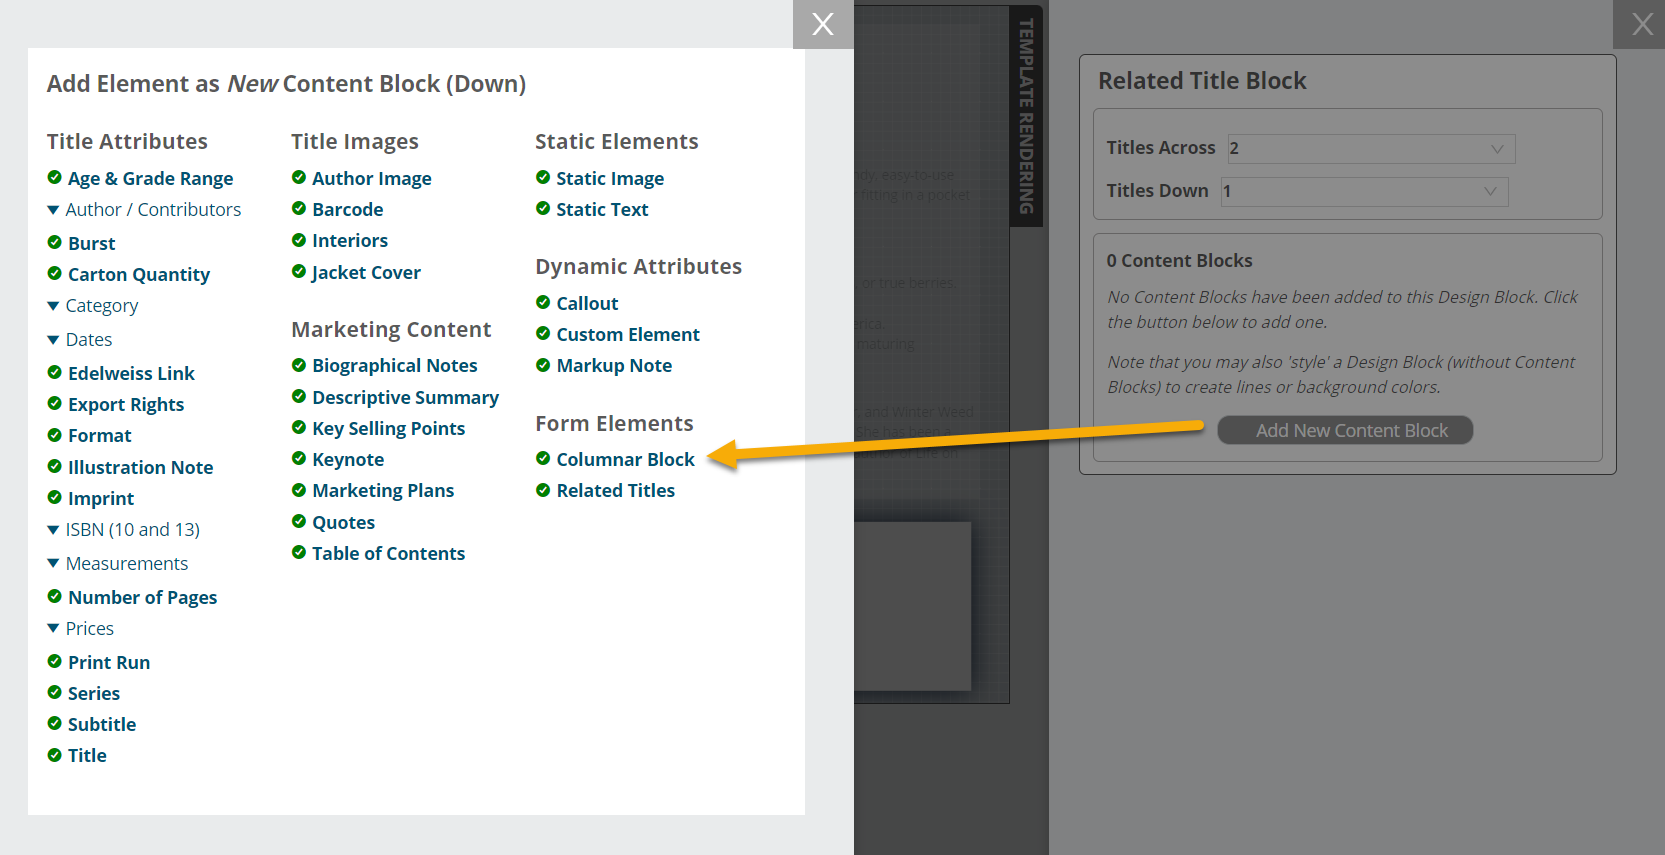
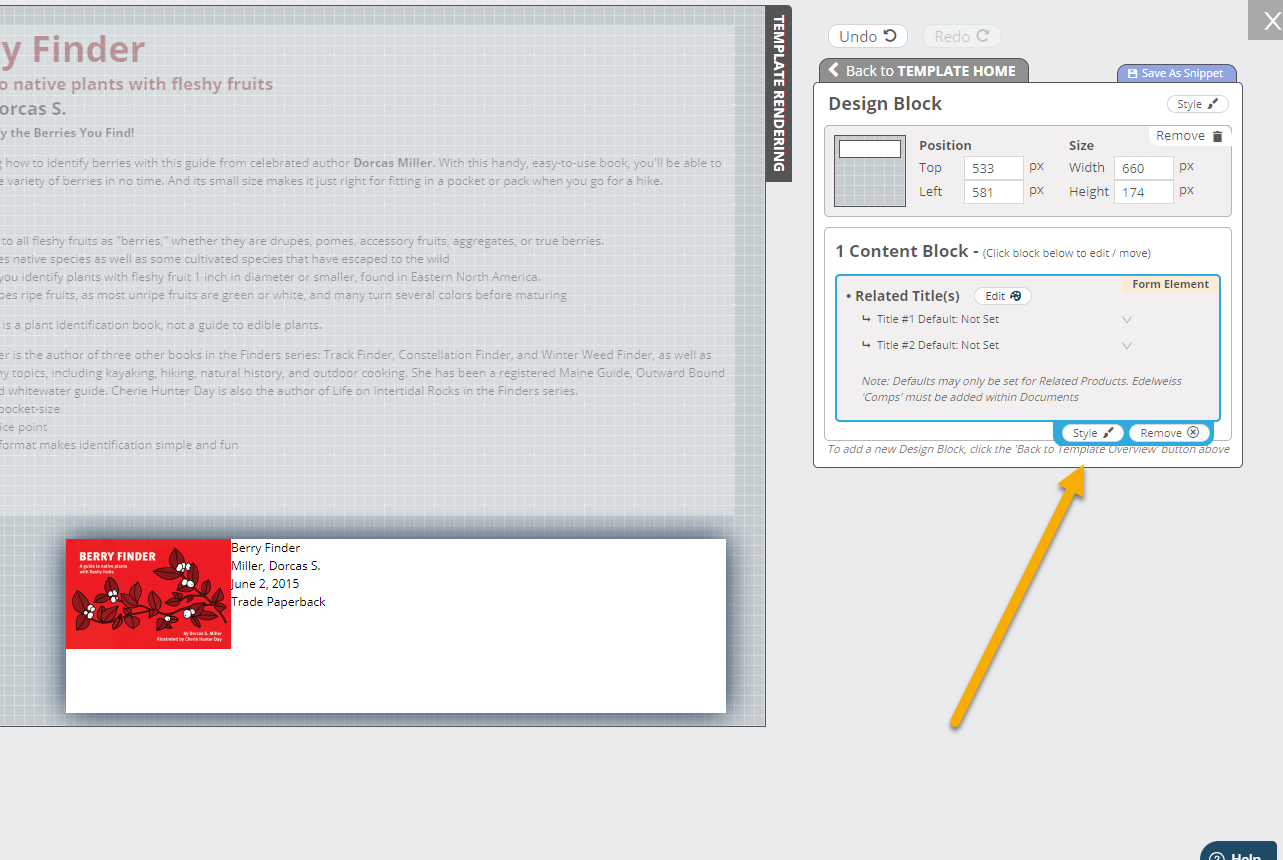
Start by adding a new design block. In this example, we have a PowerPoint template that will show one main title per page, but we’d like to include a couple of related titles as well. After adding a new design block, click Add New Content Block and choose Related Titles.

Step 2:
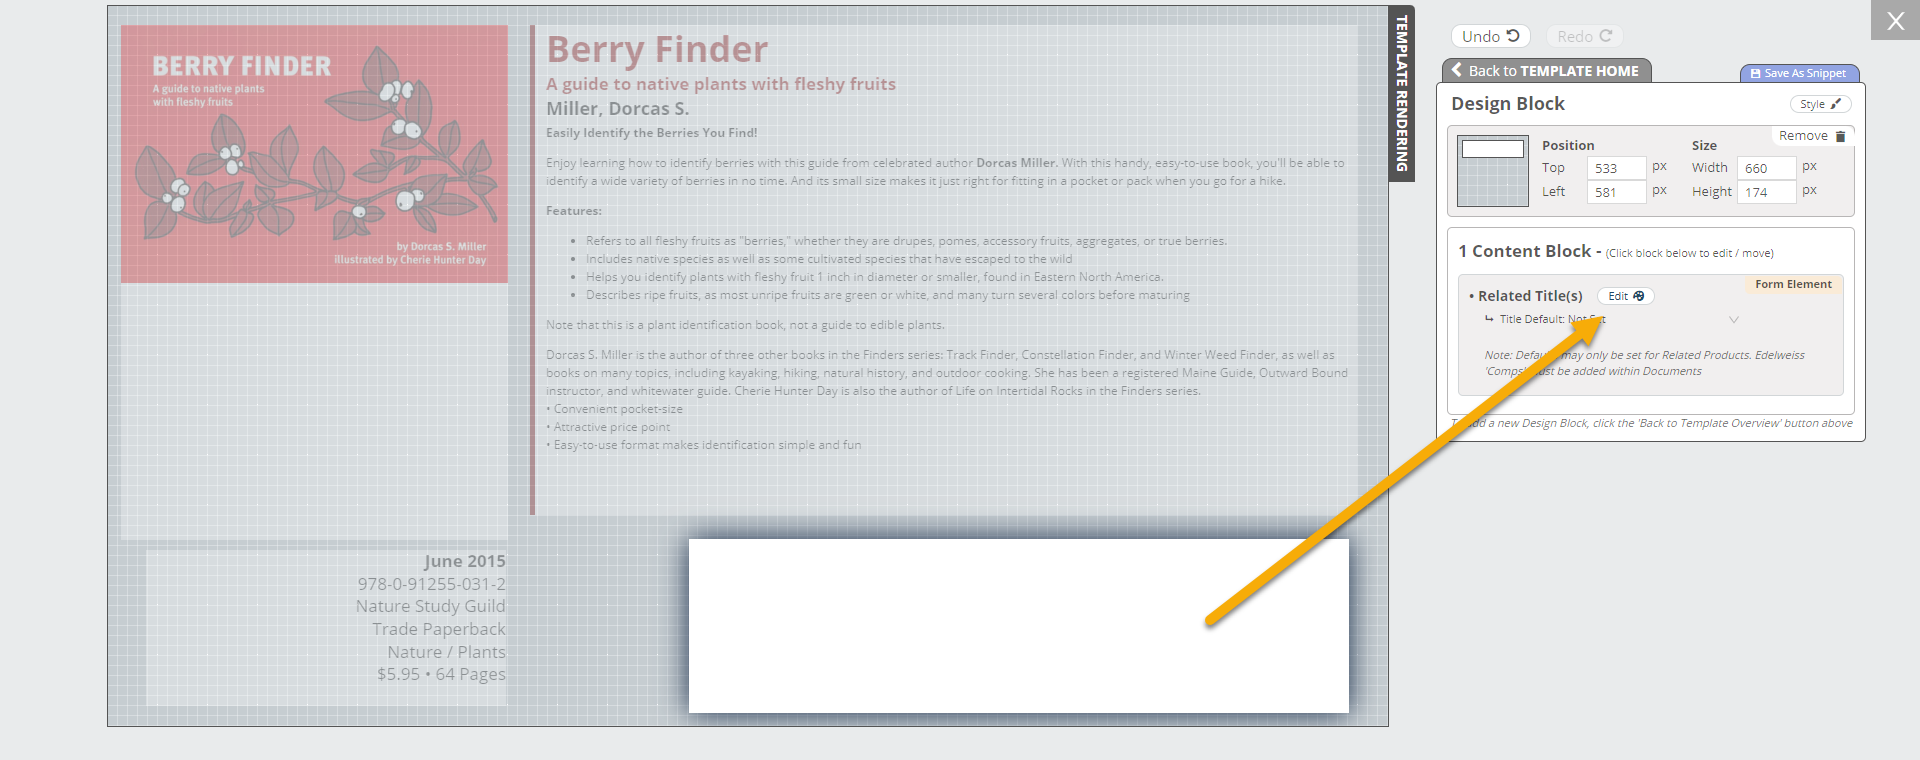
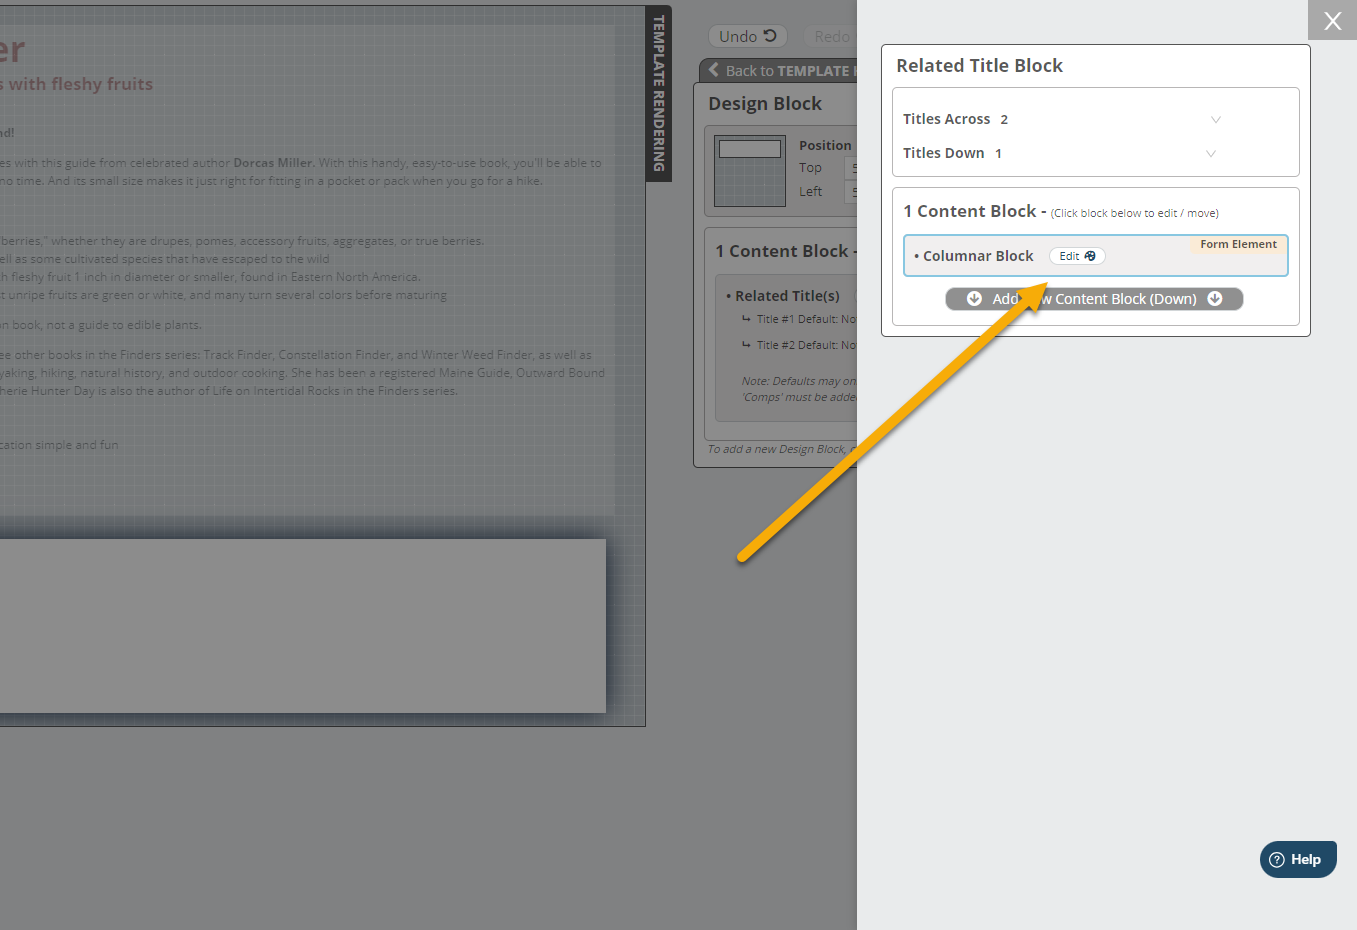
Once you have your Related Titles block, select Edit.
This is where you’ll choose how many titles should display across and down. After making that selection, click Add New Content Block once again.
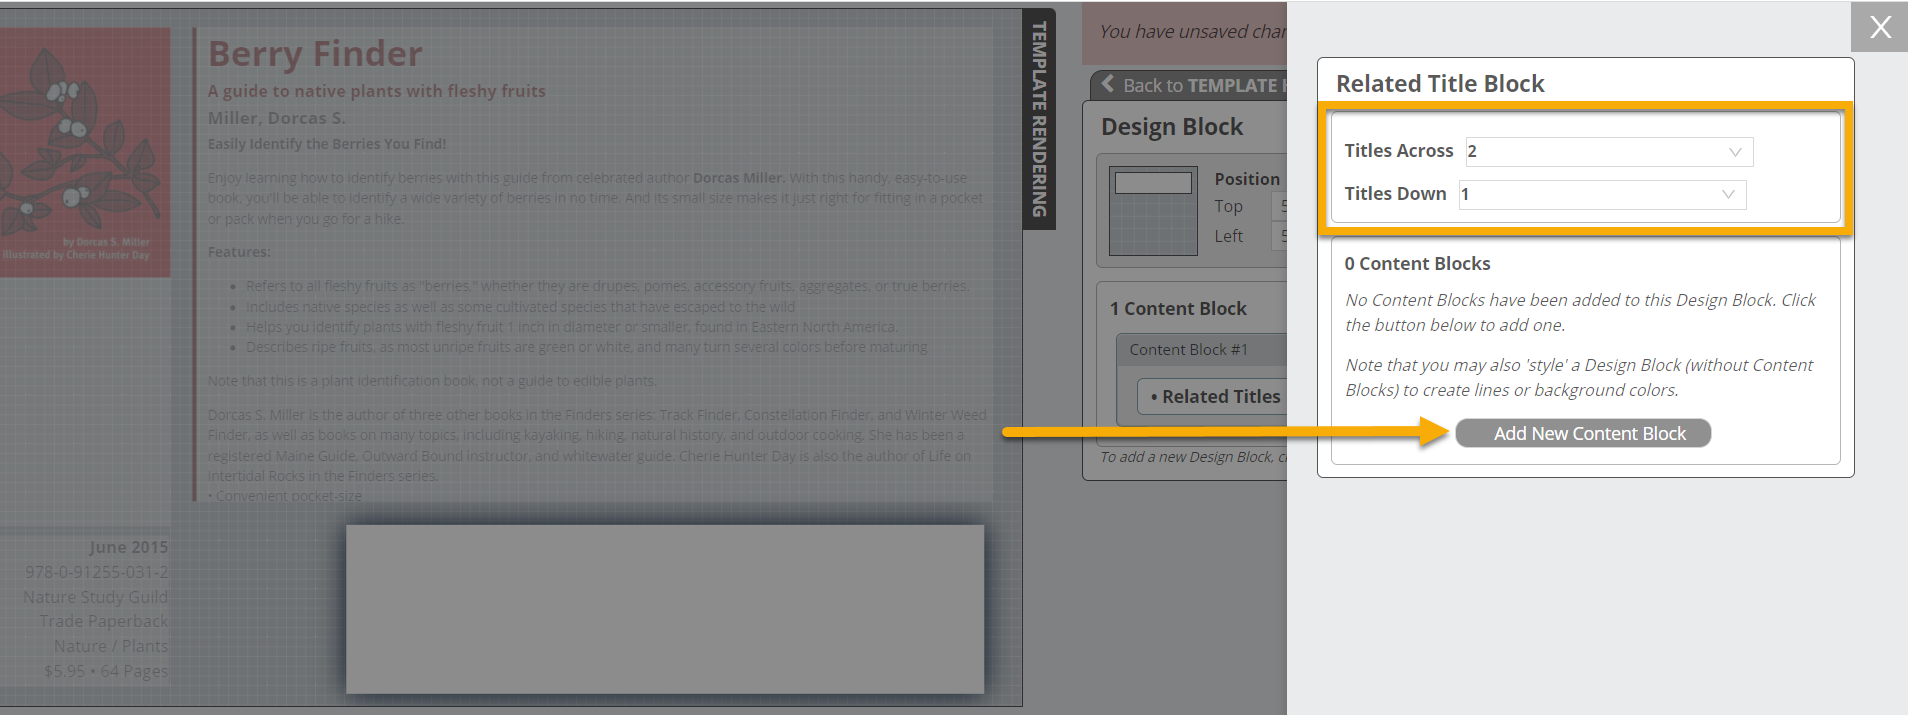
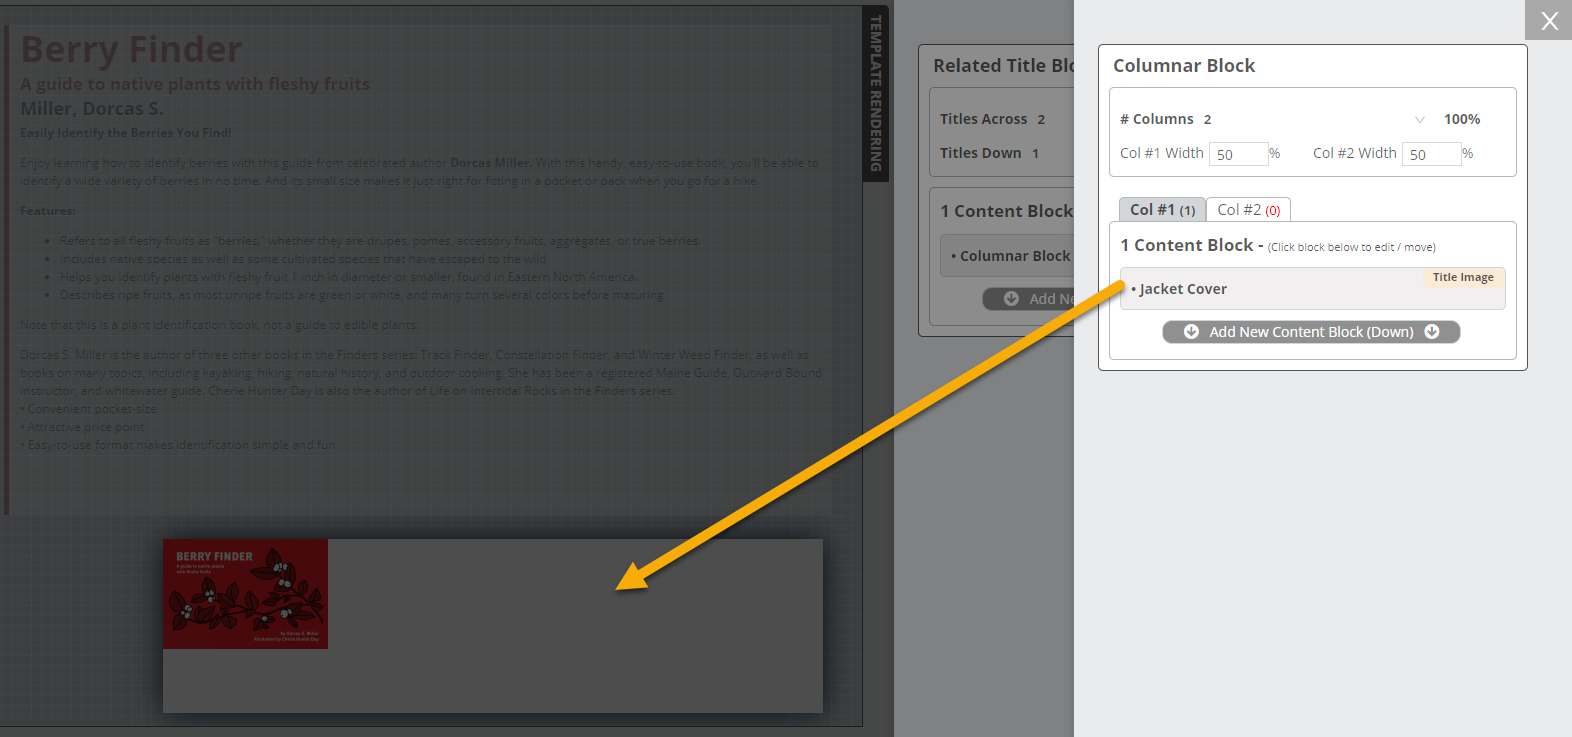
Next, select Columnar Block.
Click Edit.
In the resulting window, you’ll choose which data to include in column 1 and column 2.
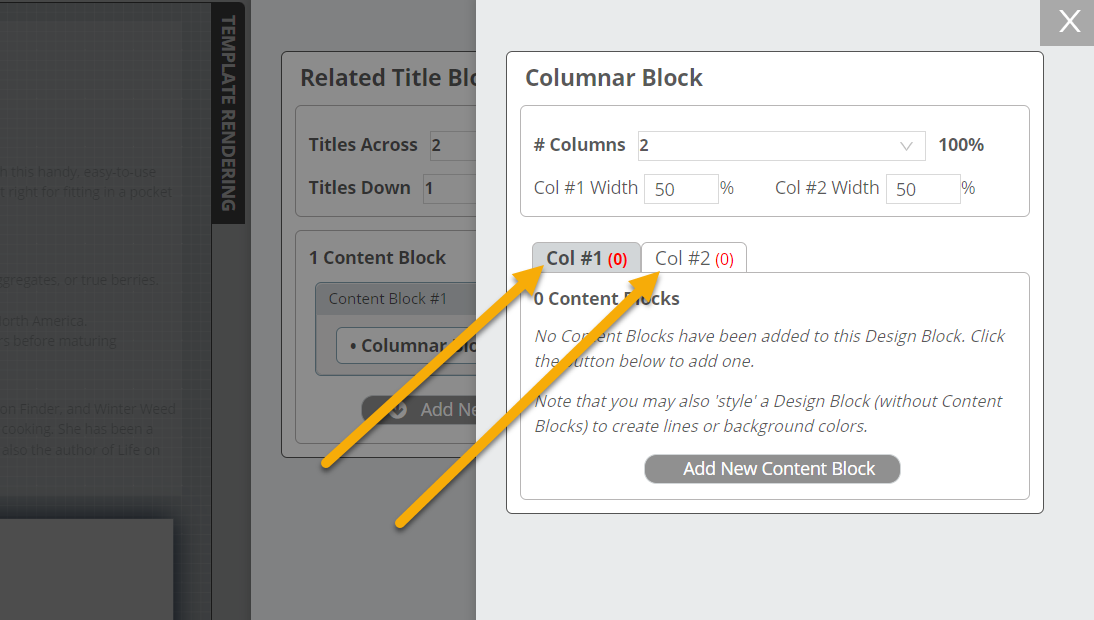
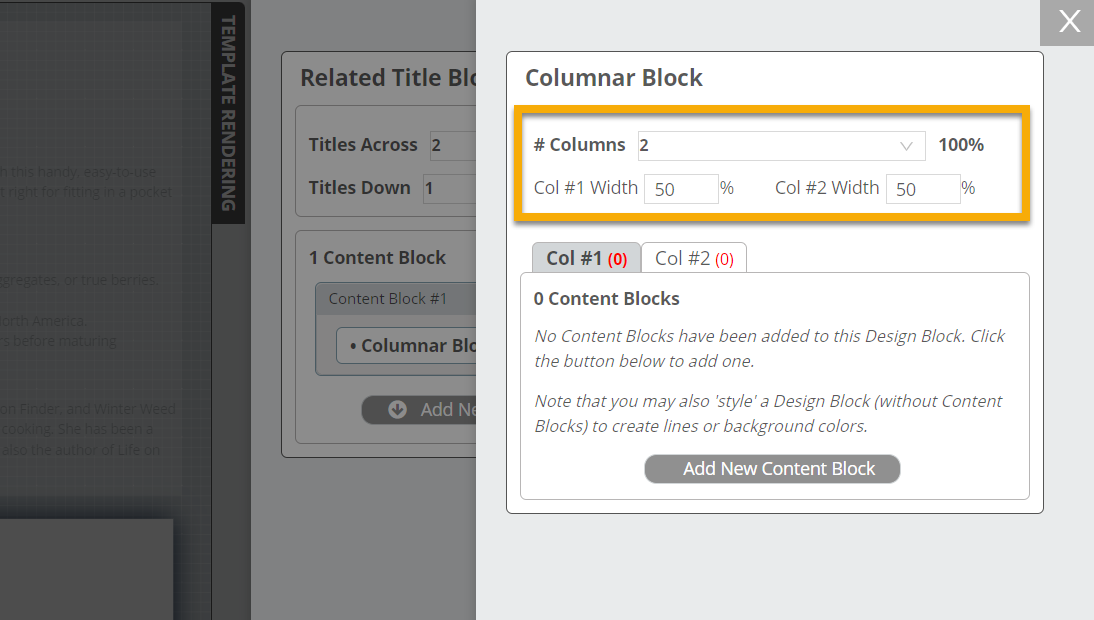
Note that the number of columns and the width of each can be adjusted here:
With Col #1 selected, click Add New Content Block. For this example, we’ll add a jacket cover in column 1.
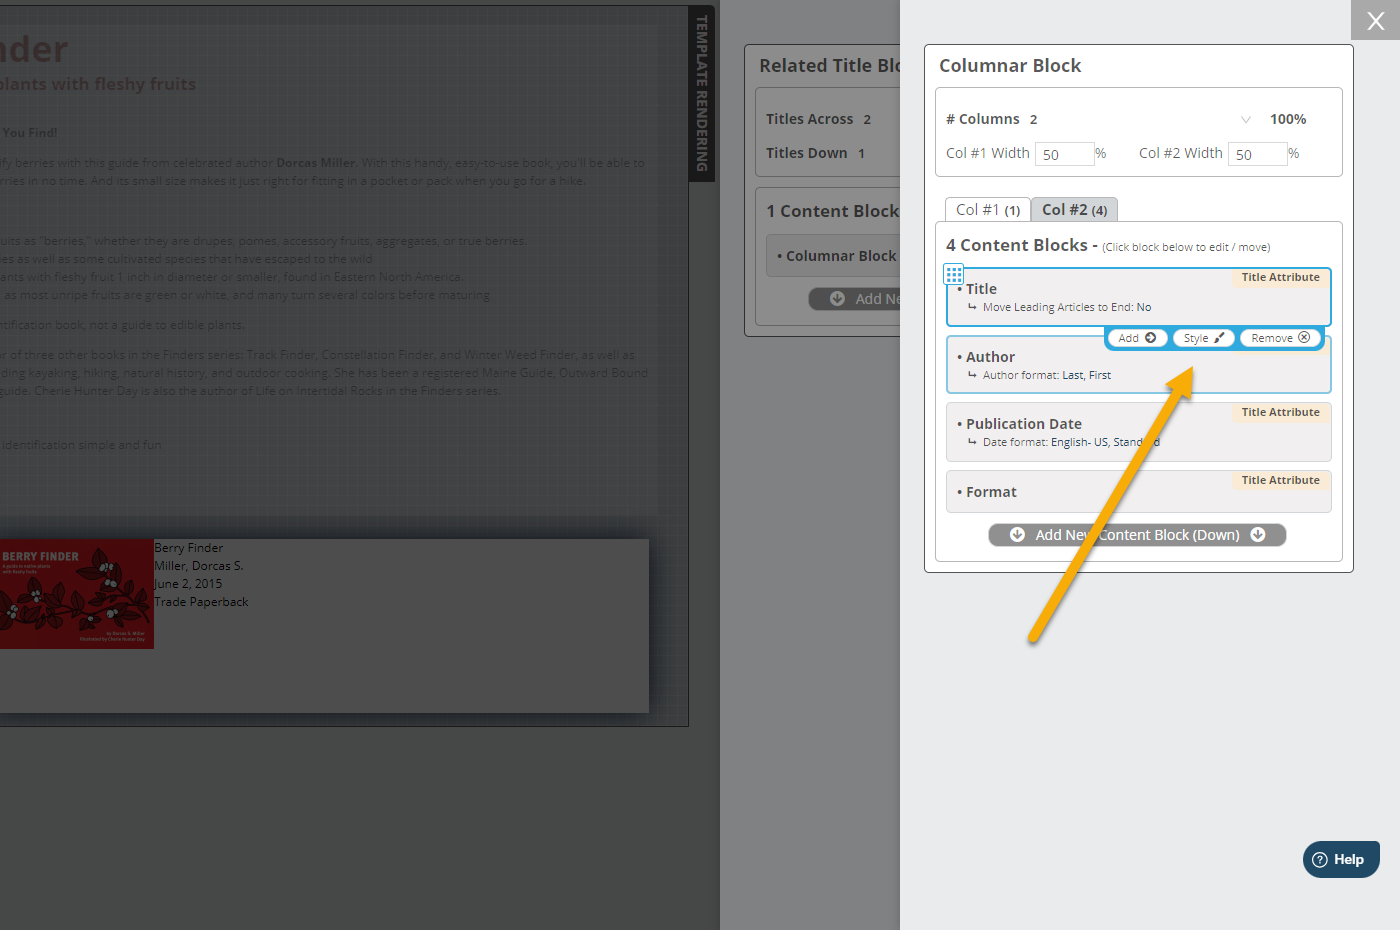
In column 2, we’ll add title, author, publication date, and format.
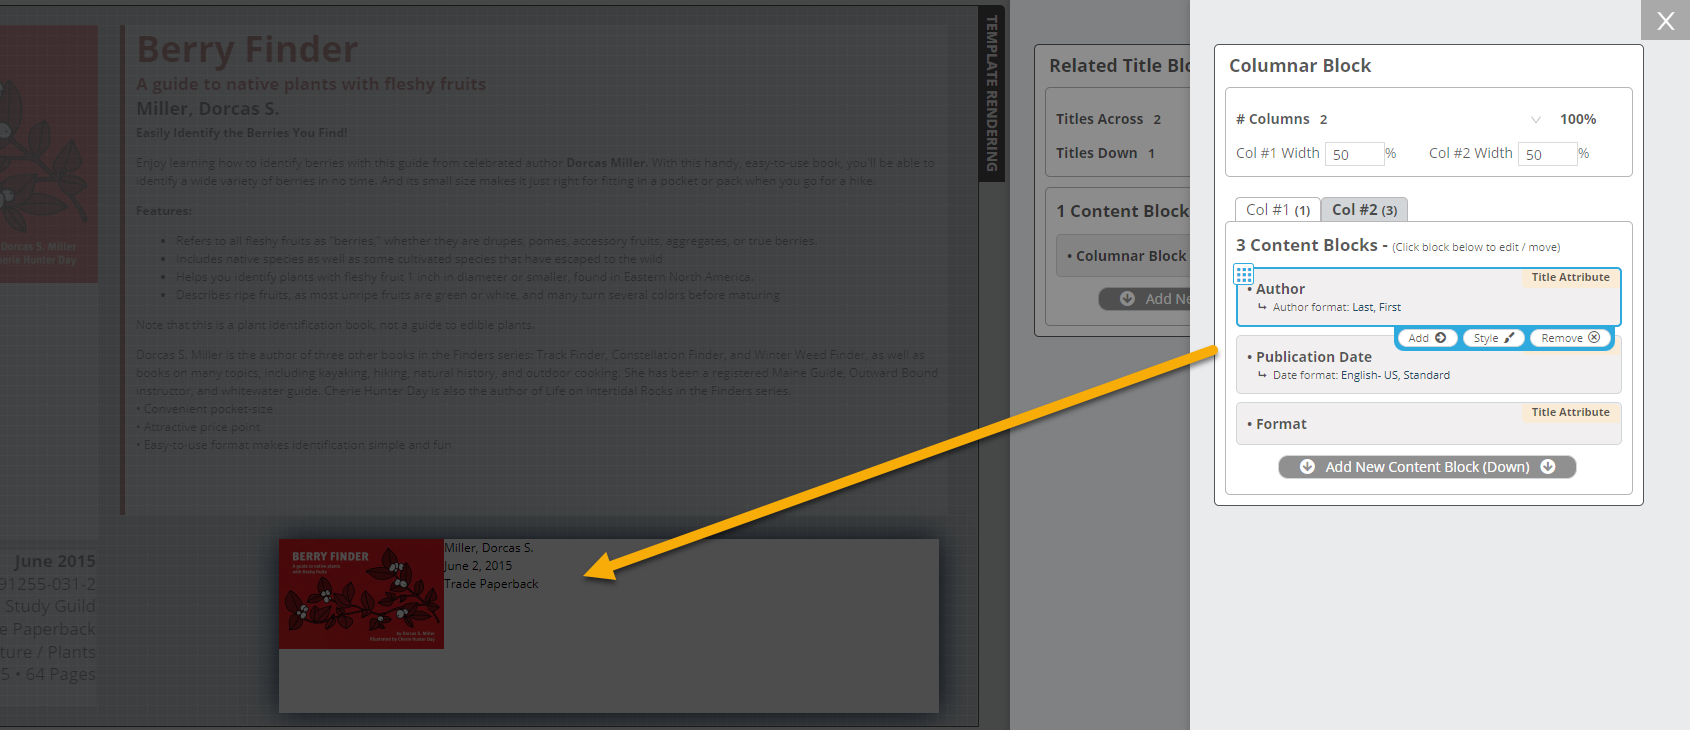
As with any other design blocks and content blocks, you can style individual elements or the content block as a whole.
TIP: Note the Title Default dropdown which enables you to choose a default for which type of related product you’d like to pull in. If you supply Related Product data via ONIX or an ancillary feed, you can make a selection here that will automatically populate your document(s), eliminating the need to choose related products manually, title by title.
In the template preview, you may notice that your working title is displayed over and over again in the Related Titles section. This is simply to provide a preview of what your document will look like once you’ve chosen the titles.
Step 3:
Open an existing document or create a new one. You can apply the related titles template you’ve created either to your entire document or to individual pages. As usual, to apply it to an entire document, the template should be selected here…
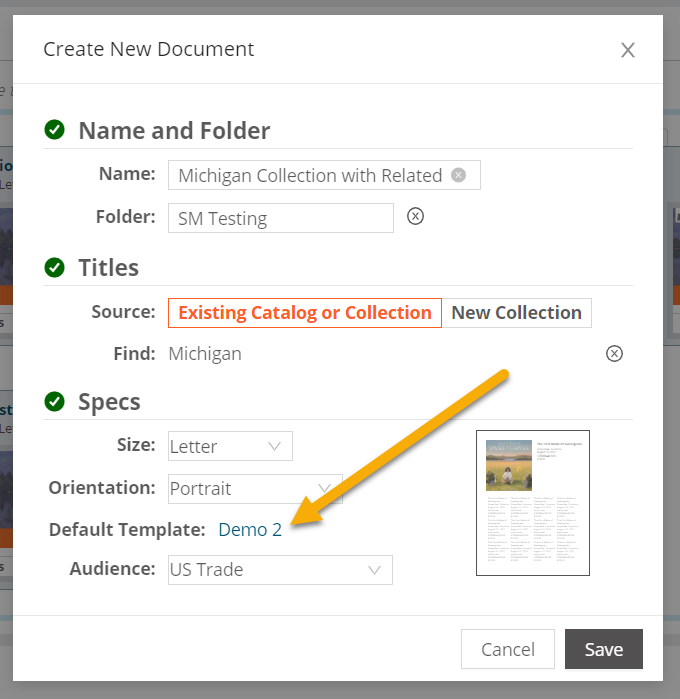
…or here, if modifying an existing document:

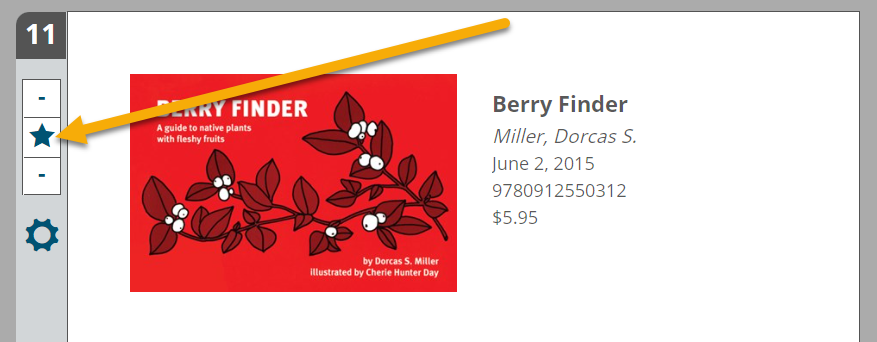
To apply the template to just a particular page in a document, click the star icon and select Swap Out Template to change the template of only that page.
Step 4:
Select your titles! This option of manually selecting titles is provided to give you as much flexibility as possible since the number of related products/comps/etc., if any, associated with a title in Edelweiss can vary greatly. If you selected a Title Default as explained in Step 3, this step should not be necessary.
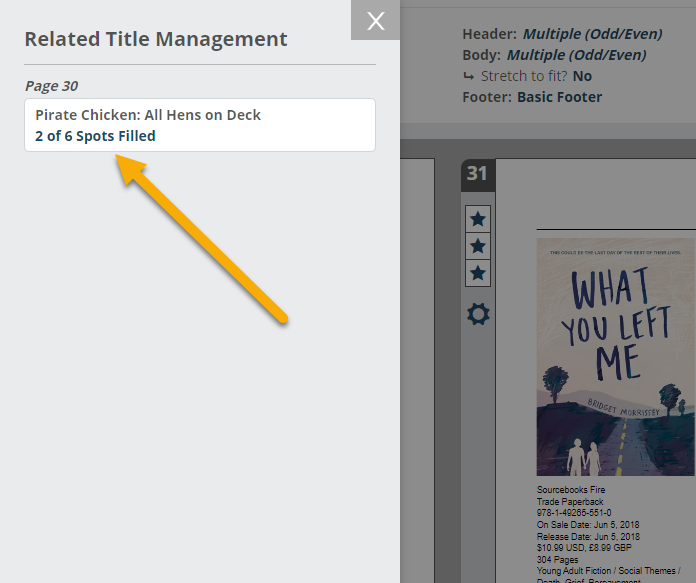
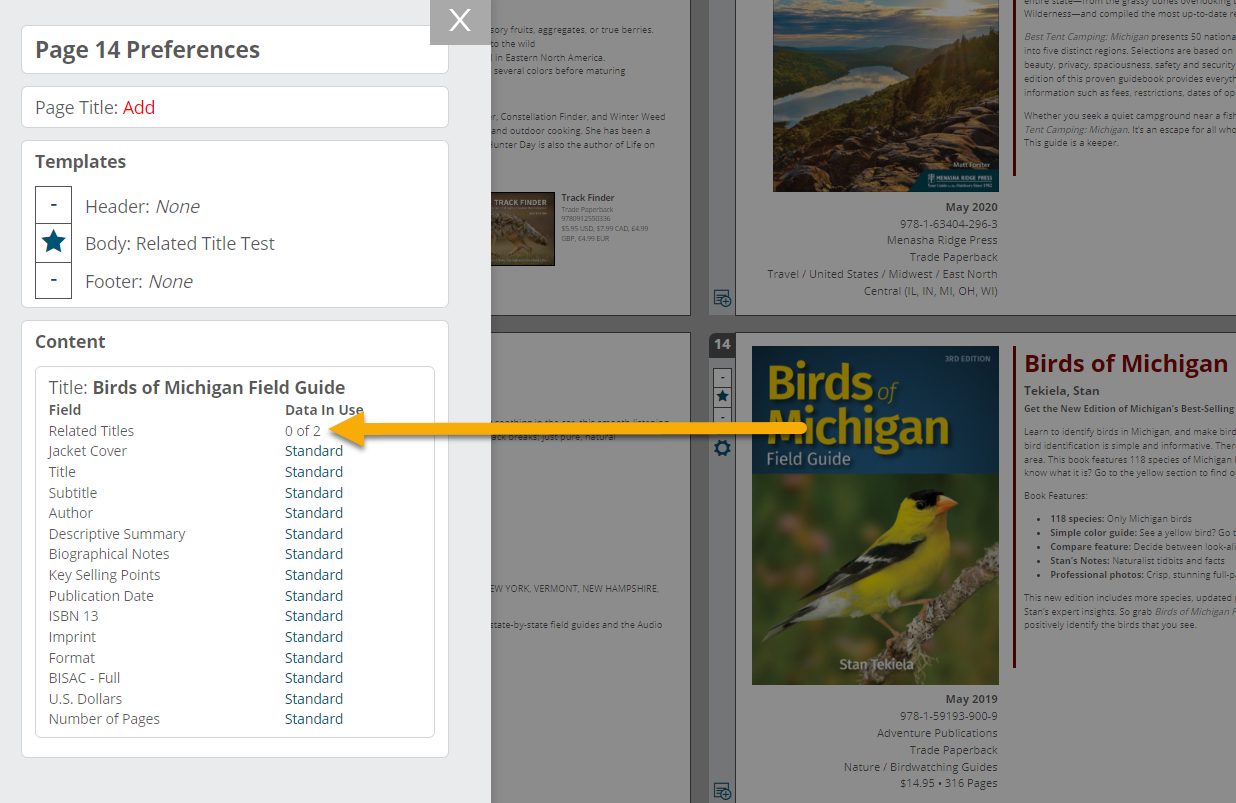
On each page of your document, you’ll find a gear icon.

Click the gear to open up Preferences for the page and select 0 out of x in the Data In Use column.
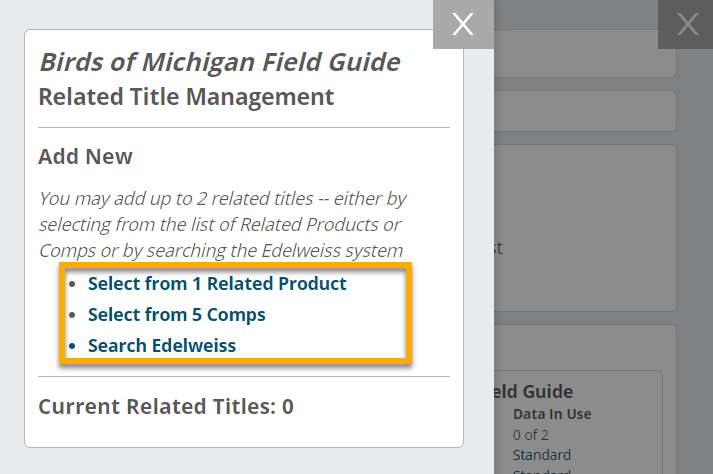
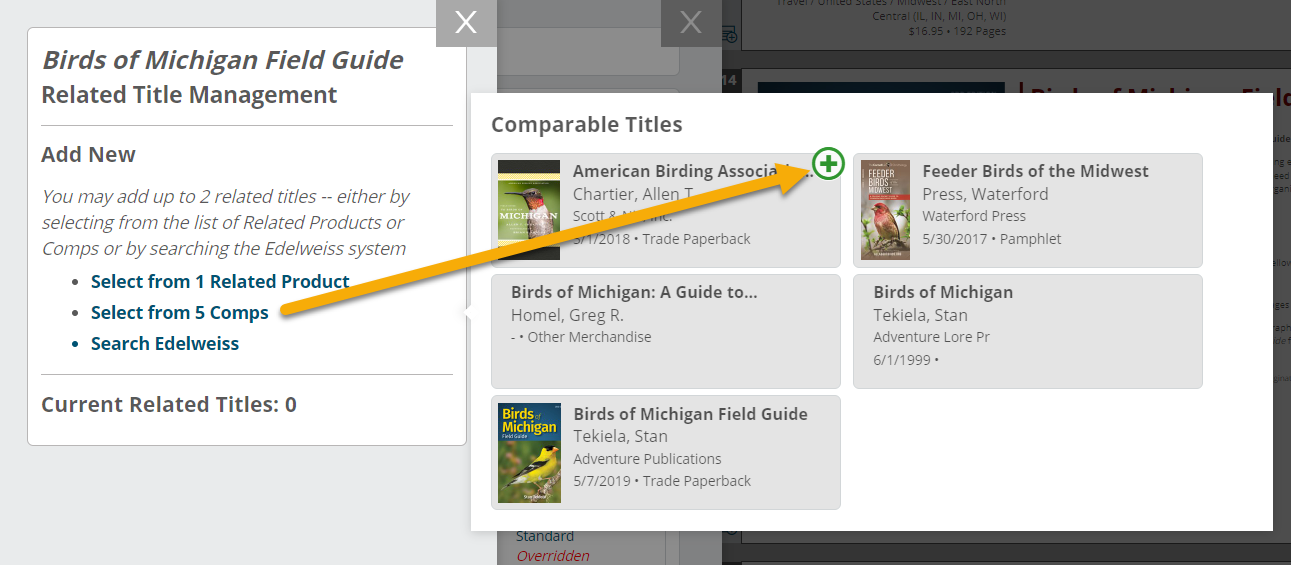
In the next window, you can select from any related products or comps already associated with the title in Edelweiss, or you can search for a title with the “Search Edelweiss” option.
If selecting from existing related products or comps, click the green plus sign on the titles you’d like to include.
Once you’ve added your titles, they can be re-ordered by dragging and dropping, if needed.
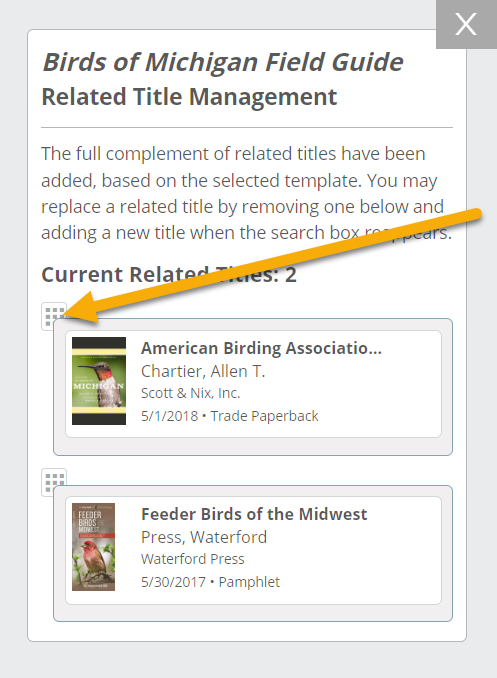
They’ll then appear on the page of your document and will display according to the placement and styles set in your template.

Repeat as needed on subsequent pages.
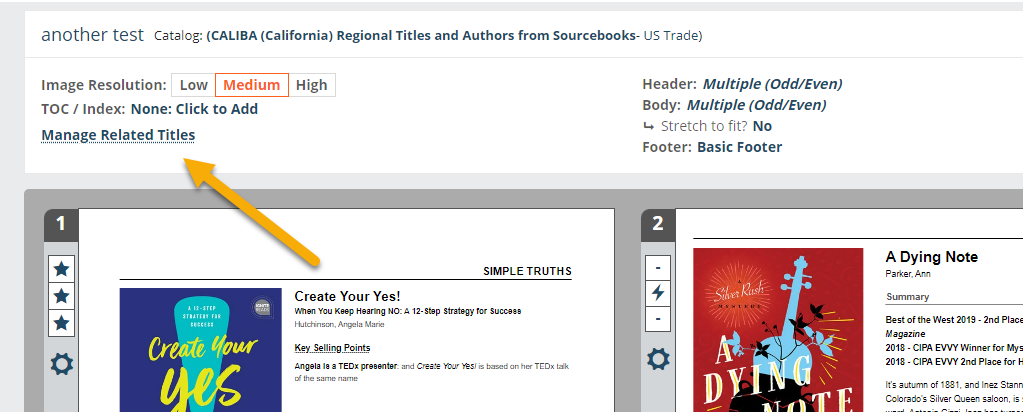
You can also choose related titles from the top navigation bar of your document by selecting Manage Related Titles.
In the next window, you’ll see a list of titles using templates with a Related Titles section — click in to select titles.