Comparable Titles, or Comps, are a quick way to make your accounts happy. Wisely chosen comp titles will speed up the process of deciding on a buy, especially for those accounts who are Analytics users, as their sales and inventory history will feed right into this tool. This is information they’re going to look up, and if they have to leave Edelweiss to have to look it up in their point-of-sale systems, the amount of time they spend on each title increases.
Basic guidelines: Established author? Add their last few titles as comps. Is this for a paperback listing? Include the hardcover as a comp. Re-Issue? Add previous editions as comps. Debut author? Use realistic comps! Adding the biggest selling book of the last few years as a comp is generally wishful thinking at which your accounts will scoff. For better or worse, your accounts will likely let you know if you do this “wrong.” In fact, you can see a document written by a veteran buyer here, that explains comps from a buyer’s perspective.
The mechanics of it:
Your publisher will, hopefully, include comparable titles in their catalog listings. You can designate different comparable titles as “Highlighted Comps,” or those that you see as being the most relevant. So, if your publisher has chosen a good couple of comps that you’d like to include in your markup, click the star outline next to a comp title. Doing so will “Highlight” that comp, letting your accounts know that you believe that particular comp title is especially relevant. They’ll see all the comps listed, of course, whether you choose to highlight any or not. Highlighted Comps are Markup-specific and will only be viewed as such when you share your Markup with accounts.
You can change the order of your Highlighted Comp Titles, too!
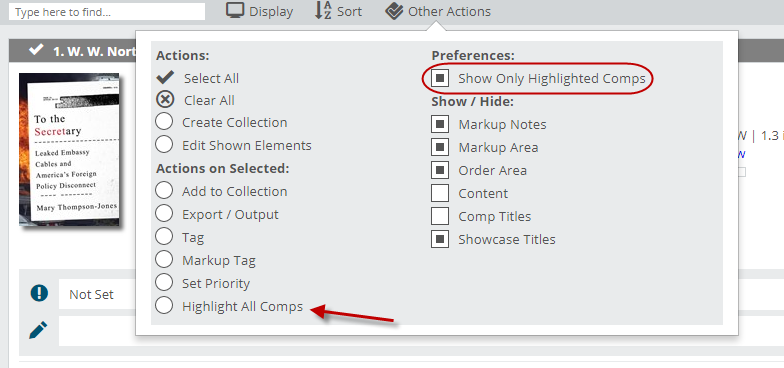
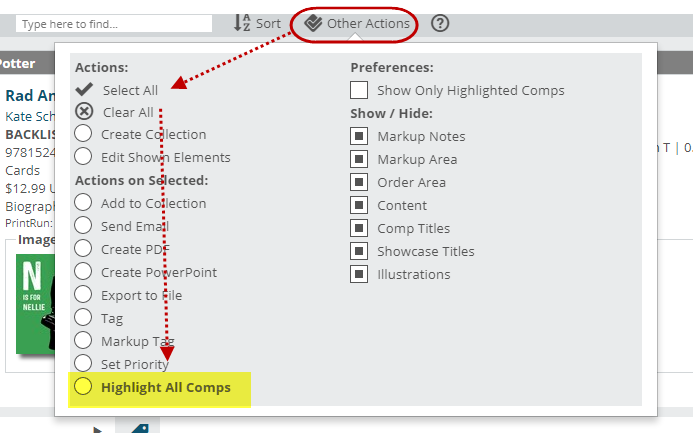
NOTE: You and your accounts both have a handy tool that allows you to see only the comps you’ve highlighted in the selected Markup. You can also choose to Highlight All Comps if you like.
Find more comps by clicking Find Additional Comps. That will bring up a screen within which you can search for comps and easily add them to your markup.
If another user has added a comp in this way, it will show as a “Community Comp.” Click on that yellow number to see what that comp is. Simply search by ISBN, Title, Author, etc. to find your relevant titles.
If another user has added a comp in this way, it will show as a “Community Comp.” Click on that yellow number to see what that comp is. Click on the number to see that Community Comp. If you’d like to add it, just click the checkmark nest to the title and then Add Selected Comp Title(s):
When you search for new comparable titles, you can choose to filter out any digital formats, if you like:
If you’d like to search a not yet published title to add as a comp, select Show Not Yet Published Titles before running your search. These settings should remain in place until manually changed, so you don’t have to select them for future attempts:
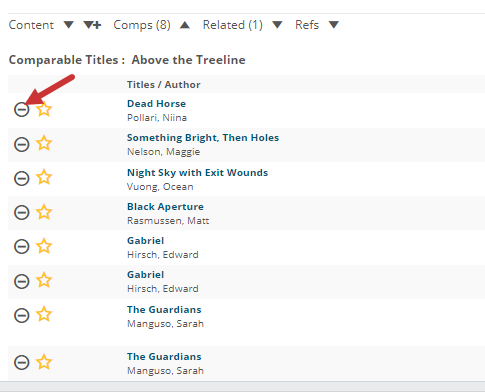
You can also hide publisher-added comp titles if you don’t think they’re relevant to your accounts. Just click the minus (-) button to the left of the title to hide the title:
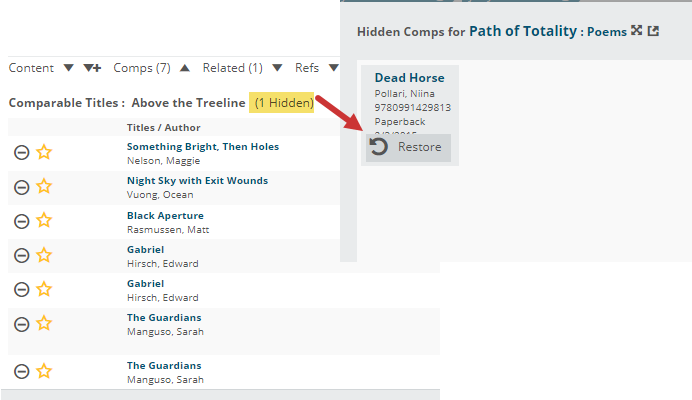
The Comps section will then reduce in number and indicate that there is a hidden comp. If you want to unhide the comp title, click where it says (# Hidden) and in the pop-up hover over the title you wish to restore and click the Restore button:
Note, the view of comp titles changes if you look at no account, or at an account that is not an Analytics subscriber the view will look like this:
When they are on Analytics, the view will look like so:
As mentioned earlier, you’ll be able to quickly see an account’s sales and inventory history for a title, as well as their current stock.
* The S1, S2, and S3 columns indicate the first 3 months of “sales” and “average on hand” for each title. I1, I2, and I3 indicate the average inventory levels for this title for those first 3 months after publication. LYS= Last Year Sales, LFS=Lifetime Sales, OH=On Hand, and OO=On Order
If your account has multiple locations, you can quickly open a drop-down view for each comp title to view activity at each location, like so:
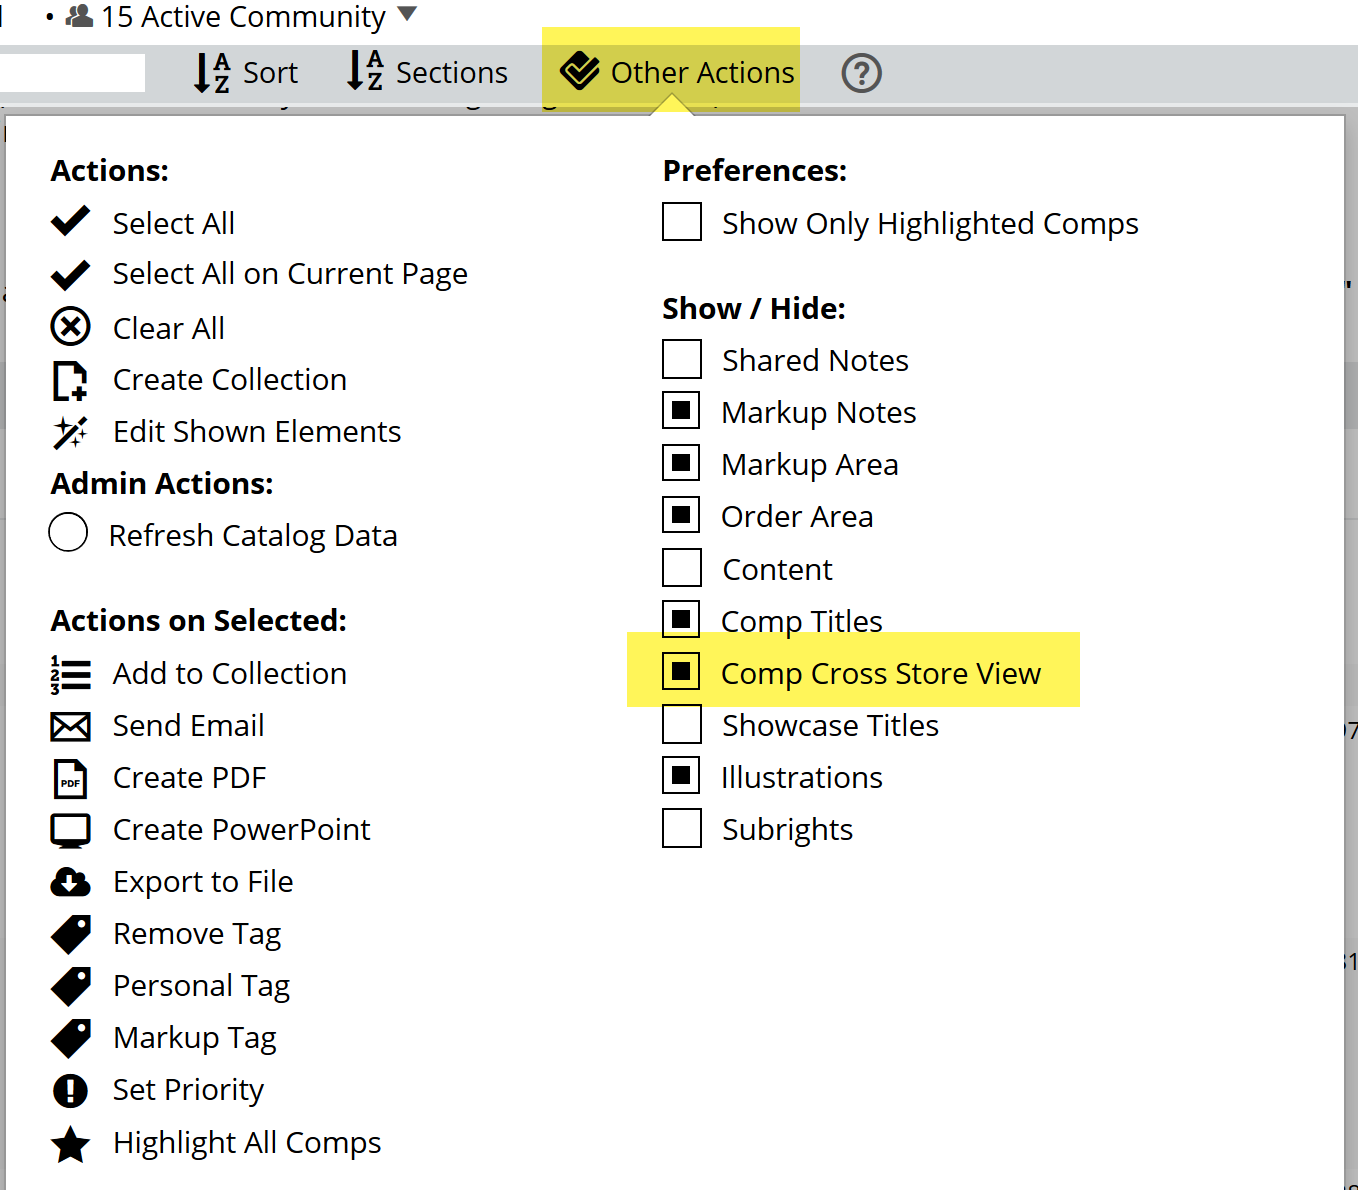
Or, as you’ll likely prefer, you can open all locations up for all comp titles in your Other Actions menu:
NOTE: When exporting a markup (details here) only your Highlighted Comps will export. If you want to export all comps with your exported markup, simply highlight all comps, like so:


