
The Order Management Module (OMM) is available only to publisher users, and only to publishers that use direct ordering features in Edelweiss. Publishers interested in signing up for this add-on module should contact sales@abovethetreeline.com.
- The OMM was designed with a few things in mind:
1) Ease of Use: A simple environment for your sales force to manipulate and create orders
2) Order Submission: Your sales force can submit orders directly to your ordering system
The OMM uses HTML5, which is a different technology than the rest of Edelweiss, or than most of the rest of the internet, for that matter. This means a few different things:
- You will need to use either Chrome or Safari, the only two browsers that support HTML5 technology. You’ll need to download one of these browsers if you do not yet have one.
- The OMM will synchronize your Active Orders, found on the Orders page in Edelweiss. Be sure that all older submitted/finished orders have been marked Complete. Doing so will make the synchronization process much quicker.
The OMM is very much like using an order form, but an order form that pulls in orders from your customers or gives you the ability to create blank orders from scratch, add lines to existing orders, search, add entire catalogs, and easily manipulate multi-store orders.
Here, we’ll explore how to use the OMM. Keep in mind, however, that your publisher may have different/additional features that aren’t covered in this general tutorial.
The first and most important thing sales reps will want to do is clean up their Active Orders in Edelweiss. The OMM will sync with their Active Orders list, and having dozens of year-old orders there will both slow the syncing process down and clutter up the workspace.
From the Orders page, simply check the Completed box, as shown below, to send an order to the Completed Orders folder.
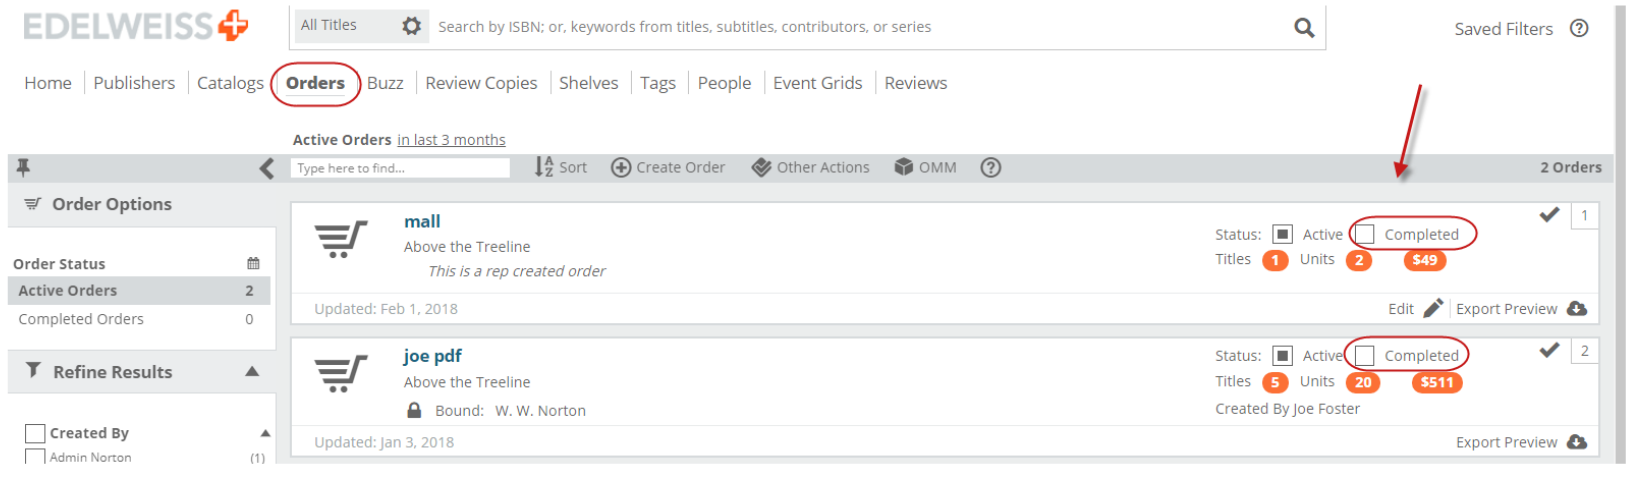
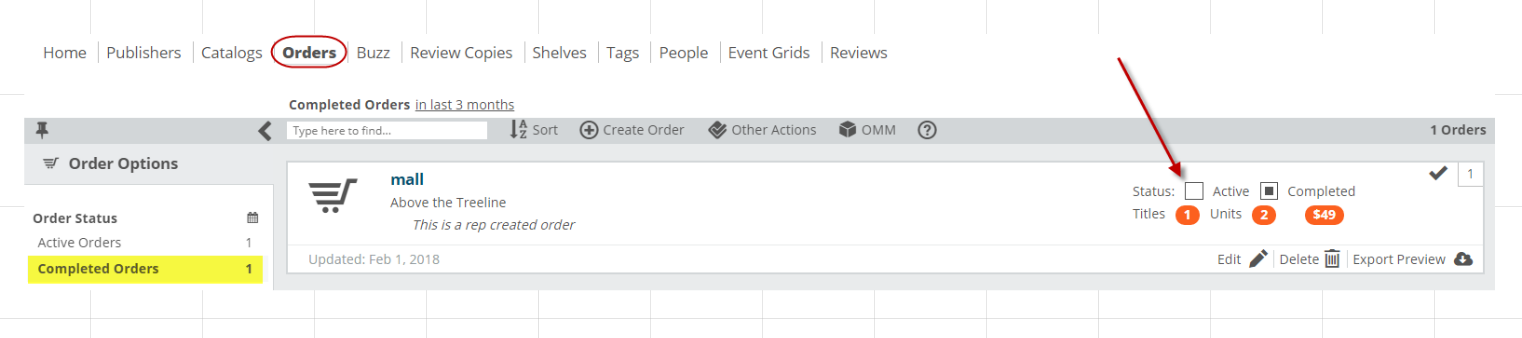
If you mark an order Completed, it will not show up in the OMM. So, if you did so accidentally, just click into your Completed Orders and check the Active box:
Enter the OMM (Order Management Module) here:
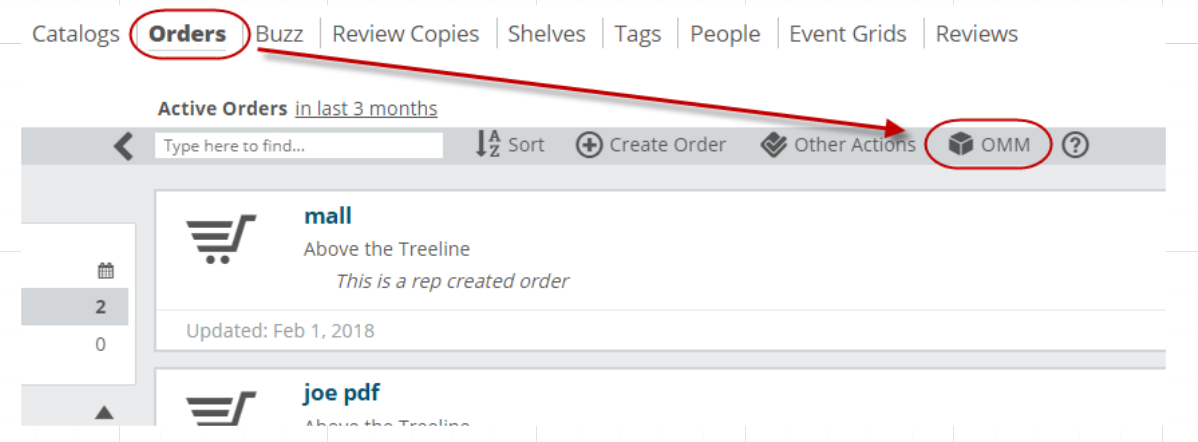
Again, be sure you’re using either Chrome or Safari, or you won’t be able to get in. You’ll see the following message on your screen once you’ve clicked to open the OMM:

If you’ve cleaned up your Active Orders, this should just take a few minutes. If not, it may take a while. This is the OMM pulling in all of your Active Orders, account information, etc.
When you enter the OMM, you’ll see this screen showing an Order Summary page (once you’re synchronized).
Next, we’ll work through some common ordering scenarios.
Scenario 1: Working with an order an account has entered in Edelweiss
Assuming your accounts have shared their orders with you, you’ll see them on your Orders page in Edelweiss. Note: As always, you’ll want to communicate with your accounts before submitting their orders. After you click into the OMM and it synchronizes, you’ll need to select both an account and the order you’d like to work with.

Once an order is open, you can take a few different actions:
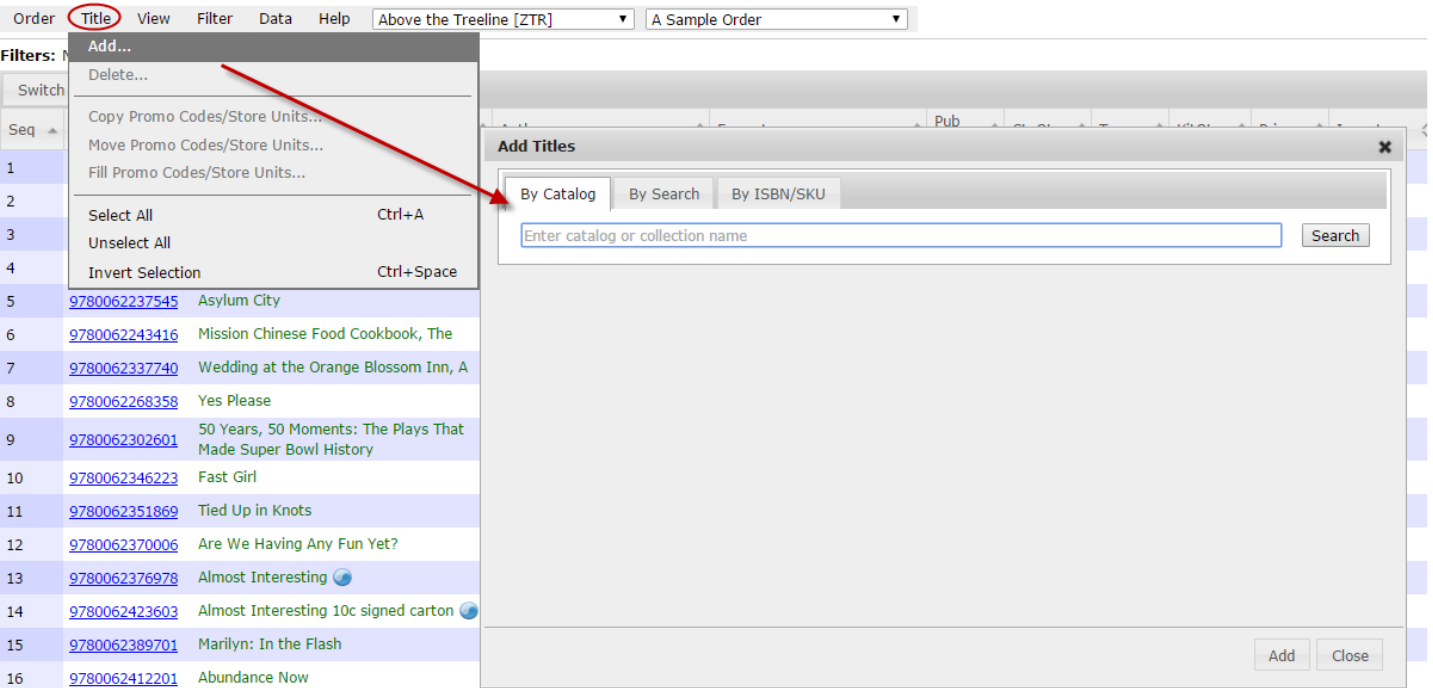
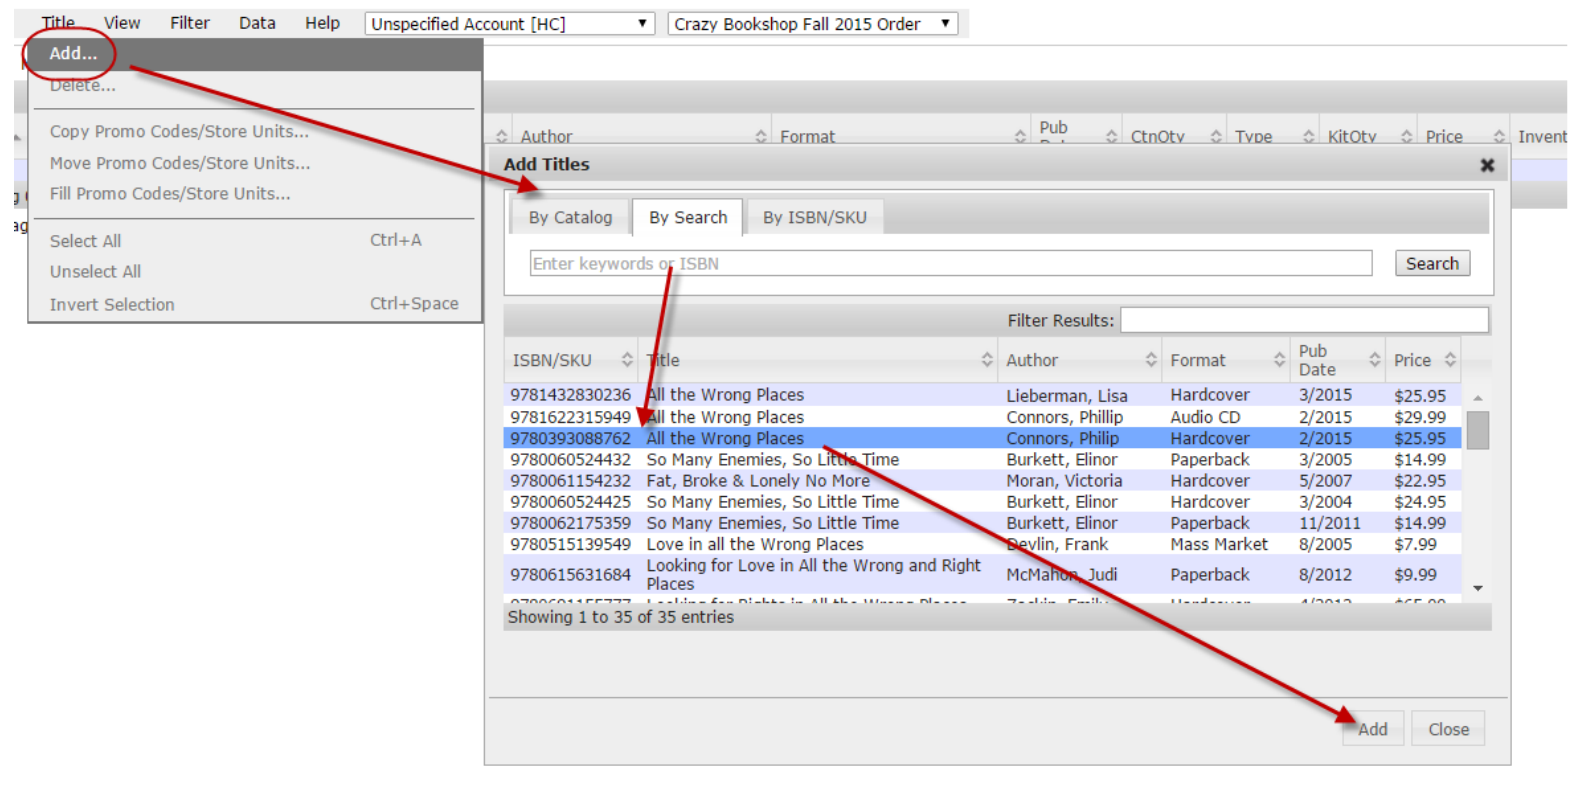
You can add titles or even entire catalogs or collections to an order, too:
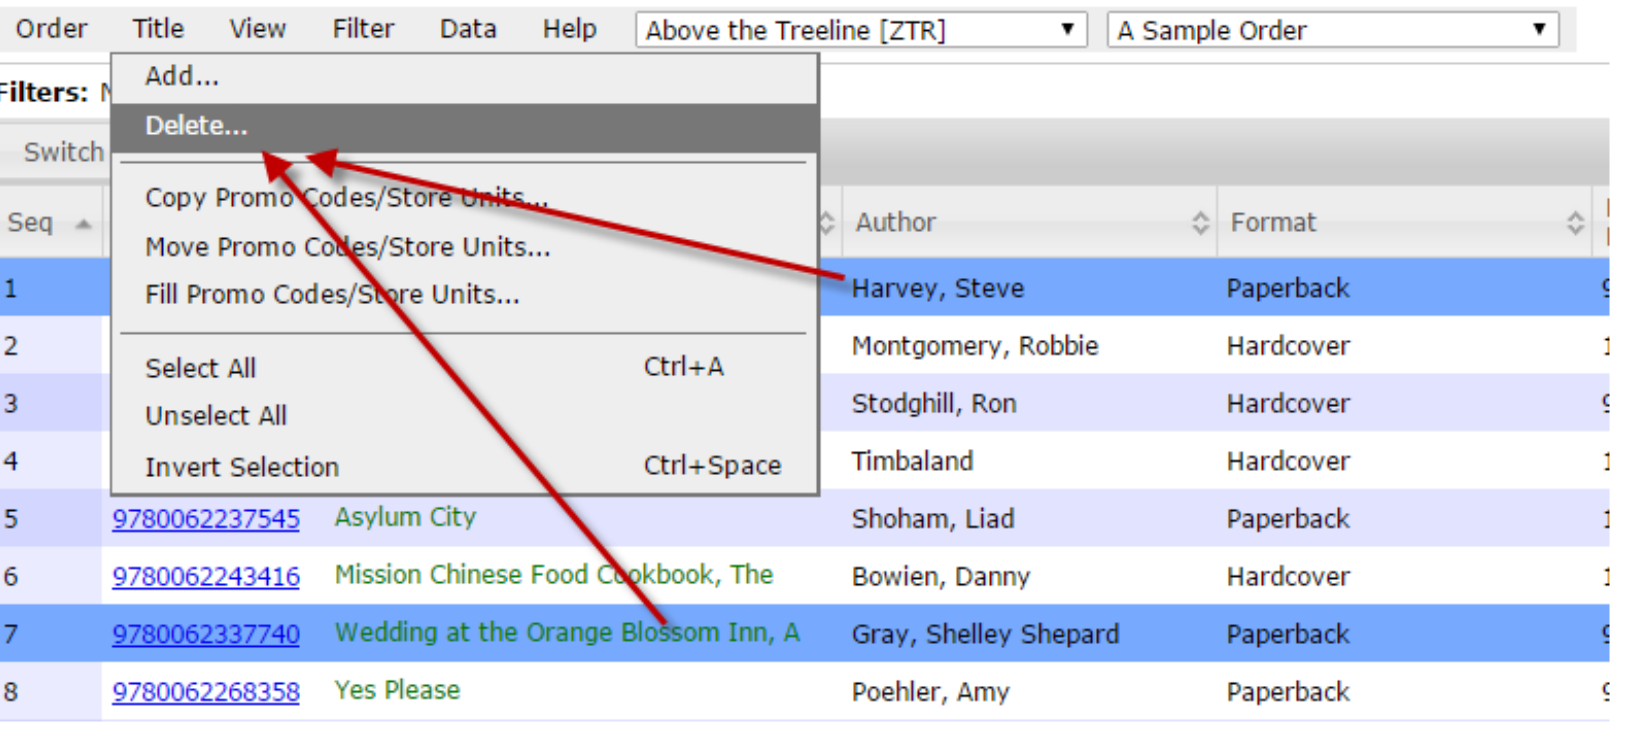
Remove titles from the order by highlighting them and deleting them as shown here:
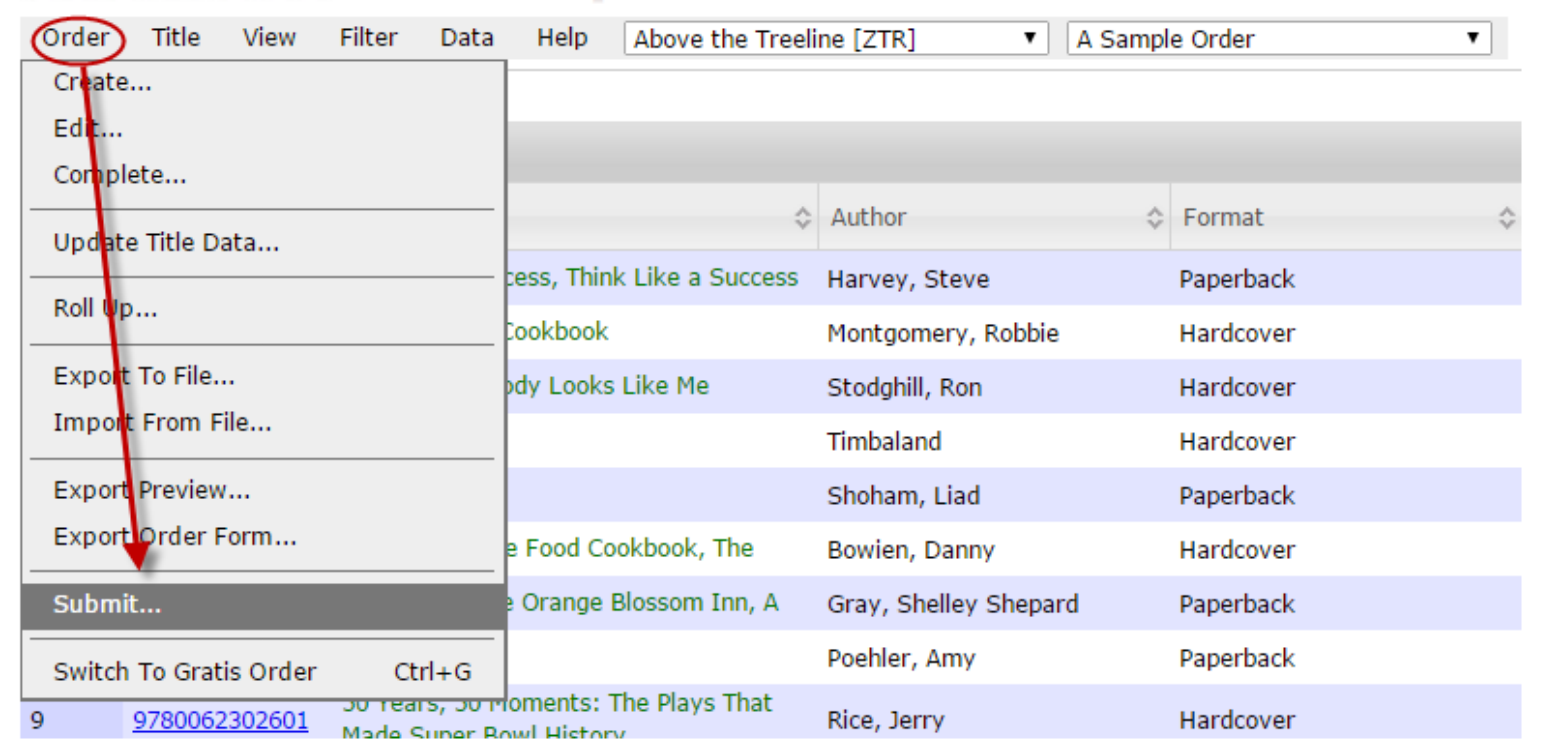
Submit the order here, which sends it right to your publisher for processing:
Once submitted, your order will be marked Completed, but you can also mark orders Completed in the OMM yourself:

Scenario 2: Creating an order from scratch
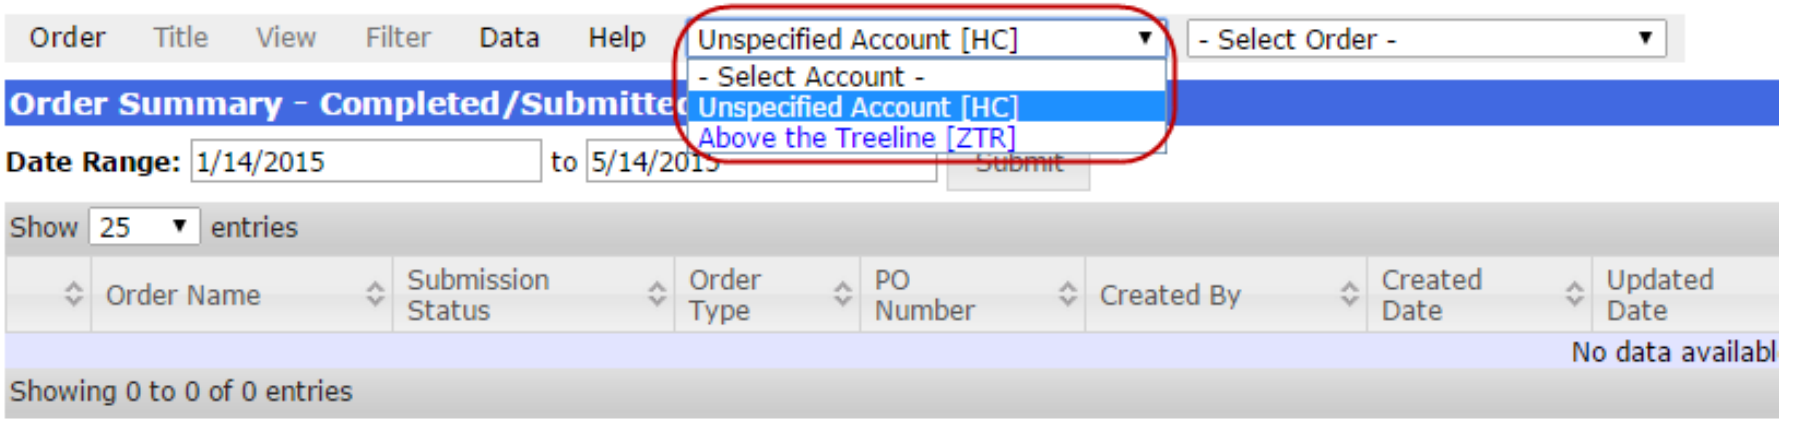
You can create orders in the OMM, both for your accounts that use Edelweiss and for those that do not. As before, select the appropriate account. If the relevant account is not listed for you, they’re either not listed in your Contacts, or they do not have an Edelweiss account. If you’re not sure if they have an Edelweiss account, your best bet is to simply ask them! If an order is for an account not listed in Edelweiss, select the “Unspecified Account” option:
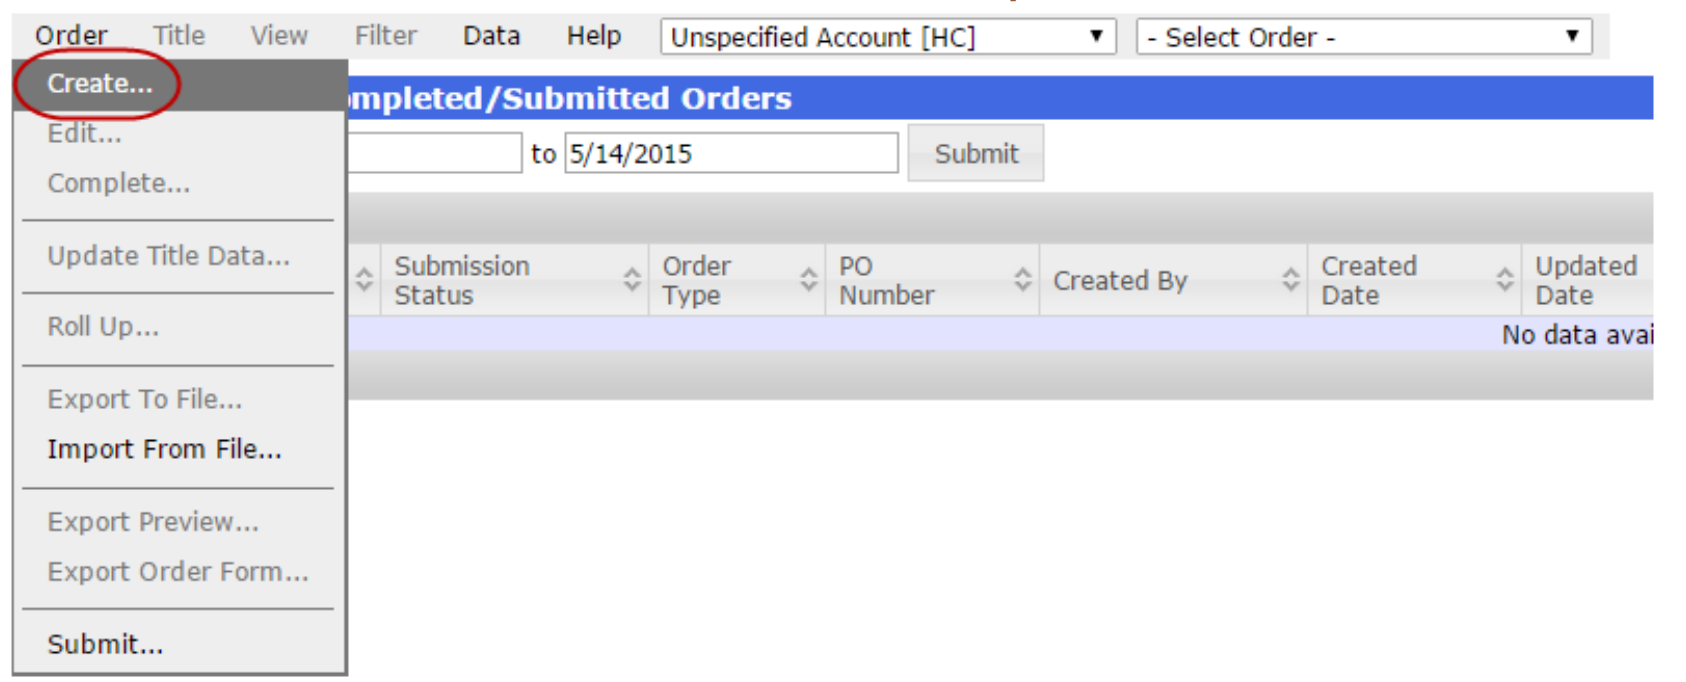
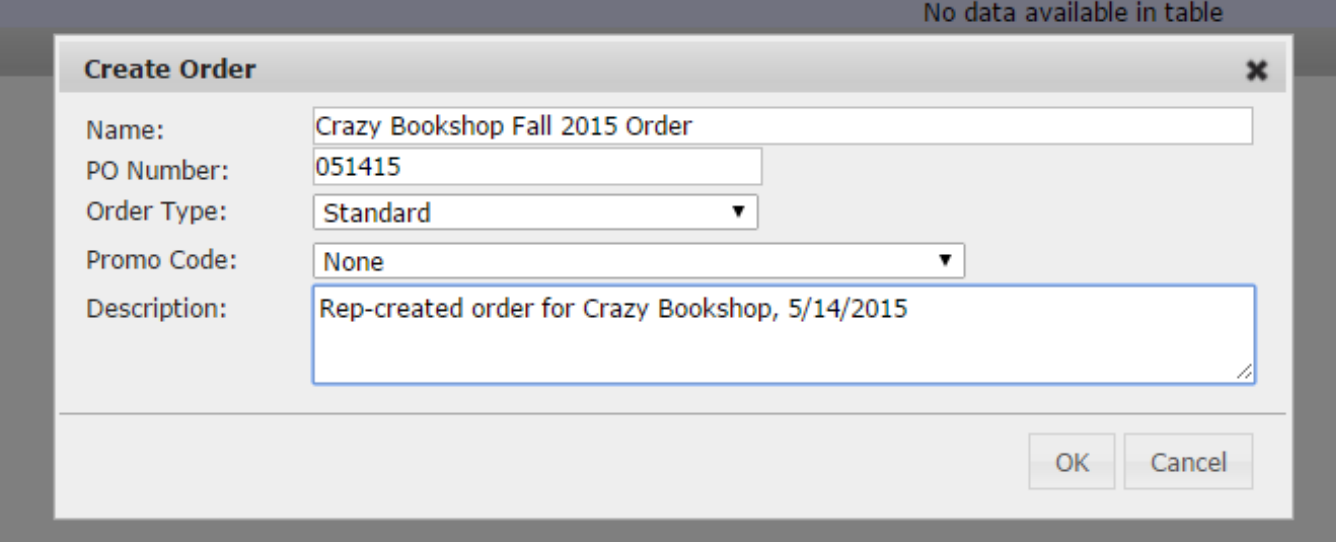
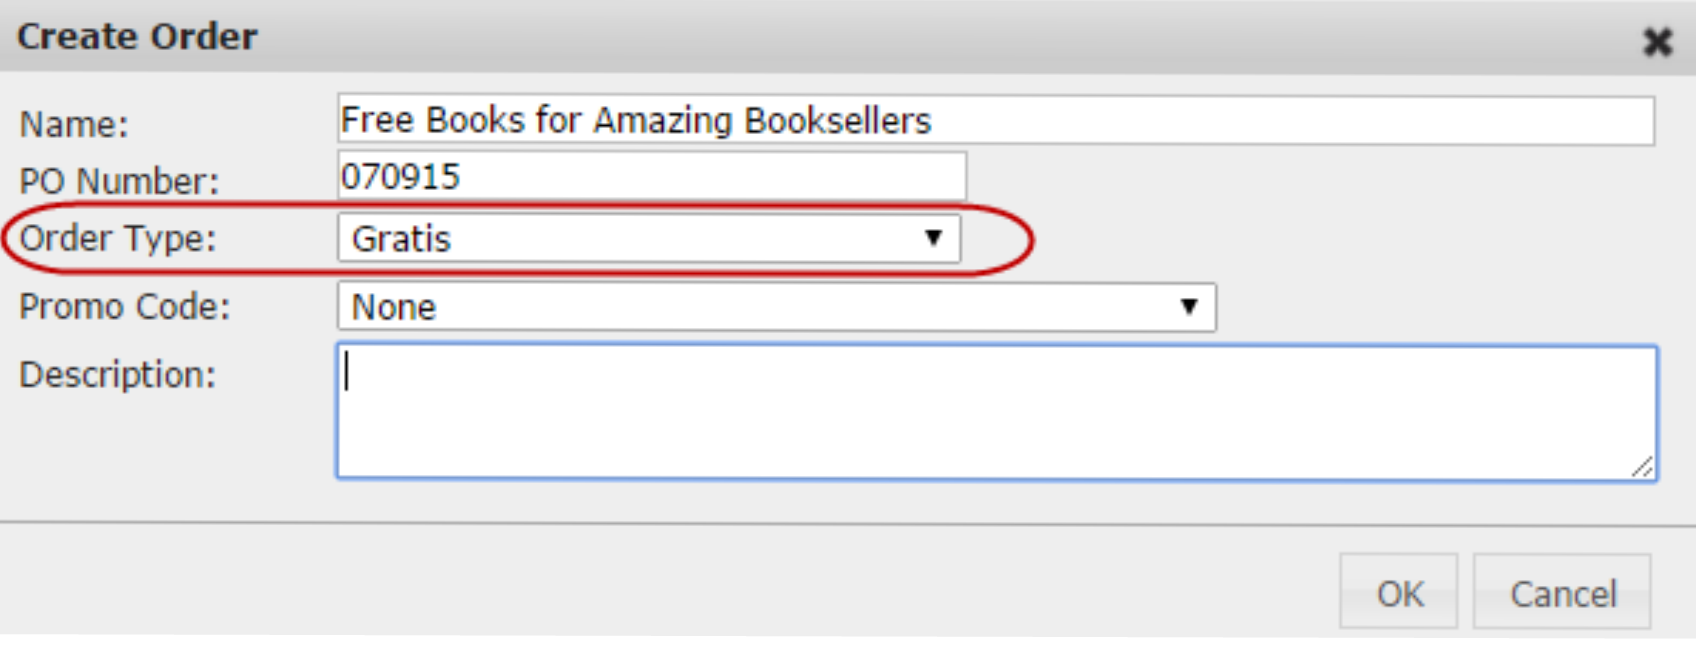
Choose Create in the Order dropdown menu:
You can name the order whatever you’d like. The PO number will, by default, be today’s date, but you can change it, if needed. Order Type is either Default, Gratis, Author Appearance, or Standard.
You’ll now have an order that’s ready for you to add titles:

Add individual titles, entire catalogs, or collections:
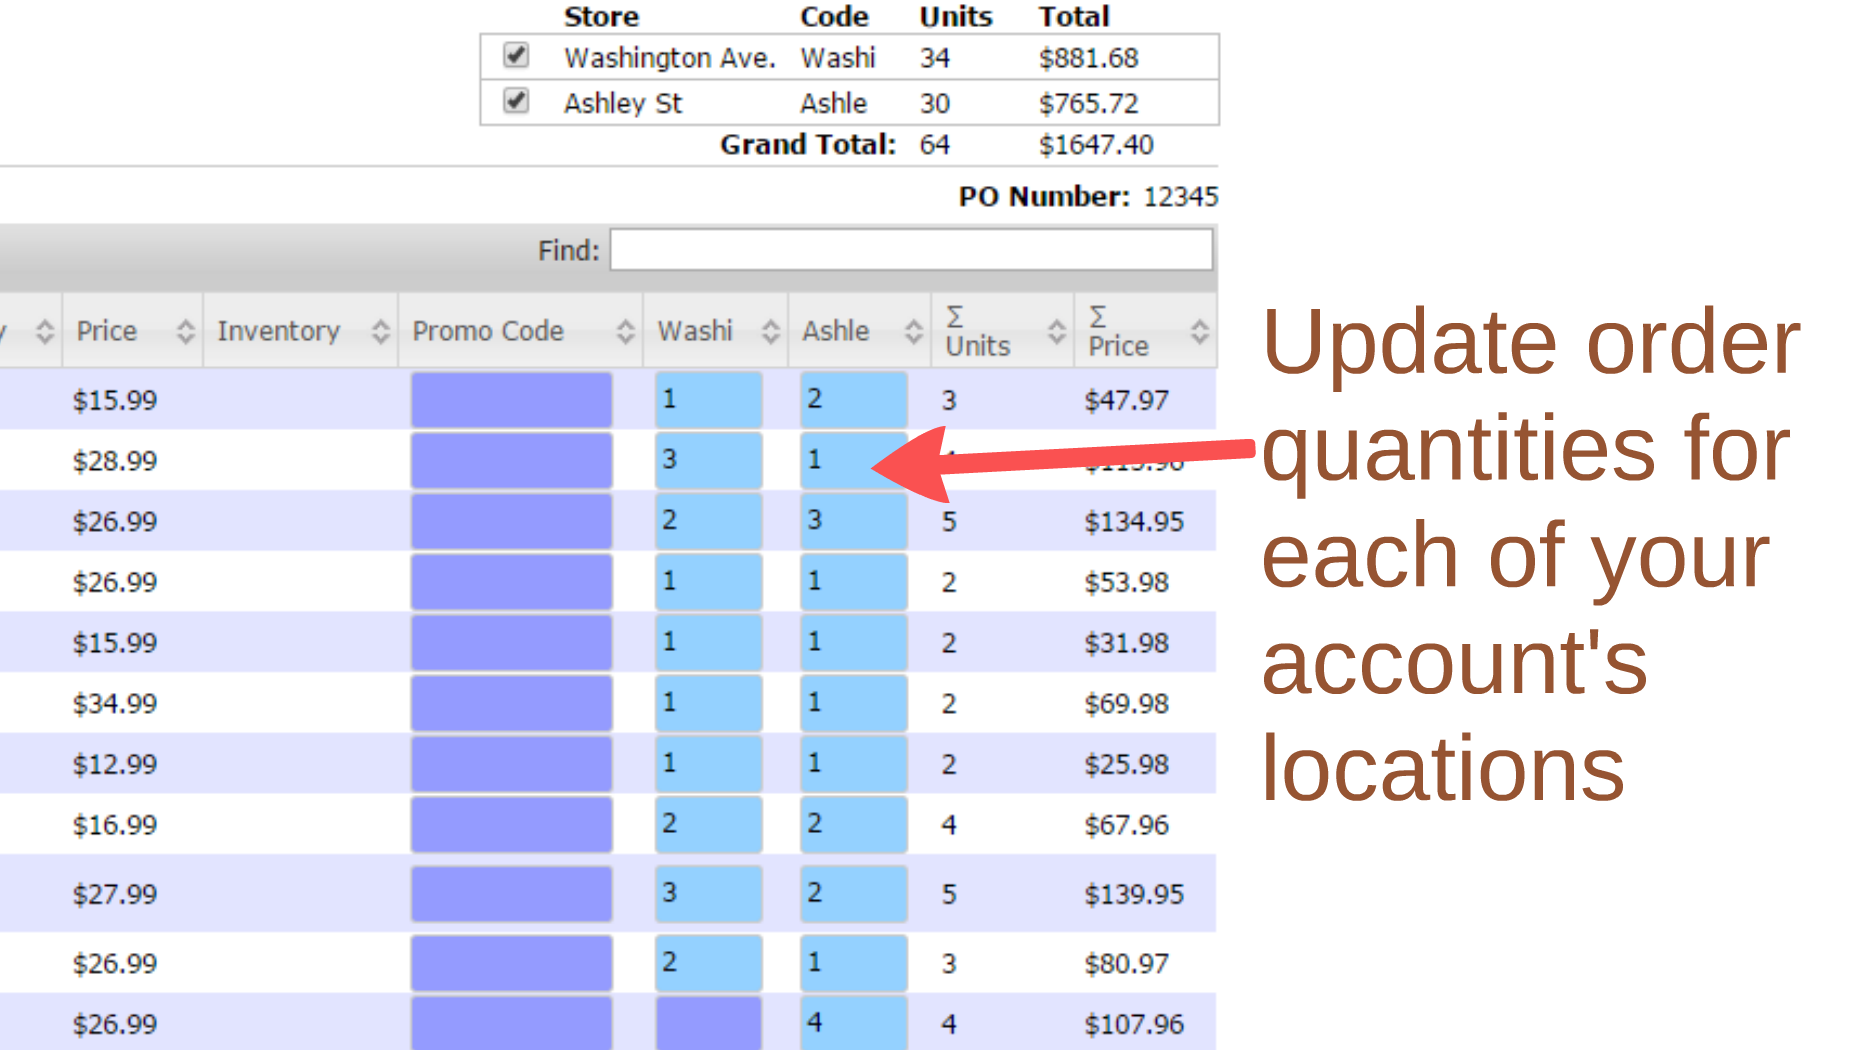
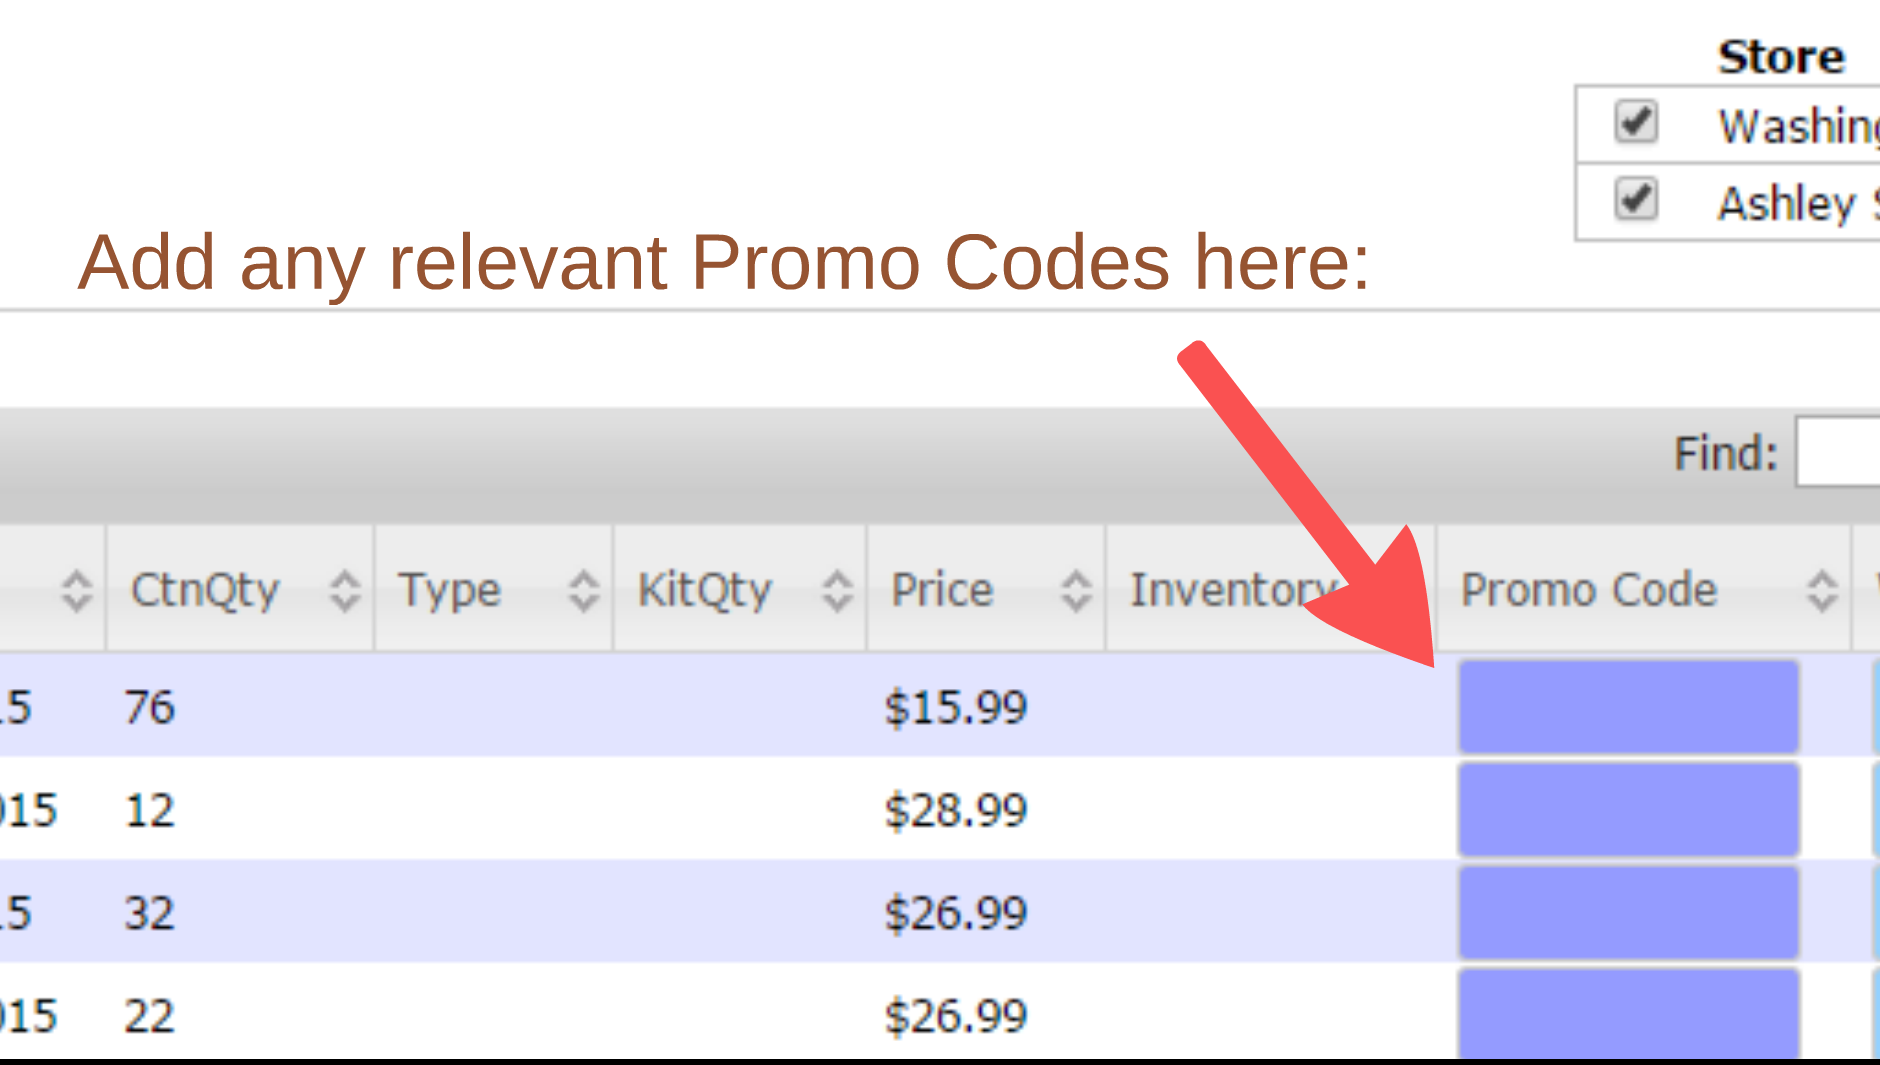
Then, add quantities, promo codes, etc:

Submit this order as before. Note that we receive a feed from your publishing house of your accounts and their account numbers. You will need to assign this order to the appropriate account. A PO number is required. If there is no number yet, click Assign next to PO Number and enter a number.
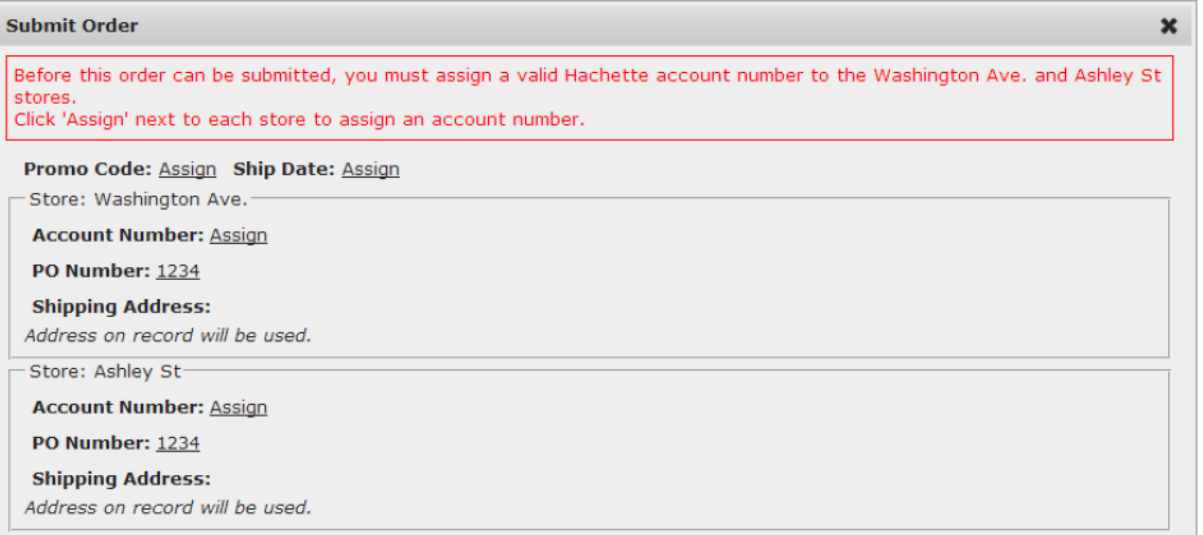
Account Number is required. Click on Assign to find the appropriate store. If applicable, you can apply a future Ship Date to this order.
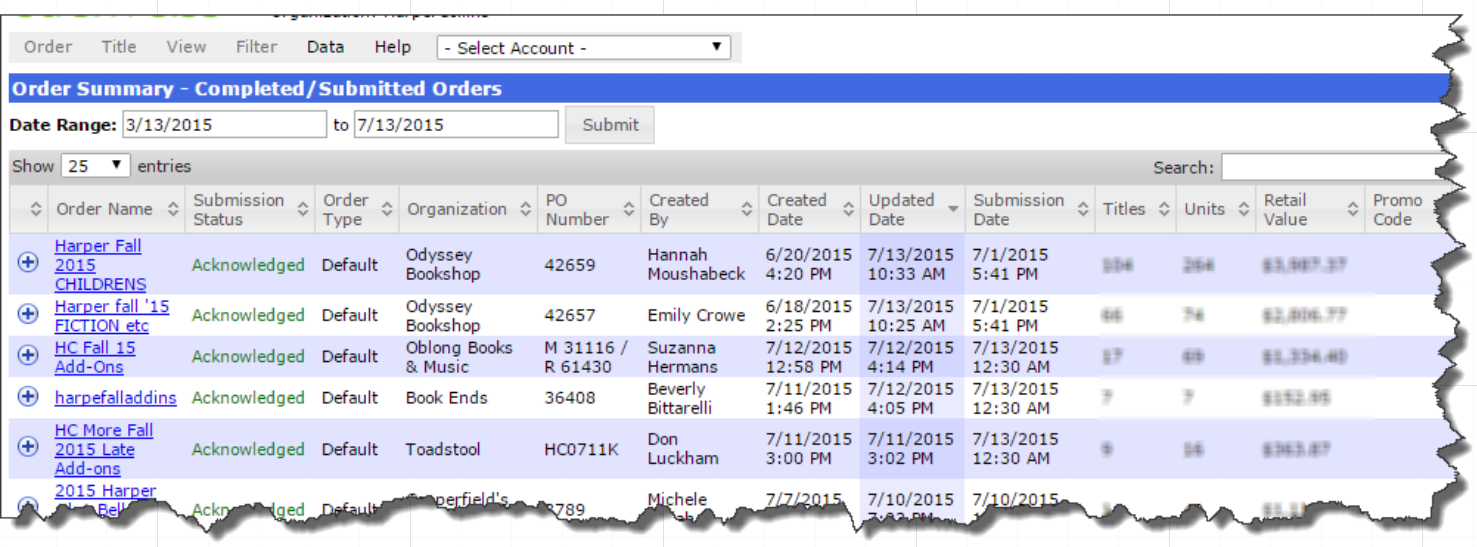
You’ll be able to see the status of your submitted/completed orders on your Order Summary page:

Tips & Tricks:
- Quickly find titles in an order by searching as shown here. Simply start typing a partial title, author, format, quantity, price, etc. to narrow the list of titles you see. To clear the filter, just clear the text you’ve typed in the Find field.

- To see more information about a title, click the ISBN to be taken right to that title’s page within Edelweiss.
- Move titles to a new order (for example, moving promotional titles to a separate order) by filtering for/selecting those titles and moving them, like so. Hold down CTRL to select multiple titles at once.

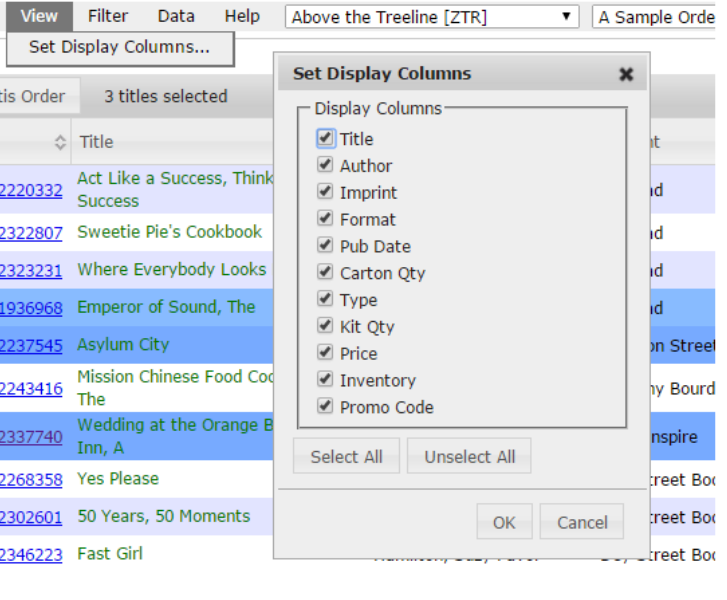
- Hide columns using Set Display Columns in the View menu. You might want to hide the promo code column if you don’t use it, or to temporarily make more space when viewing an order from a store with multiple locations (so you don’t need to scroll to the right to see all those locations).
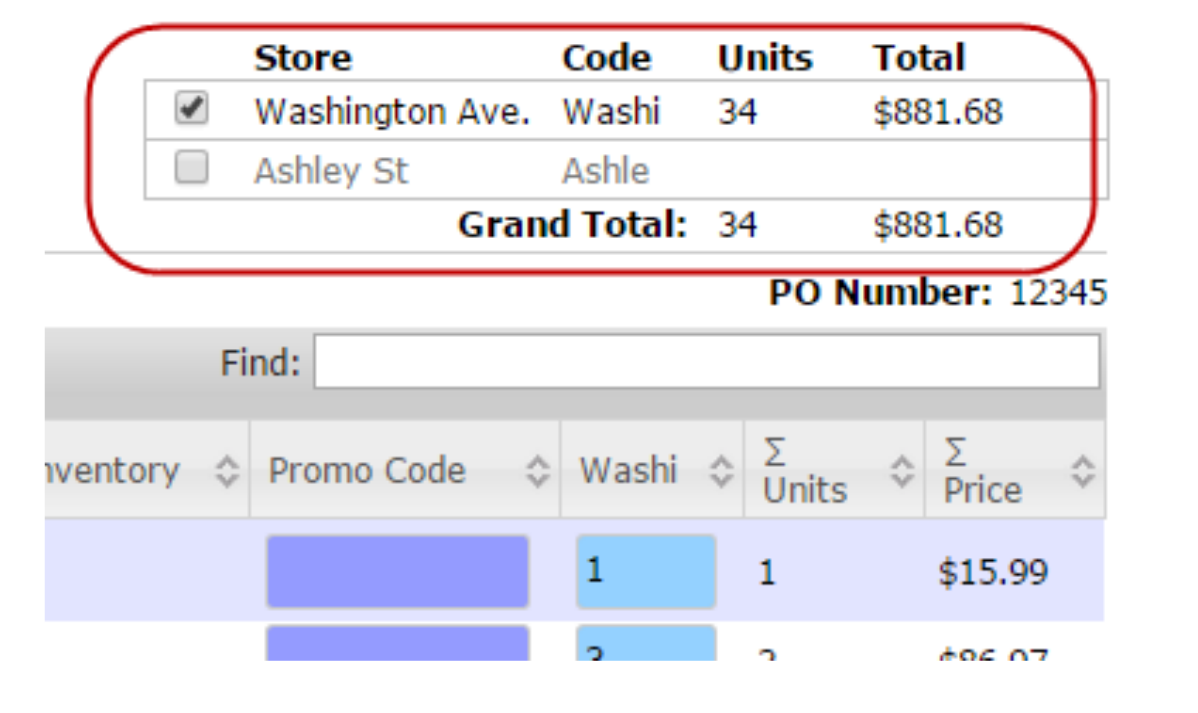
- Hide store locations by using the checkboxes at the top right of the page:
 Color Coding:
Different areas of the OMM will be color-coded to alert you to specific conditions.
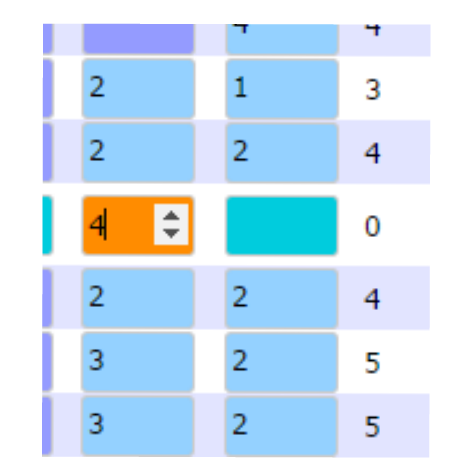
For example, the order quantity box will show as orange to signify that a quantity is unsaved. Press <Enter> or simply move to the next line to save that quantity.
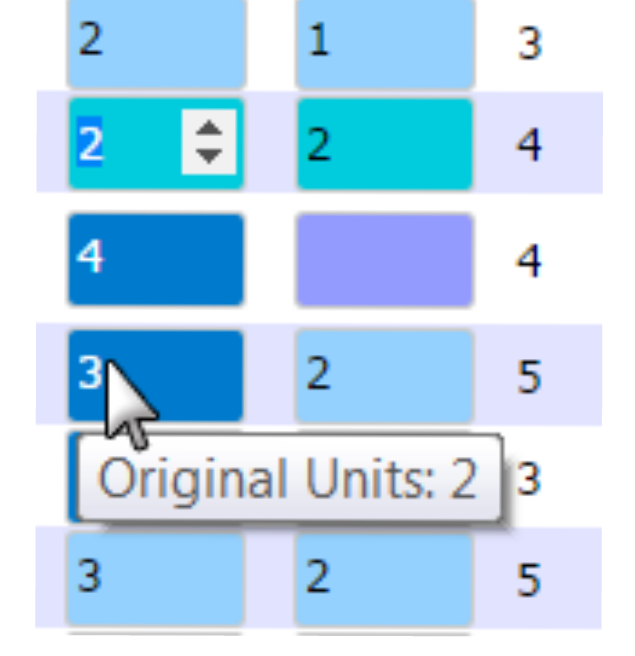
A darker blue box with white text means that you overrode the store’s original order quantity, which can be viewed by hovering your cursor over the new quantity:
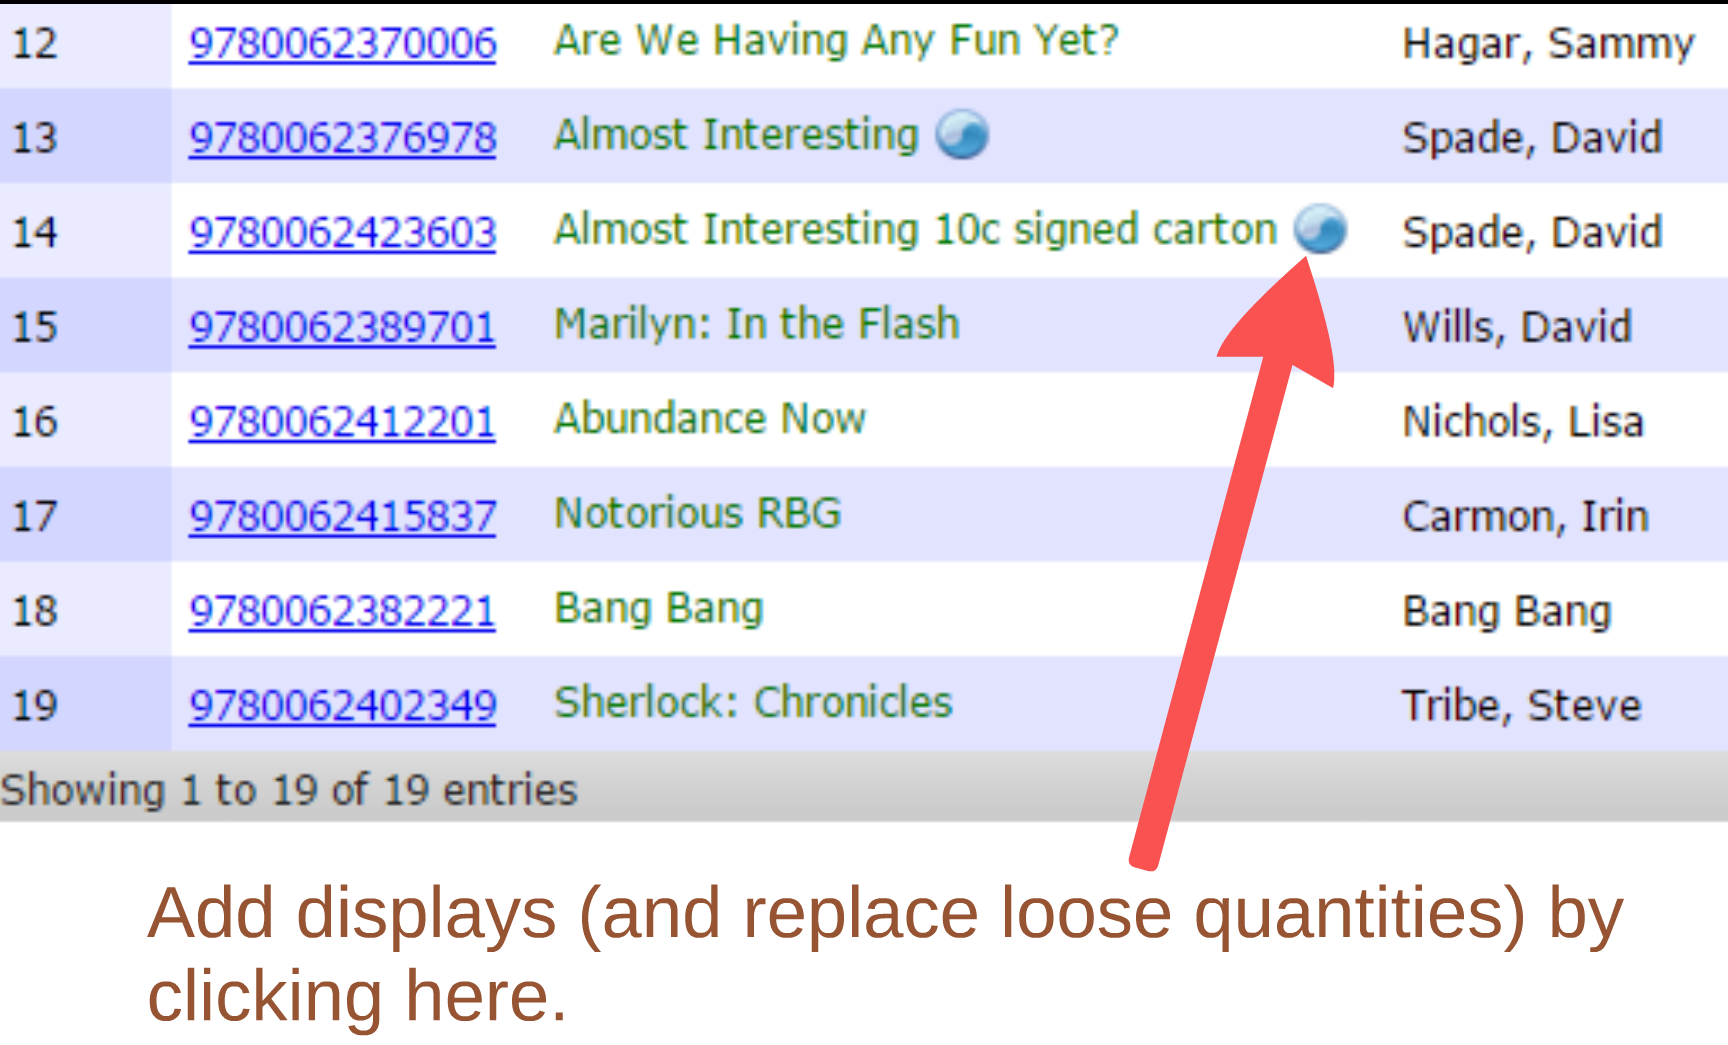
A title in black text signifies an Active title. A green title indicates that a title is forthcoming or frontlist. A gray title indicates that a title is “unavailable” (OSI or OP).

Promo Codes:
For most publishers, only one promo code per order is allowed. For that reason, entering multiple promo codes here will likely not work for you. Note that this is a restriction put in place by your publisher.

You can move those promotional titles to new orders, and add the relevant promo code there:

Gratis Orders:
If your publisher’s ordering system accepts Gratis Orders (orders for review copies, or finished copies, for either your customers or yourself), you can place those orders in the OMM.
While viewing an order, click the Switch to Gratis Order button to create a copy of that order’s title list:

From there, you can add gratis copies of desired titles, as well as toggle back to the “Parent Order.”

You can also create new blank Gratis Orders and add relevant titles using the Title>Add tool:
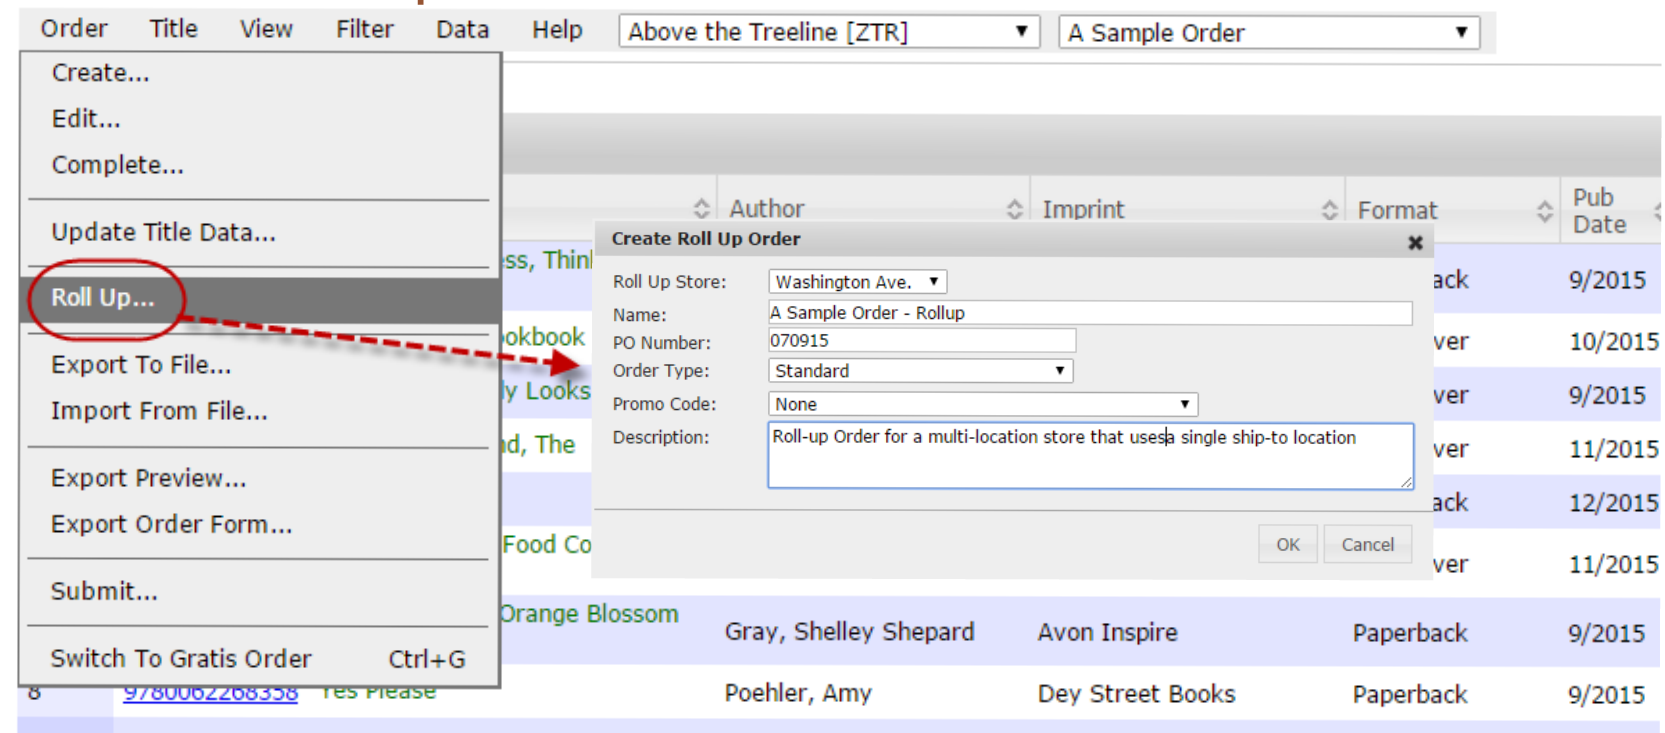
Roll Up Orders:
If submitting an order for an account with multiple locations, you have a few options:
- Submit an individual order for each location, so each store is shipped its own separate order.
- Roll Up the individual orders into one single order to ship as a bulk order to one central location.
Your customers will have their own preferences here, so be sure to ask your multi-store accounts about this!
To set up a Roll Up Order, select Roll Up from the Order. Next, select the appropriate location in the Roll Up Store dropdown list.
Importing/Exporting Orders:
You can easily export any of your orders using the formats available to you in Edelweiss, including any of your Custom Export Formats.
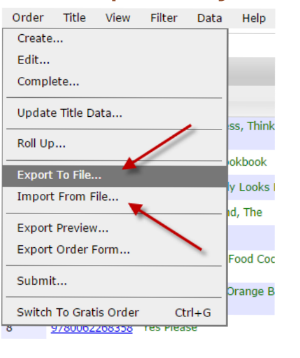
To import an order, click Import From File… in the Order menu.
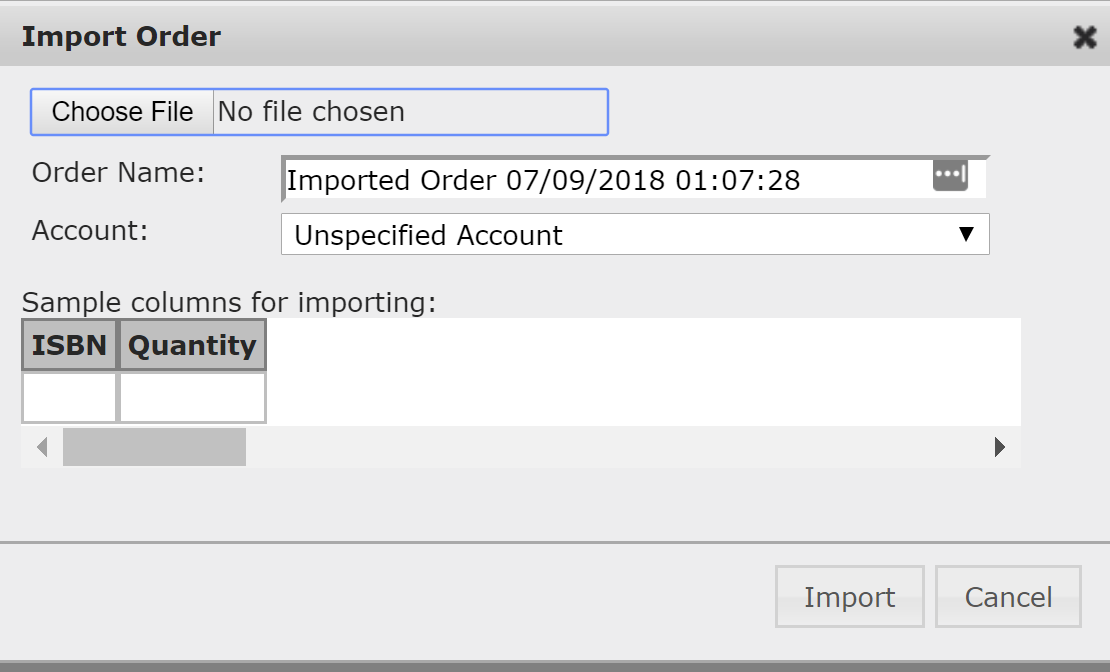
You can name the order and assign it to an account. The accepted file format is simple – a spreadsheet showing ISBN in column 1 and Quantity in column 2.
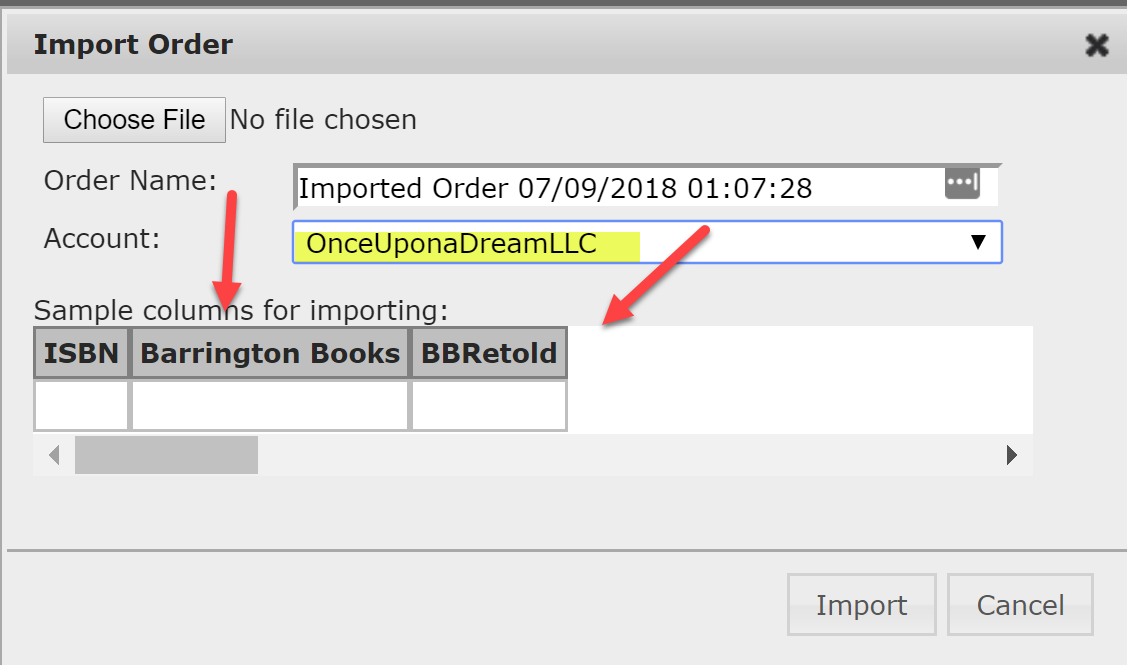
You can also import orders for accounts with multiple locations. Select the account, and you’ll see a quantity field designated by each location’s name, as listed in Edelweiss:
Due to the HTML5 technology and the need to sync your Edelweiss account with the OMM, a regular practice of cache-clearing will be sure to keep the OMM synced and as up-to-date as possible.