
If your organization is using Designer to create & print catalogs, you may want to use left and right page templates to achieve the effect shown below.

The first step is to create two individual templates: one for the “left page” and one for the “right page.” You can design these templates however you’d like, of course, but in the example above, the two templates used are mirror images of each other (the same title data is included in each template, but flipped).
If you plan to include a header and/or footer, you’ll also need to create left header/footer templates and right header/footer templates. Learn more about creating a header/footer template here.
Once you have finalized your templates, they can be applied to a document following the steps below.
1. Either create a new document or open an existing one. If creating a new document, select either your left template or right template as the Default Template — this will be adjusted in the next step.

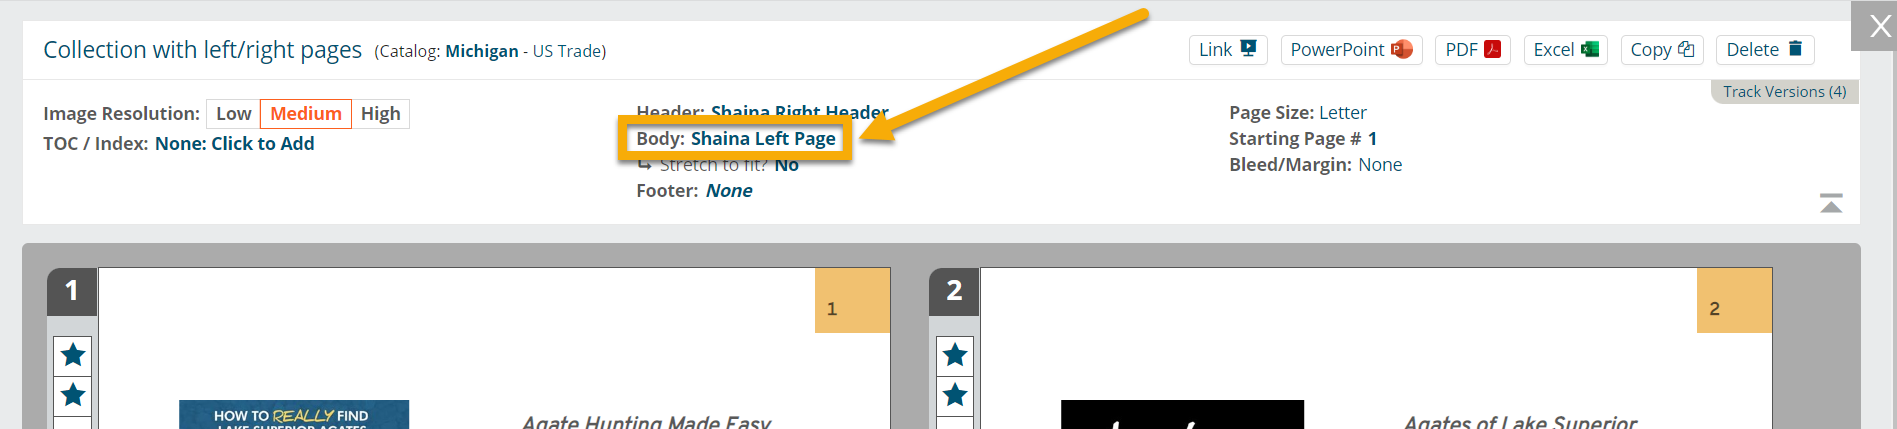
2. Once you’ve opened your document, click on Body.
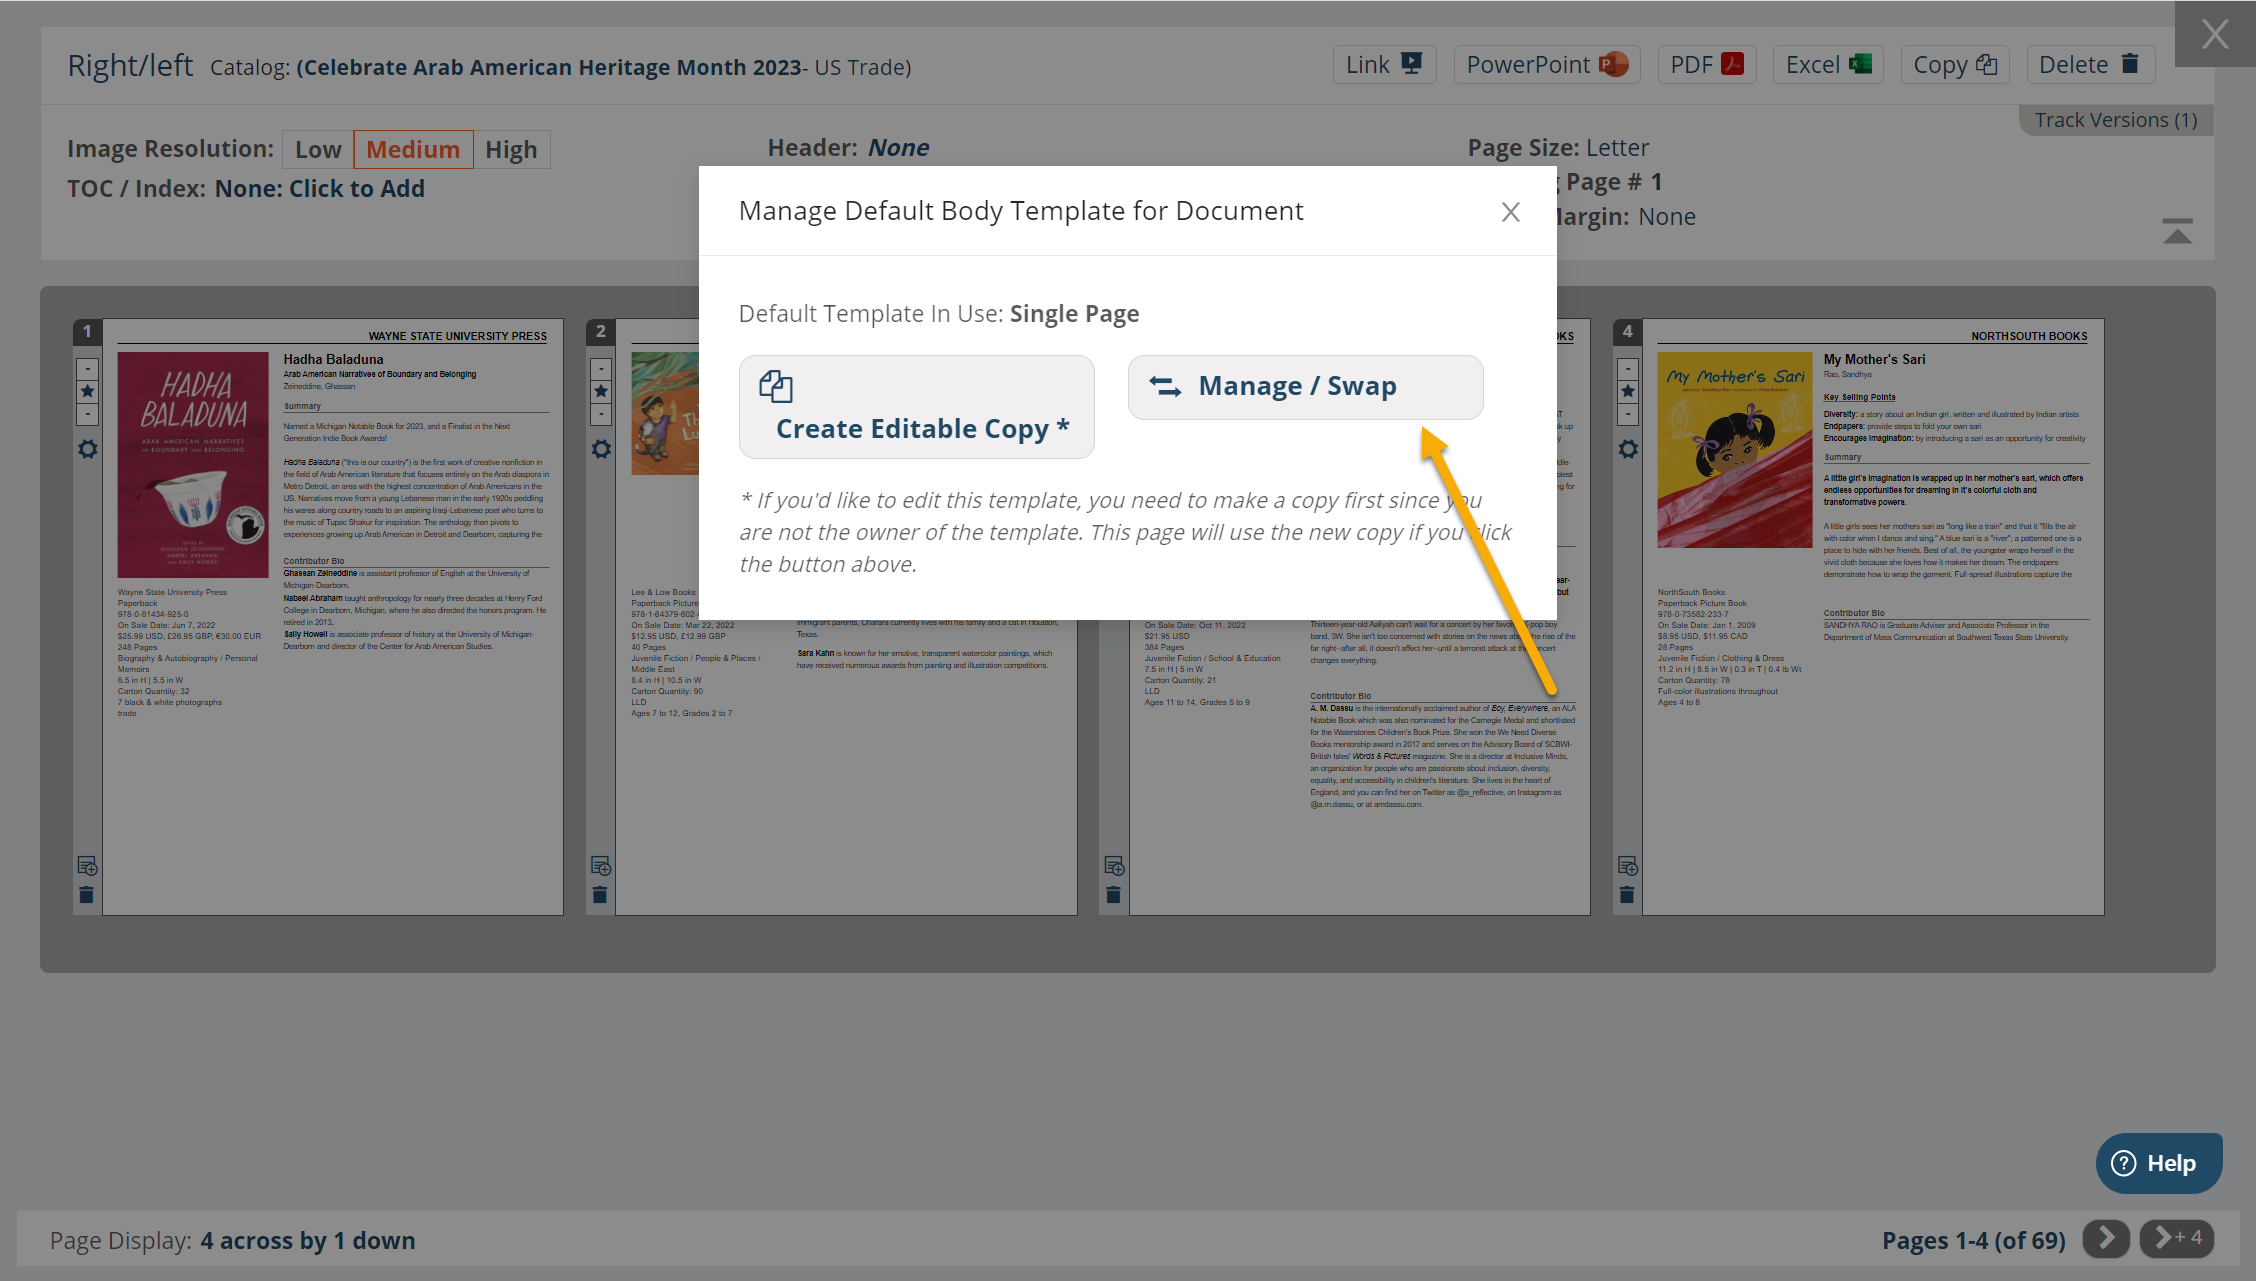
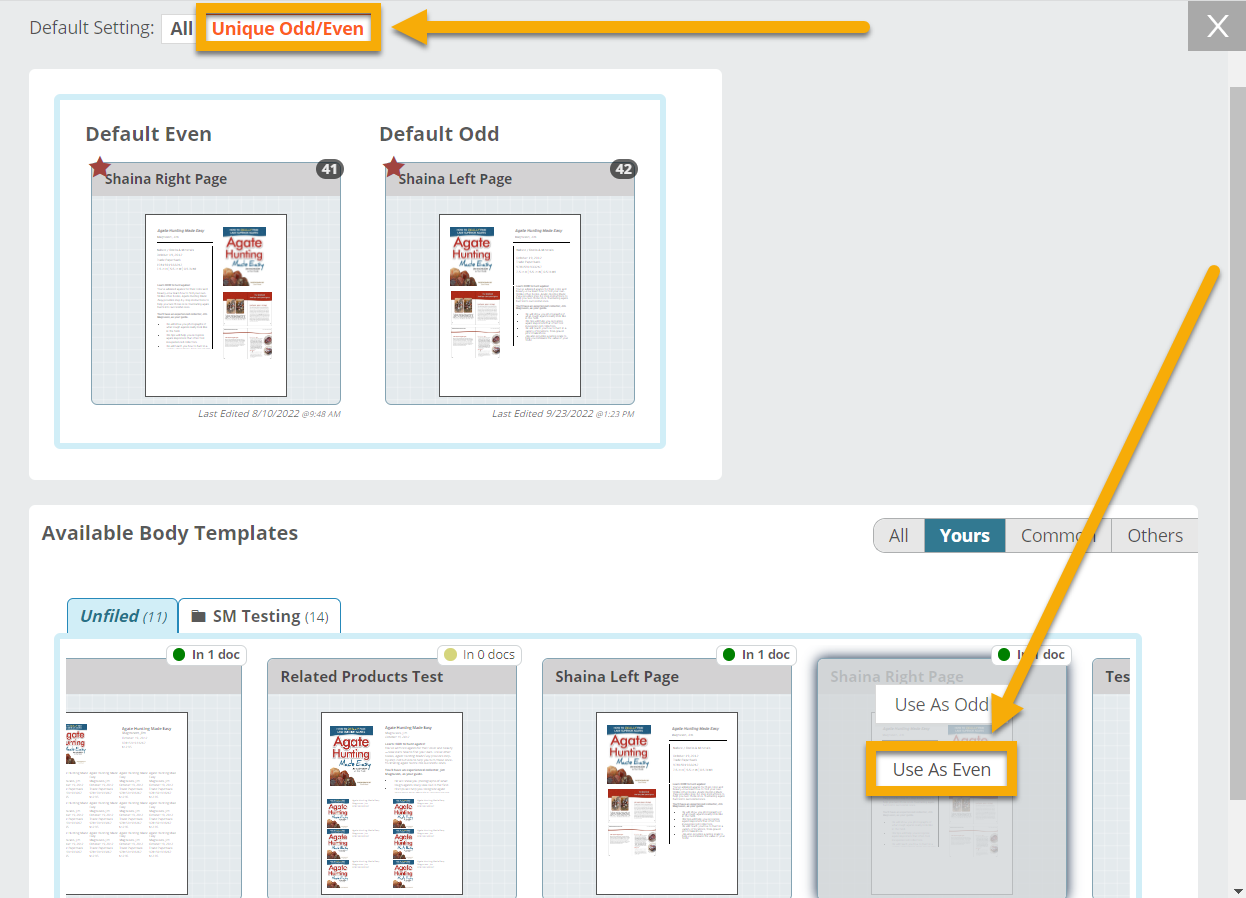
3. In the pop-up, select Manage/Swap and then set the Default Setting to Unique Odd/Even — choose from your list of available body templates by selecting a Default Odd Template by clicking the Odd button, and a Default Even Template by clicking the Even button. Your document will update to show the Default Odd Template on all odd page numbers and the Default Even Template on all even page numbers.
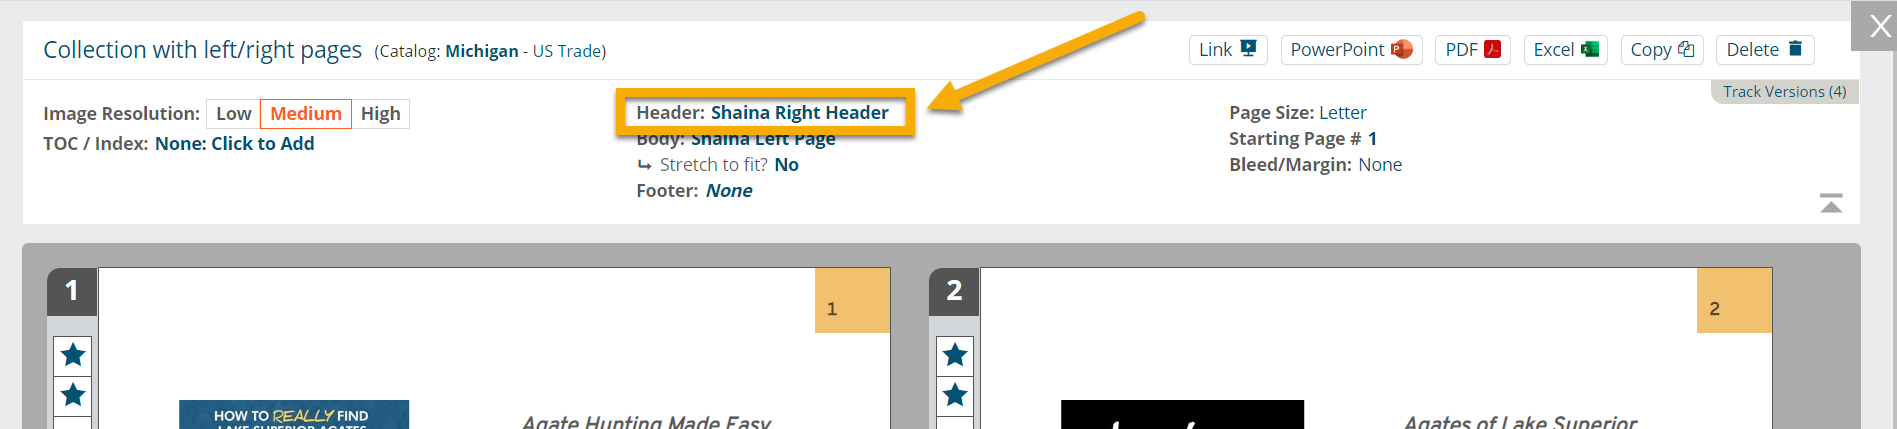
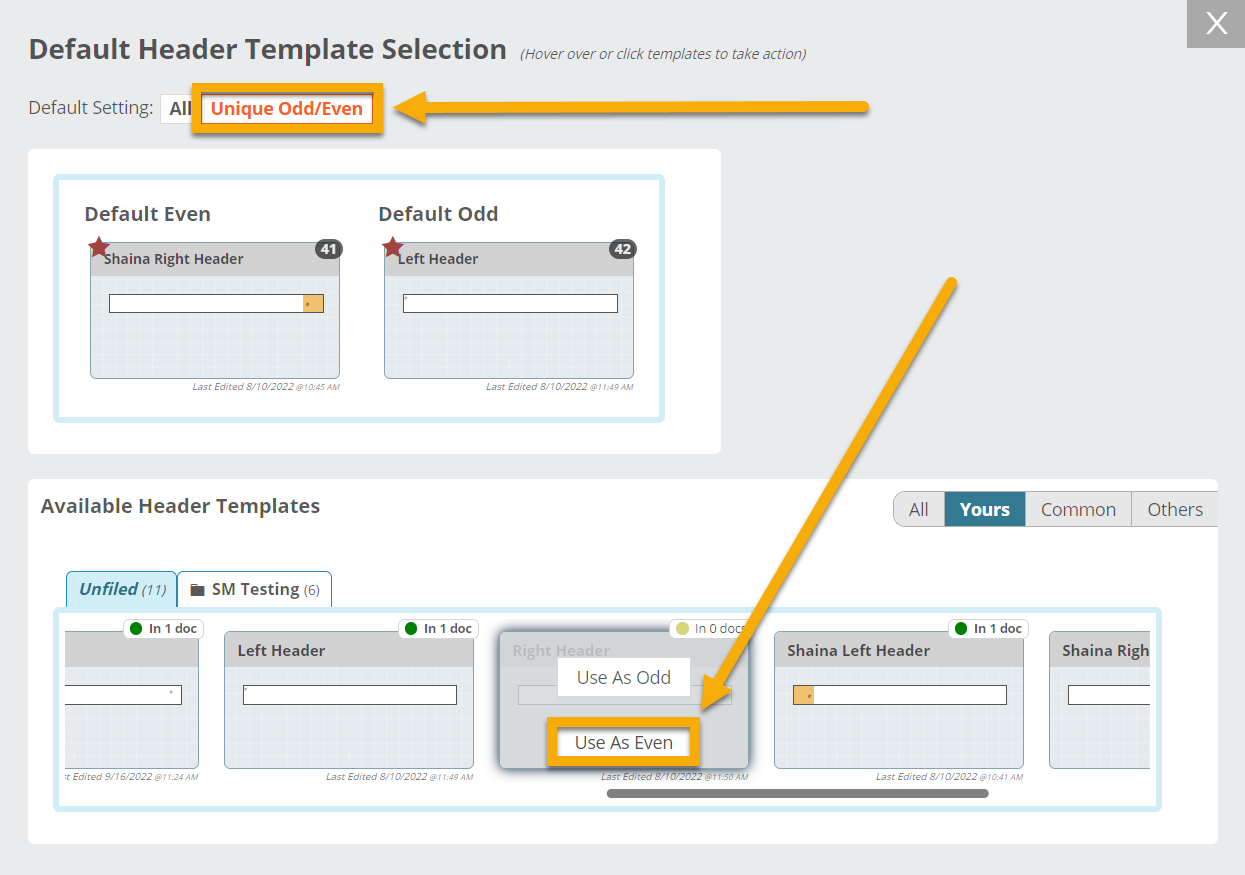
Follow this same process for applying left page/right page headers or footers. Again, click on Header or Footer (you’ll see “None” if one hasn’t yet been applied).
In the next window, click on Unique Odd/Even to choose your left & right/odd & even header templates.
Learn more about creating templates here!