
Once you’ve created a template or settled on one of the pre-loaded ‘Common’ templates in Designer, you are ready to create a document. A document in Designer is created from a catalog or collection of titles run through a selected template.
This help page will walk you through the basic steps of creating a document in Designer:
- Creating a Document
- Adjusting Your View
- Switching Templates
- Skipping Titles
- Reverting to Previous Versions
- Checking In/Out a Document
- Disconnecting Pages
Creating a Document:
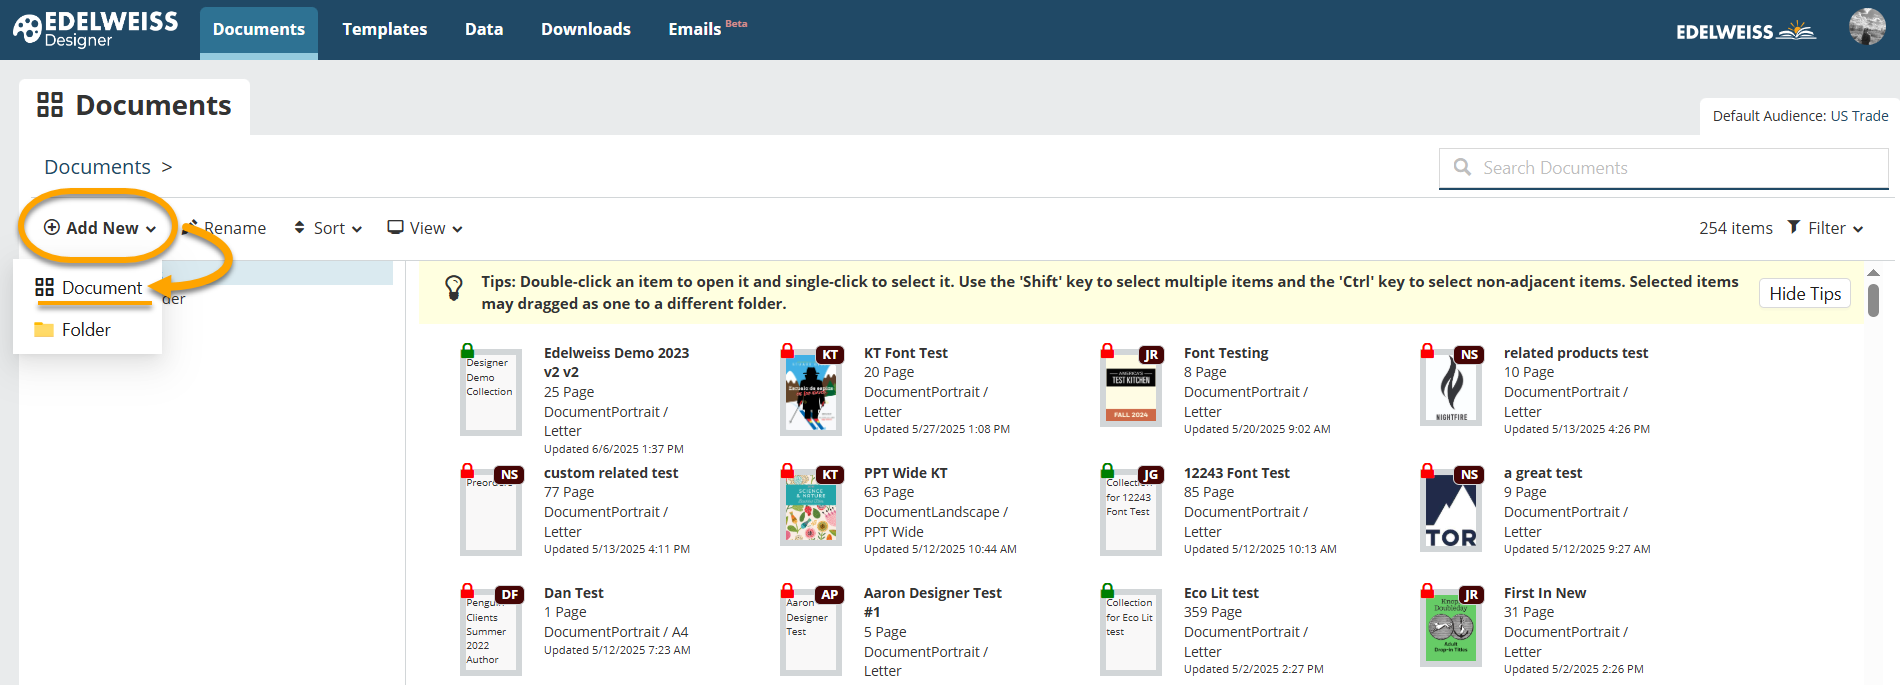
To create a new document, begin on your Documents page and select Add New > Document.
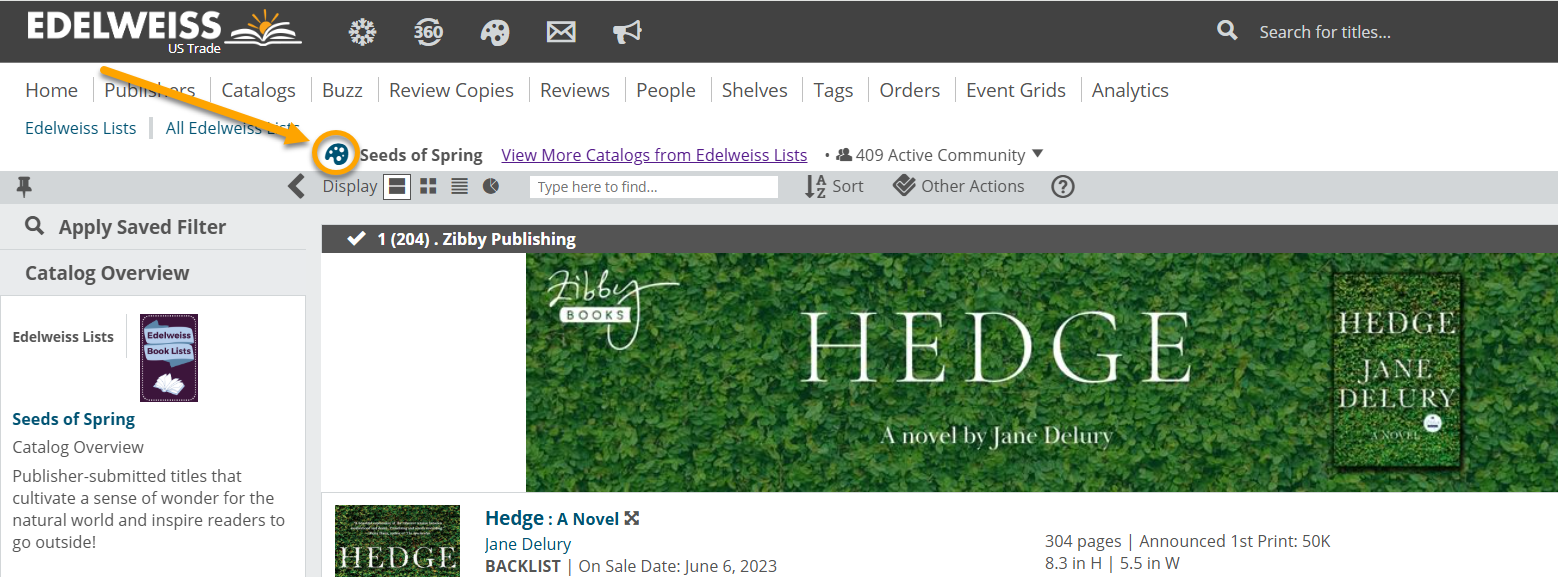
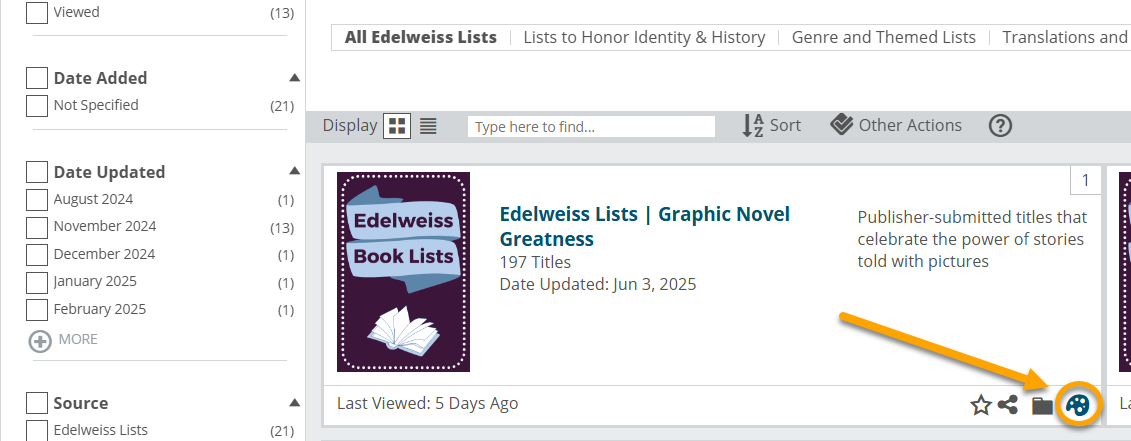
It’s also possible to create a new document from an Edelweiss catalog by selecting the palette icon from either of the two areas shown below.
Fill out the fields in the resulting window:
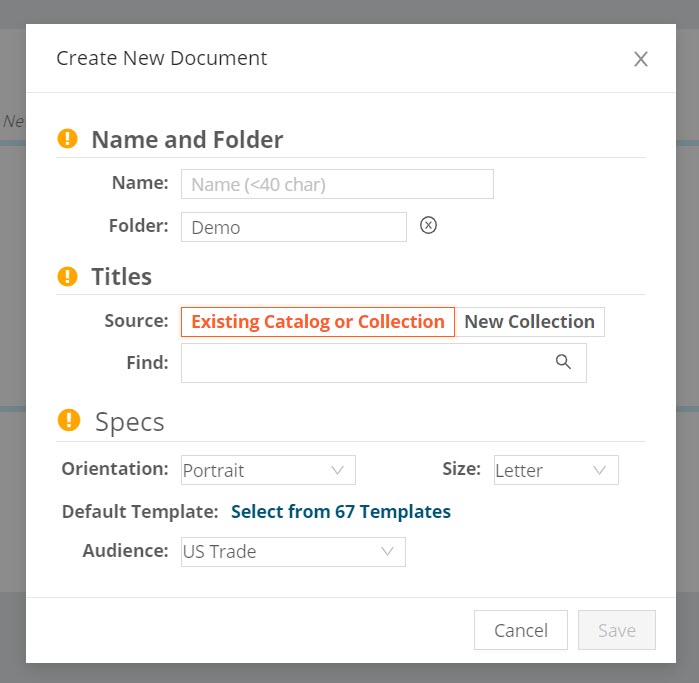
- Name: Name your document!
- Folder: Place your document in an existing folder or create a new one.
- Title Source: Use an existing catalog/collection or create a new one. Use the Find box to search if you choose to use an already existing catalog/collection.
- Orientation: Portrait or Landscape
- Size: Letter or A4
- Default Template: Choose the template you’d like to use for this document.
- Audience: US Trade, UK Trade, Canadian Trade, etc.
Once these are complete, click Save.
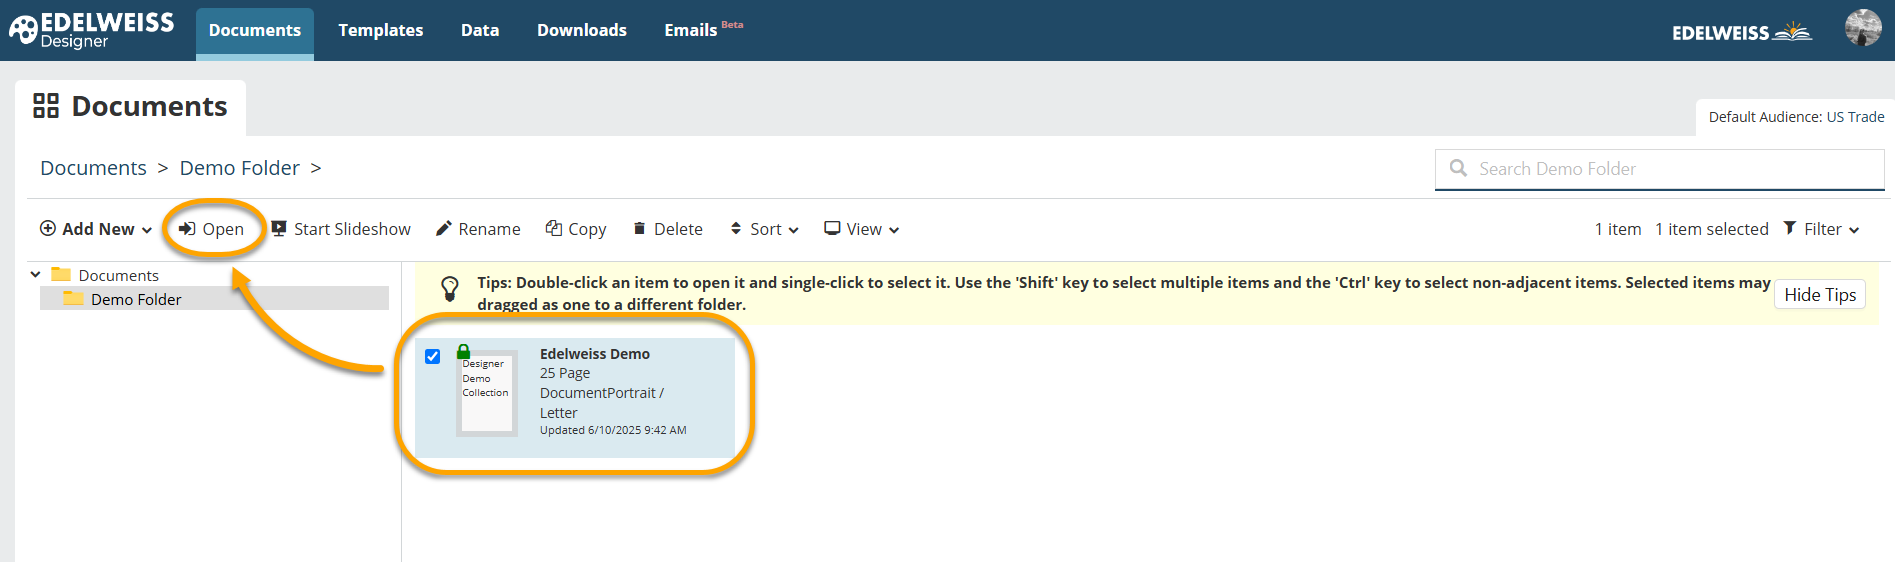
Your newly-created document will drop into your main documents folder or the folder in which you’ve placed it — locate it, click once, and choose Open, or double-click to open it and begin working.
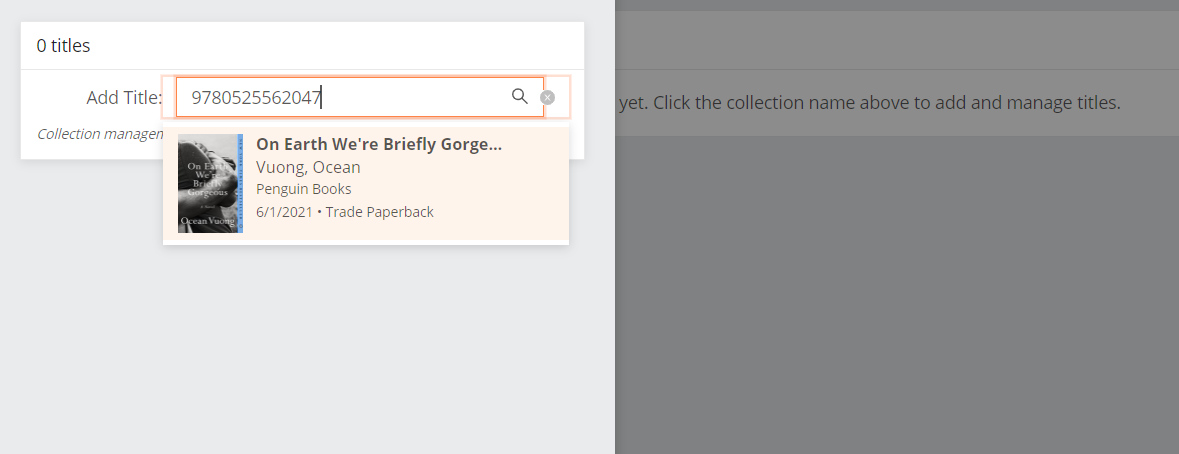
*If you choose to create a new collection for the document, you’ll need to add titles to it through Edelweiss or do so within Designer.

If your catalog or collection has been selected and your template chosen, much of your work should be done. However, if needed, you can make many changes to your document ranging from replacing the Default Template you selected initially to adding filler pages, modifying text, replacing cover images, and more.
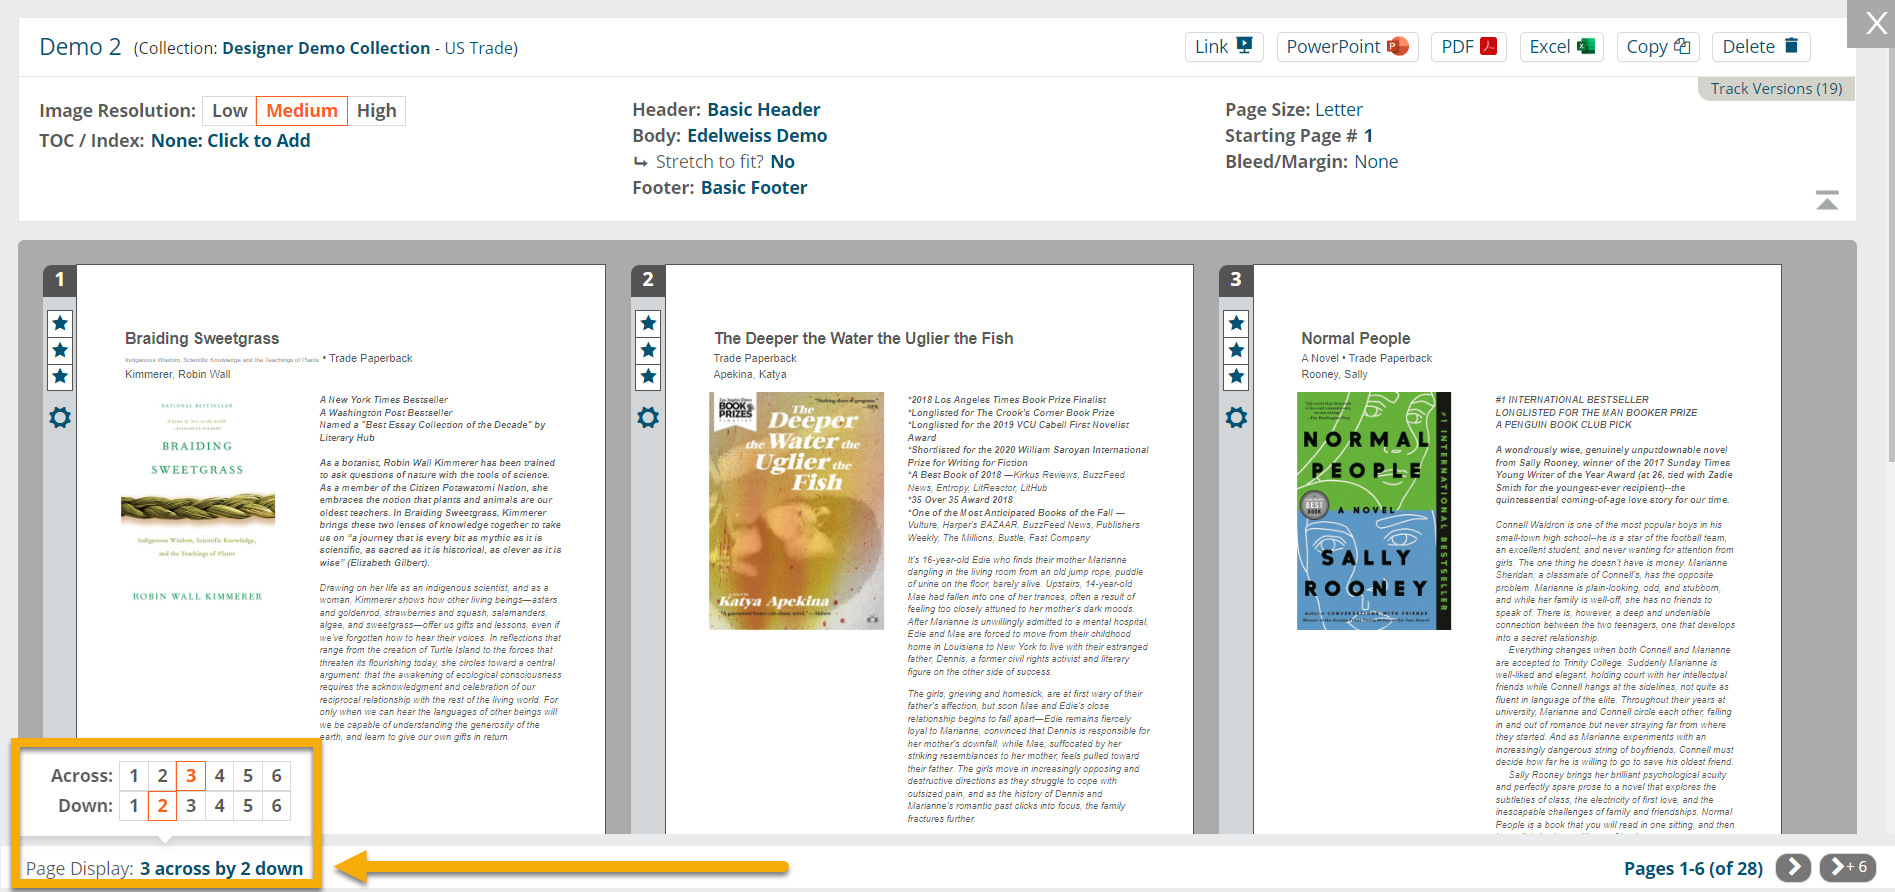
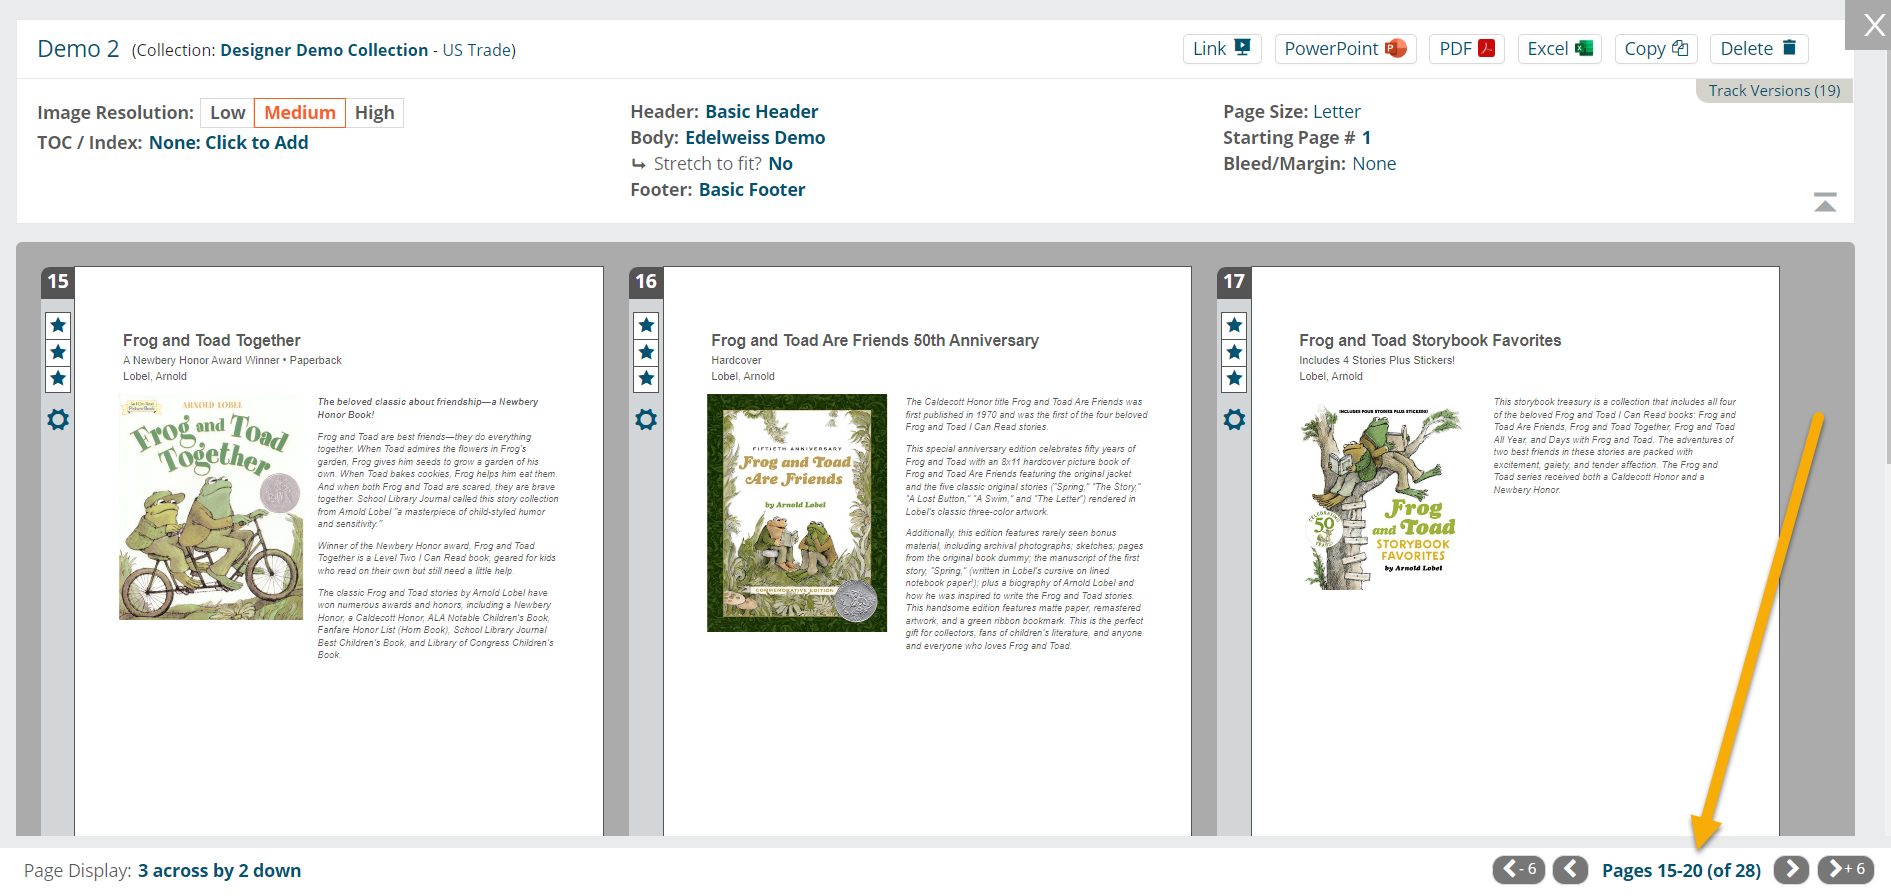
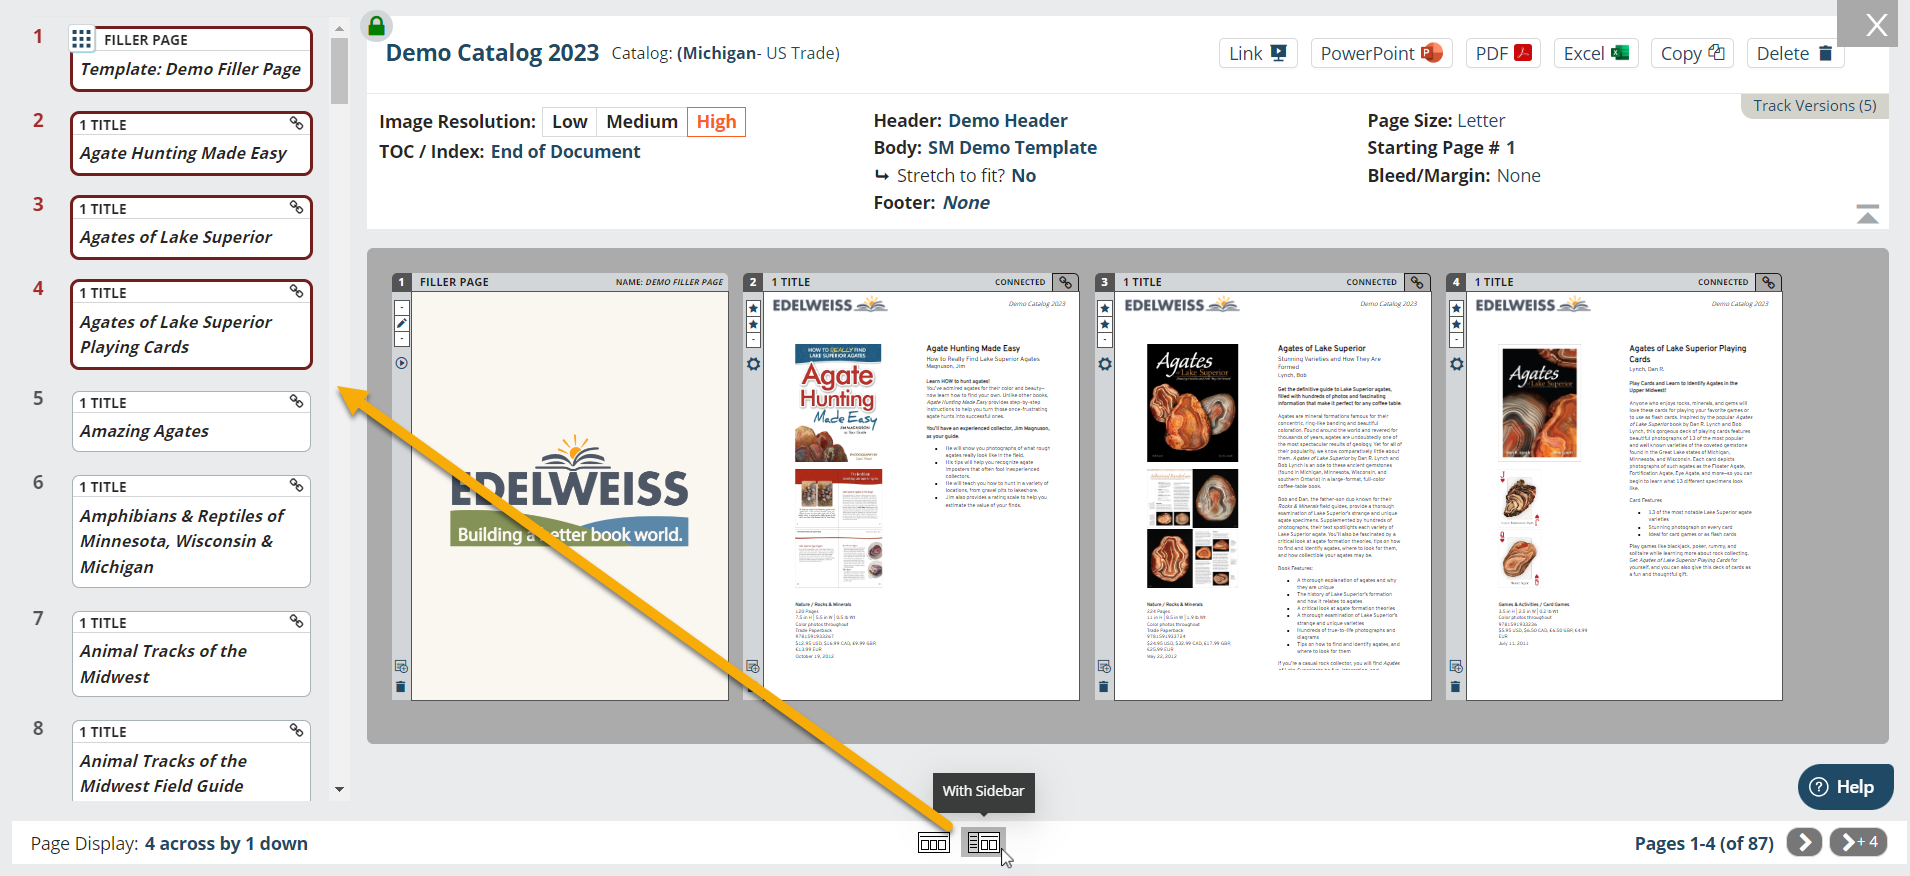
There are various adjustable settings in the top menu of a given document.

Most of it should be self-explanatory, but the image below serves as a guide:

Adjusting Your View:
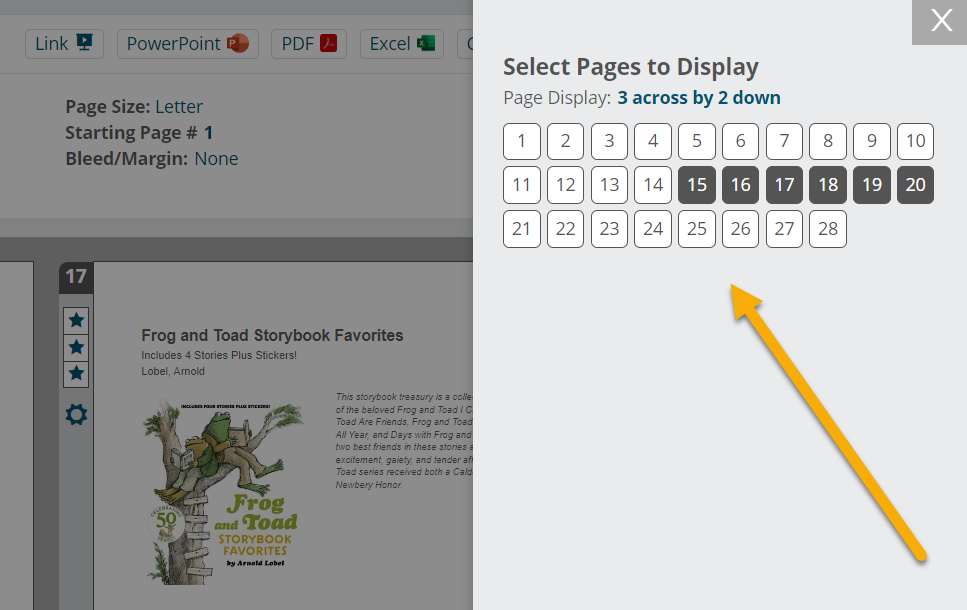
It’s also possible to adjust your view based on how many pages you’d like to appear across & down, as well as which page numbers display. Keep in mind that this doesn’t impact the appearance of a document once exported but is meant for convenience and faster loading times.
Switching and Editing Templates:
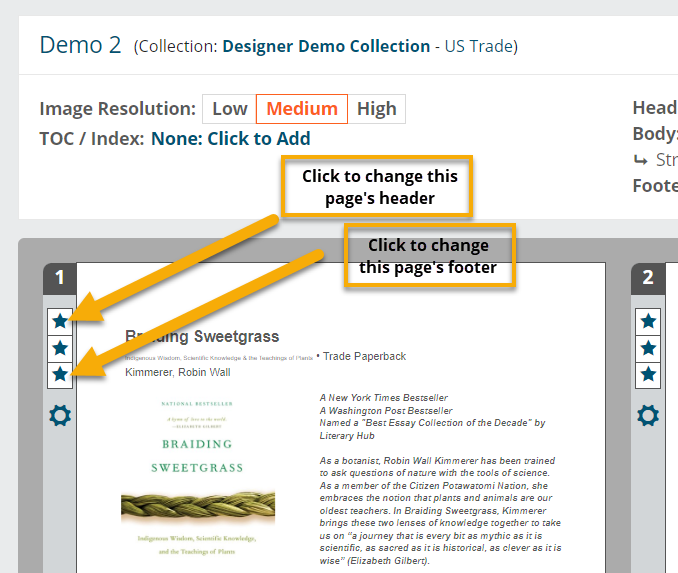
You can switch out or edit your default body template on individual pages by clicking the middle star icon on a given page.

In the screen that opens, you will have the option to either edit the selected template or to swap it out. If you are using a colleague’s template, or another template that you do not own, you will be prompted to make a copy prior to editing.
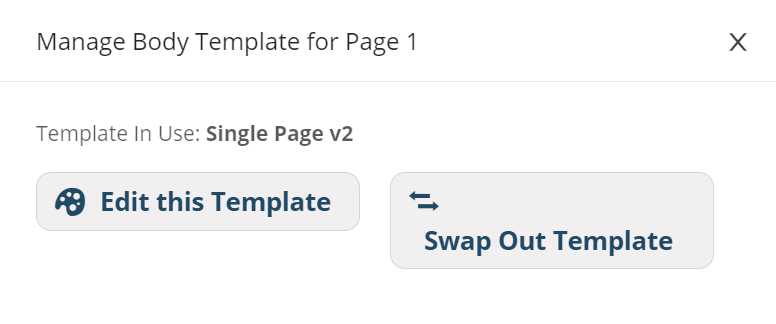
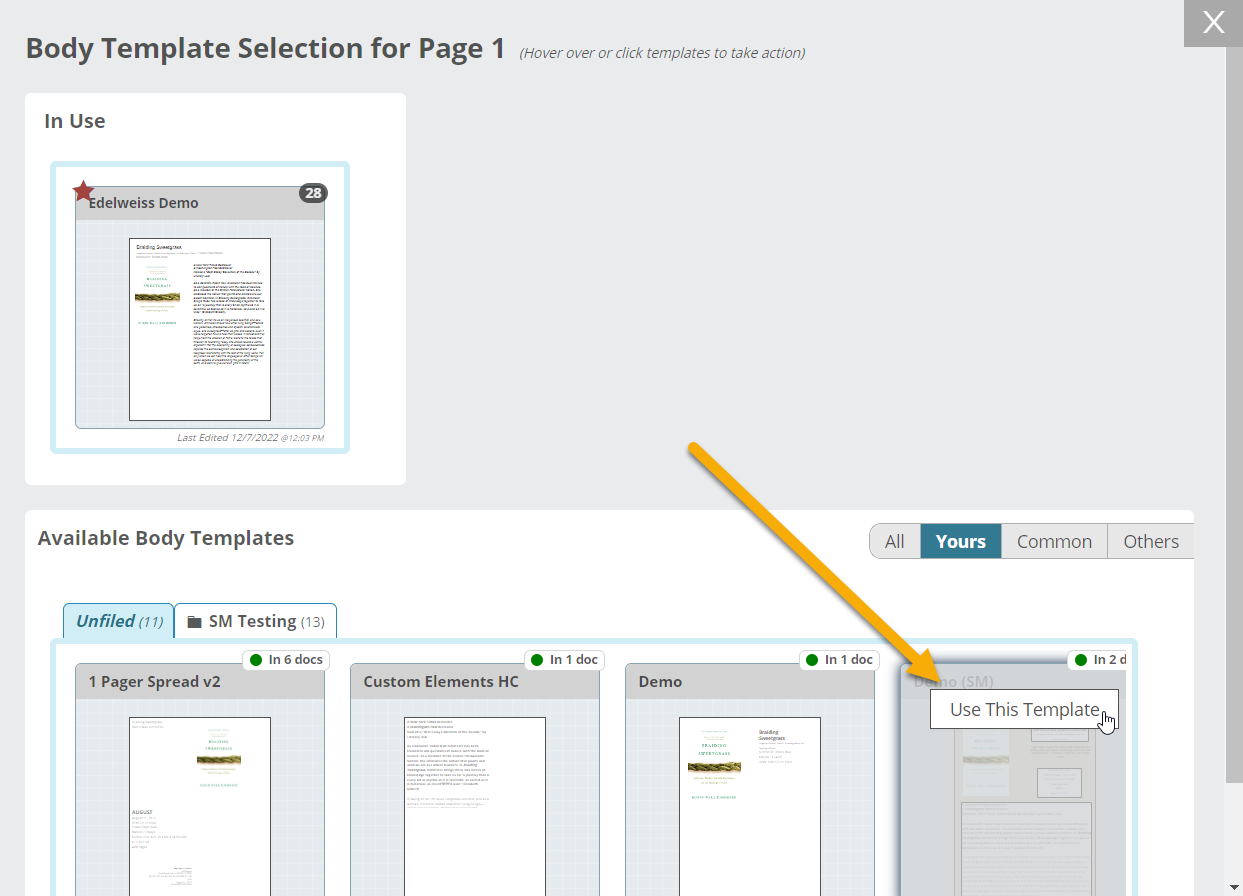
If you select Swap Out Template, you will be able to select from the list of available body templates in the next screen.
Note that if you plan to select a new template that displays a different number of titles than your original template, consider inserting new title pages to prevent titles on your other pages from being adjusted, or learn more here about disconnecting pages.
Similarly, rather than using a default header or footer template for an entire document, it is also possible to mix and match them as needed. Click the top or bottom star icons to change the header or footer of just that page.
Another option (relevant especially when planning to print a catalog), is to use left & right page templates. Learn more here.
Skipping Titles:
There may be times when you’d like to push a title in your document to the next page. Selecting Insert Skip does just that. When working in a document, click the gear icon. In the resulting window, you’ll see the Insert Skip button next to each title currently included on the page. Simply click it to move that title to the next page.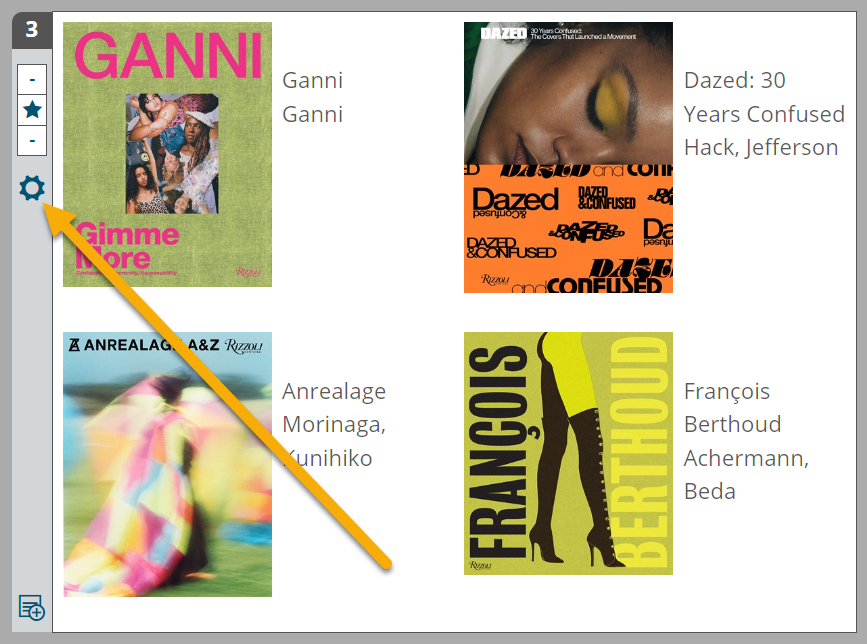

Reverting to Previous Versions:
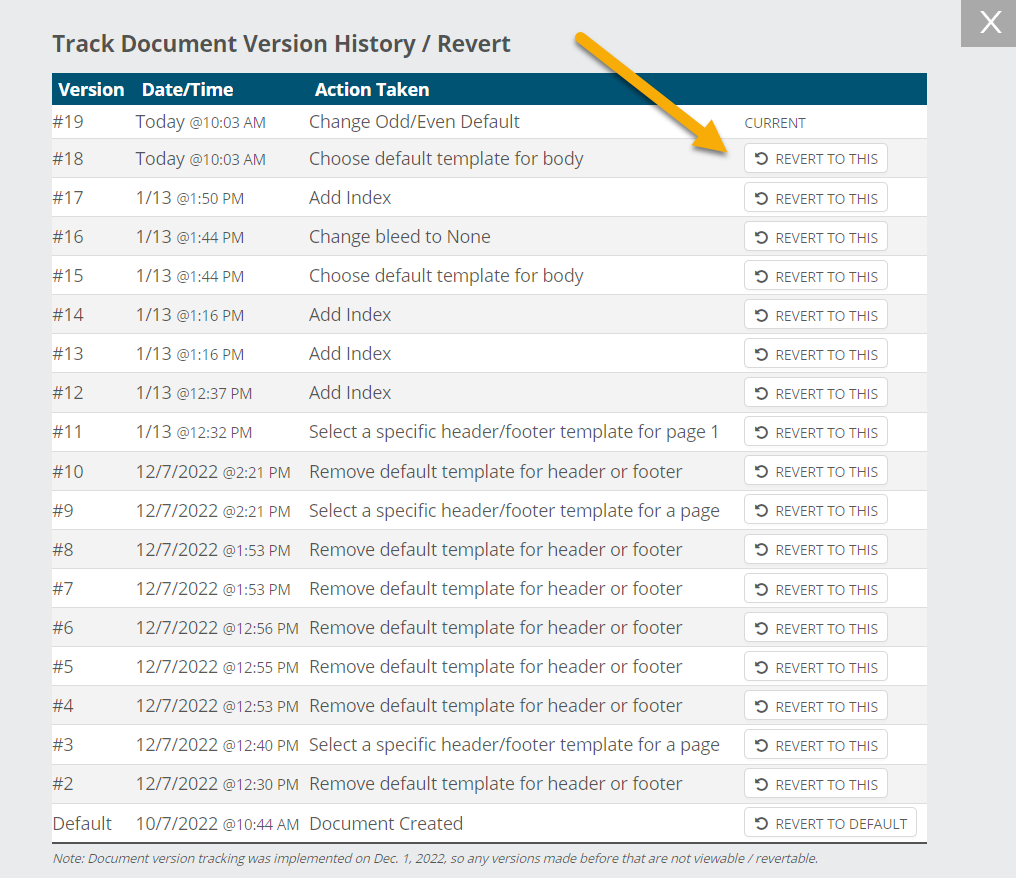
If at any point you need to revert to a previous version of a Document, click Track Versions, find the version you’d like to revert to, and select Revert To This.

Checking In/Out a Document
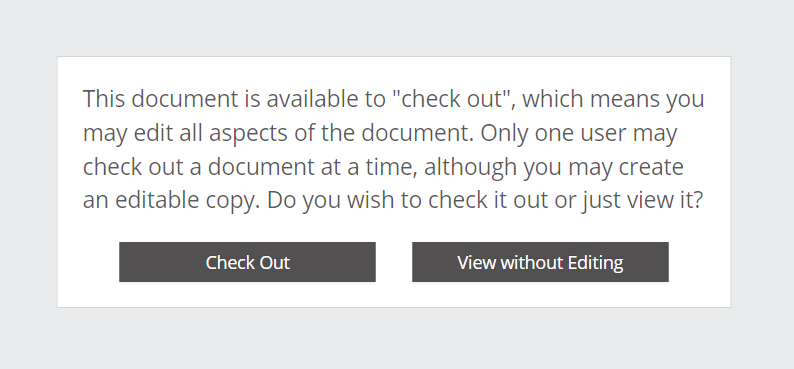
To prevent issues that may arise from two users editing the same document at the same time, documents must be “checked out” to be edited, but can be viewed in read-only mode at any point. Users also have the option of creating an editable copy of a checked out document.
When opening an existing document that is not currently checked out by another user, you will see this message and can proceed to either check out the document to begin editing, or choose to simply view it without editing capabilities:
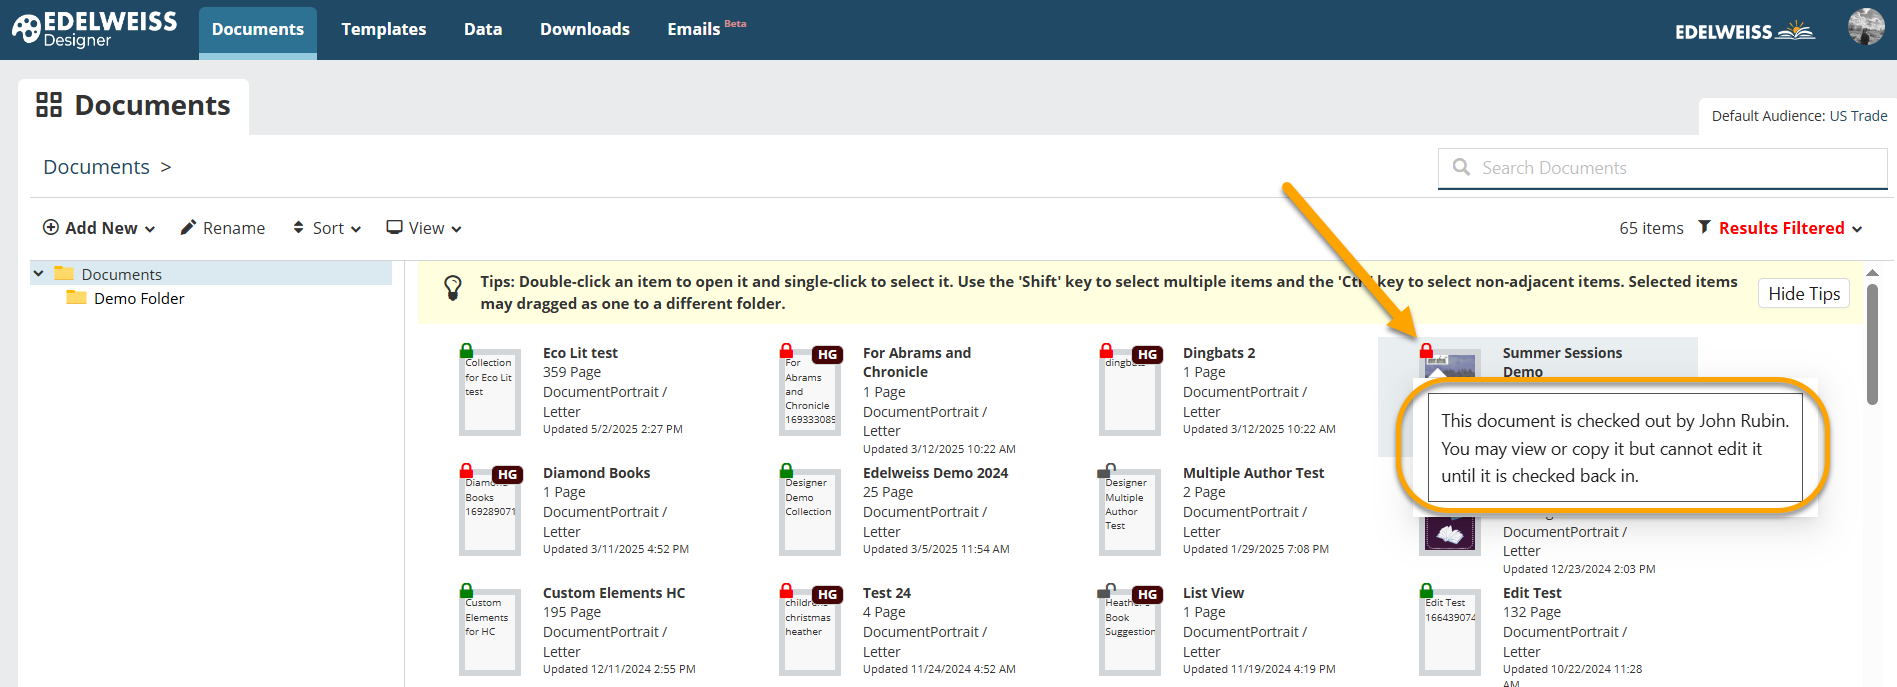
When viewing your organization’s Documents page, those that have been checked out will be marked with a red lock icon. Again, these can be viewed or copied and edited, but the original document cannot be modified until the user who has checked out the document checks it back in.
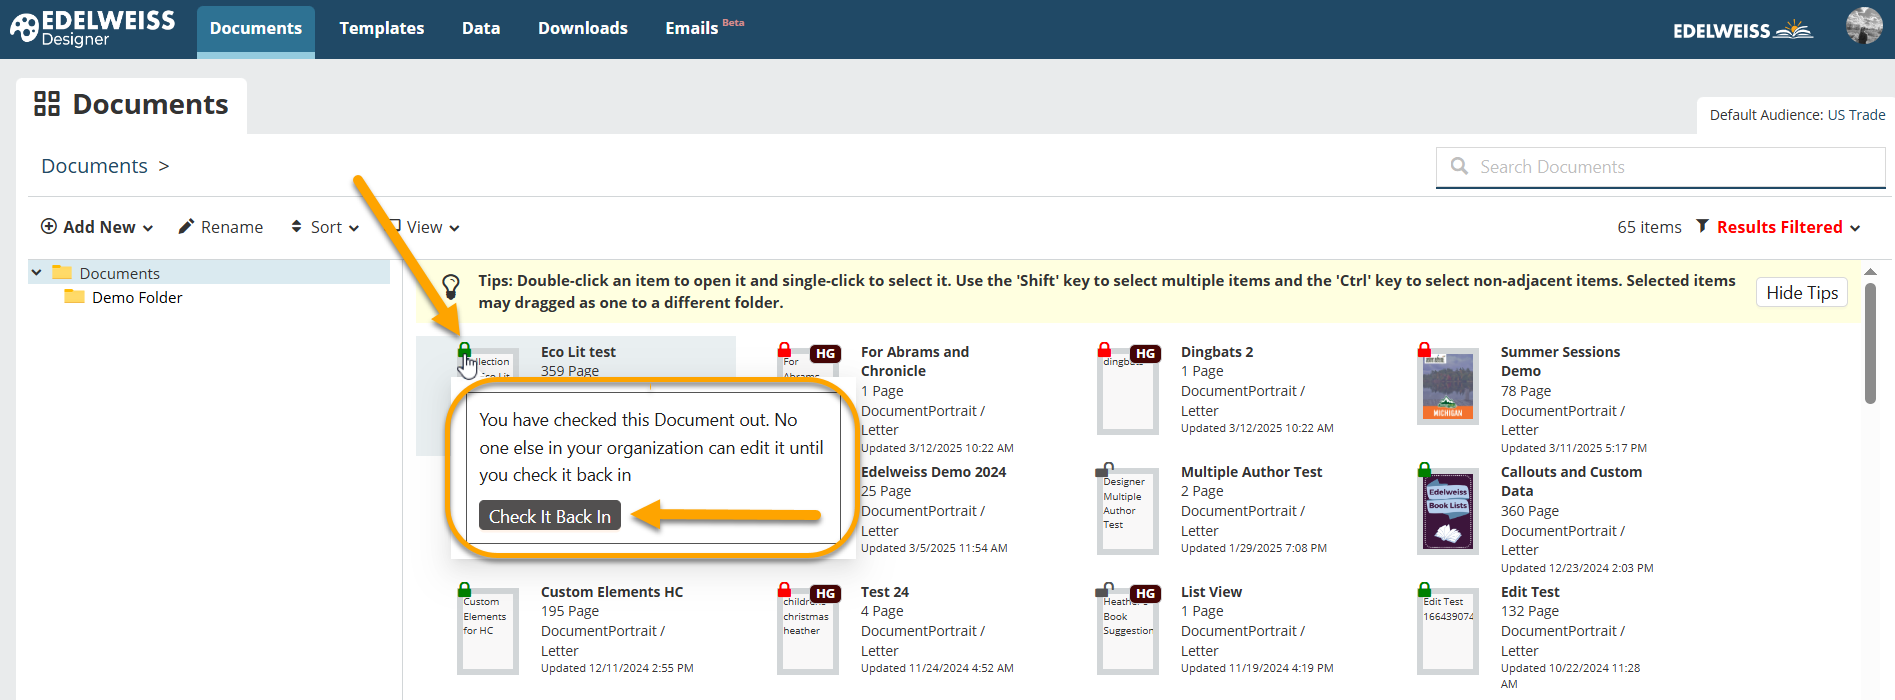
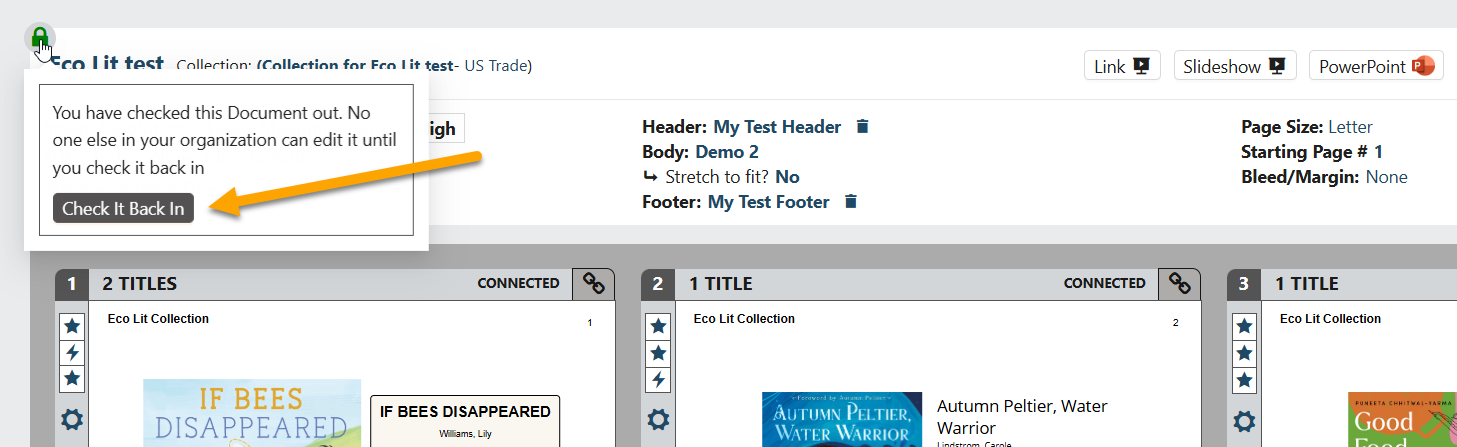
When you create a new document, it will automatically be checked out by you.
To “release” a document for another user in your organization to edit, select Check It Back In either from the main Documents page or from within a document itself.
Disconnecting Pages
The sidebar view in Designer provides an easy way of managing large documents, especially those with multiple templates and filler pages. Using the sidebar, you can disconnect pages, drag and drop them, and rearrange filler pages. This tool also enables you to add titles to a document that are not included in the underlying catalog or collection.
Learn all about disconnecting pages here.
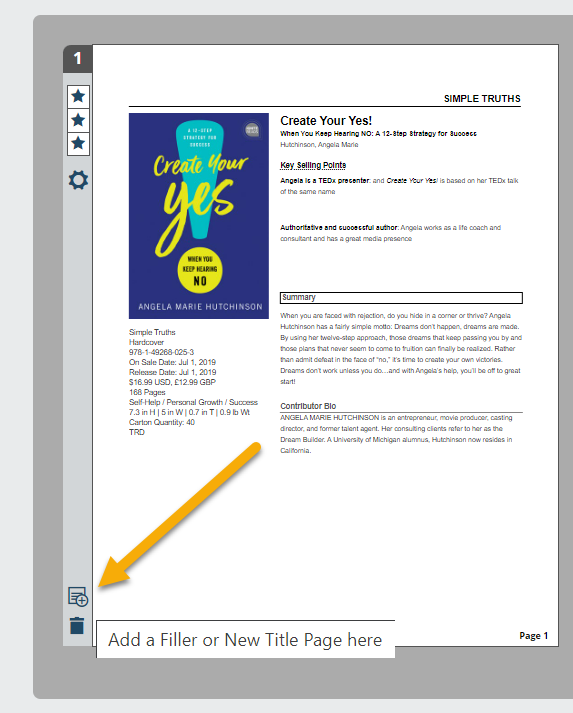
Learn more about editing and customizing documents here. Want to add a filler page or a table of contents? Find instructions here.
All set to export your finished document? Downloading your creations is easy.